
Adding YouTube Music to CapCut isn't as straightforward as it sounds. If you're editing a video and want to use a song from YouTube or YouTube Music, you'll quickly find that CapCut doesn't support importing tracks directly from YouTube, which often leaves creators stuck.
This guide shows you how to add YouTube music to CapCut the right way. You'll learn how to download YouTube music for CapCut and import it on both computer and mobile, step by step. By the end, you'll be able to export your video with the added music.
Part 1. How to Add YouTube Music to CapCut
If you're a YouTube Premium subscriber, you might assume that downloading music is a breeze. While premium subscriptions offer a range of benefits, they do not grant you unrestricted access to YouTube music for use in unauthorized apps like CapCut.
Most music on YouTube, even with a Premium subscription, is protected by digital rights management (DRM). This protection is designed to prevent direct usage of the music, such as adding music from YouTube to your CapCut projects.
However, there's a more significant challenge: CapCut, like many video editing software, can't handle encrypted audio or video files and has limitations when it comes to file formats. We don't stop at removing DRM from the YouTube music tracks, but also convert them into supported format files.
| Format Type | CapCut Supported Formats |
| Audio | MP3, WAV, WMA |
| Video | MP4, VOB, VRO, ASF, WMV, WMV HD, MOV, MOD |
| Image | JPEG, TIFF, BMP, GIF |
Tool Required: ViWizard YouTube Music Converter
CapCut cannot process DRM-protected files from YouTube Music directly. ViWizard YouTube Music Converter helps you bypass these format restrictions with the following features:
- Format Compatibility: Convert songs, playlists, and soundtracks into MP3 or WAV files that work perfectly in CapCut.
- Accessible to All: Works for both YouTube Premium and free users.
- Batch Downloading: Save entire playlists or multiple tracks at once to save time.
- Custom Quality: Adjust the sample rate, bit rate, and audio channels to match your project needs.
Download songs, playlists, albums, and your whole music library from 10 major streaming platforms, including YouTube Music, to MP3, FLAC, WAV, AIFF, M4A, or M4B with original sound quality and full song info and keep your music forever.
Part 2. How to Download Music from YouTube for CapCut
Now, turn your favorite YouTube tracks into local files that CapCut can recognize. Use the following steps to convert and save high-quality audio directly to your device using the ViWizard converter.
Step 1 Set the Audio Format for CapCut
Open ViWizard YouTube Music Converter and click the Menu icon. Go to Preferences and select the Conversion tab. Set the output format to MP3 because it is the most reliable format for mobile and desktop editors. For the best audio quality in your videos, set the bitrate to 320 kbps. Click OK to save your settings.

Step 2 Access Your YouTube Library
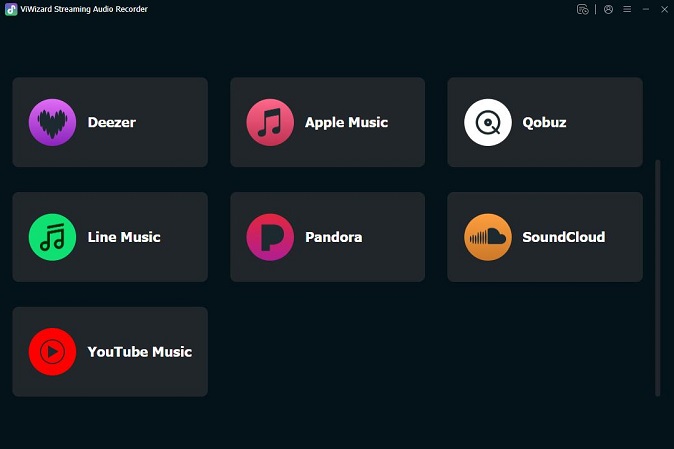
Click the YouTube Music icon within the software to open the built-in web player. Sign in to your account to see your saved playlists, liked songs, and custom soundtracks. This makes it easy to find the exact music you planned for your video.
Step 3 Select Your Tracks
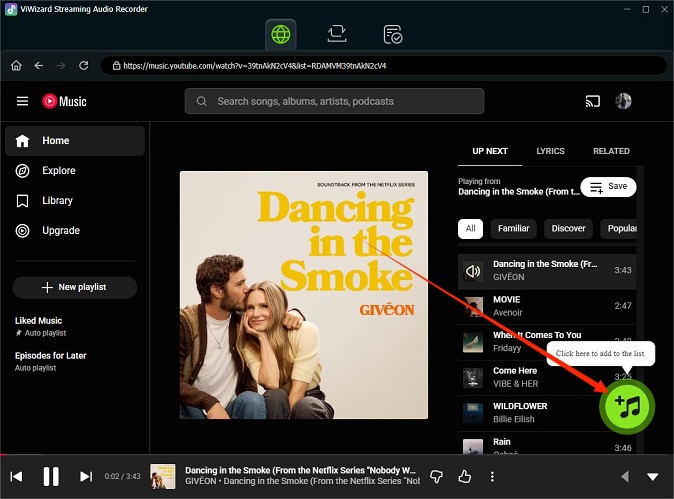
Browse YouTube Music and find the songs you want to use in your CapCut project. Open a song, album, or playlist and click the Plus button on the right. You can select individual songs or click Select All to download a large batch of audio assets at once. Click Add to List to confirm your choices.
Step 4 Convert and Save for Editing
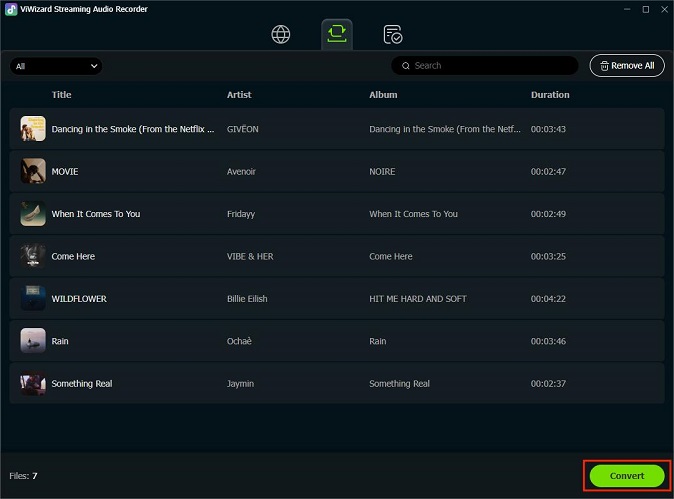
Check your conversion list and click the Convert button. The software will process your songs and save them as MP3 files. Once finished, open your output folder to find your files. They are now ready to be imported into CapCut for your project.
Part 3. How to Add Music from YouTube to CapCut on Computer and Mobile
Before you begin editing with CapCut, it's essential to get your music onto the device you'll be using for the project. Here's how to do it:
Preparation: Transfer YouTube Music to Your Device
Make sure your device, whether it's a smartphone, computer, or tablet, is connected and accessible for transferring files.
Find the YouTube Music files you downloaded earlier on your computer.
If you're using a smartphone or tablet, you can transfer music through a USB cable. Connect your device to your computer via USB, then copy and paste the music file directly into your device's music folder.
How to Add Music from YouTube to CapCut on Computer
CapCut offers two editing options on desktop: the CapCut app and the CapCut online editor. The steps are slightly different.
Option 1. Add YouTube Music to CapCut Desktop App
This method works for both Windows and Mac. The interface is almost the same on both systems.
Step 1 Open CapCut on your computer and start a New Project.
Step 2 Click the Import button in the Media tab.

Step 3 Find the music file you downloaded on your computer and select it.
Step 4 Click Open to bring the music into your project's library.
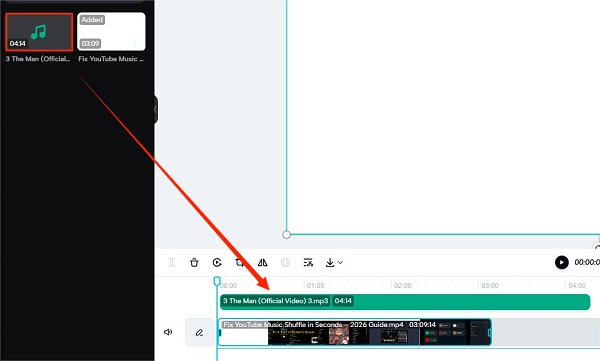
Step 5 Once the file appears in your media library, drag and drop the track onto the timeline below your video.

Step 6 Now that you know how to use YouTube audio in CapCut, you can trim the song or adjust the volume to match your video clips.

Option 2. Add YouTube Music to CapCut Online Editor
If you prefer editing in your browser without installing software, follow these steps to import music from YouTube to CapCut:
Step 1 Go to the CapCut online editor and sign in to your account.
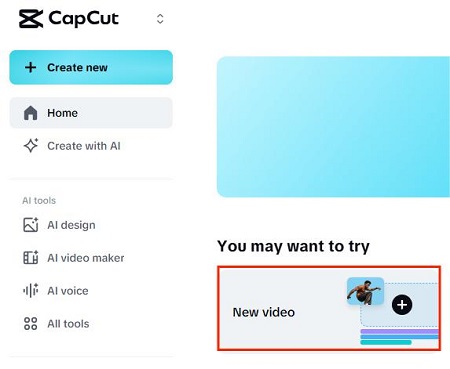
Step 2 Click Create new video to start.
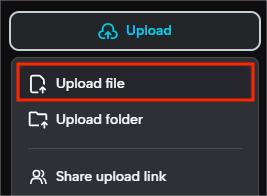
Step 3 In the Media section, click Upload and choose Upload file. Select the YouTube music files saved on your computer. Wait for the upload to finish.
Step 4 After uploading, drag the music file to the timeline.
How to Add Music from YouTube to CapCut on Mobile
Once you have transferred your music files to your phone, bringing them into the CapCut app is easy. Here is how to add audio from YouTube to CapCut using your mobile device:
Step 1 Launch the CapCut app on your smartphone. Tap New Project on the screen.

Step 2 Choose the video or photo from your device that you want to add background music to. Tap Add to create a new CapCut project.

Step 3 In the Tracks area, tap Add audio.

Step 4 Select Sounds from the menu. Tap on the file icon, then choose From device.

Step 5 Find the YouTube music file that's already on your device. You can preview the music by tapping it. To add it to your project, tap the + icon.

Step 6 Now you have the music in your project, and you can edit it to fit your video as needed.
How to Export Your CapCut Video
Step 1 Click the export button in CapCut to save your video project. Choose the export settings you prefer, including video quality and format.
Step 2 Start the export process, and CapCut will merge your video with the YouTube music. Once it's done, save your final video to your device.
Additional Tip: Can I Use Capcut Music on YouTube?
Yes, you can use music from CapCut in your YouTube videos. most tracks in CapCut's library are royalty-free and safe for commercial use. This means you can add them to your videos without risk of copyright claims.
How to Find Copyright Free Music for YouTube on CapCut:
Step 1 Open the CapCut app or the CapCut online editor on your device.
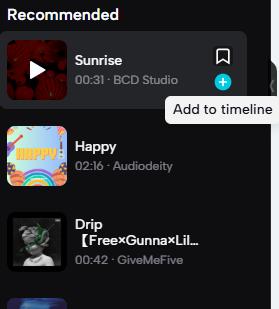
Step 2 Tap the Audio tab to open CapCut's music library.
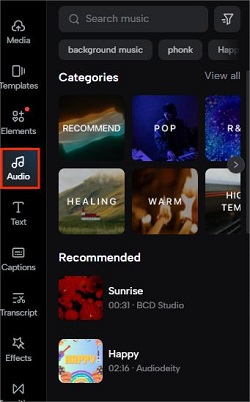
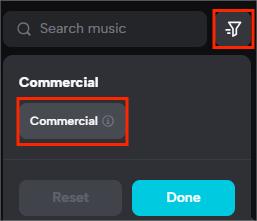
Step 3 Browse for copyright-free tracks. You can also tap the filter icon to show only commercial-use tracks.
Step 4 When you find a track you like, tap the plus (Add to timeline) button to add it to your project.
FAQs: Adding YouTube Music to CapCut
Can I use my YouTube Premium downloads in CapCut?
No. YouTube Premium downloads are DRM-protected and cannot be imported directly into CapCut. You need to convert the music into a common format like MP3 or WAV using a tool like ViWizard YouTube Music Converter before using it in CapCut.
Can I screen record a song from YouTube Music to use it?
Yes, you can record your screen and then use CapCut's Extract Audio tool to pull the sound from that recording. However, this often results in lower audio quality, and it does not grant you legal rights to use copyrighted material.
Can I use copyrighted music in CapCut?
Technically yes, but at high risk. CapCut includes licensed music intended primarily for TikTok, but these tracks may still trigger Content ID claims on YouTube. For videos meant for YouTube, it is safer to use the YouTube Audio Library or CapCut's royalty-free options.
Is there a built-in way to check for copyright before I post?
Yes. In 2026, CapCut features a built-in Copyright Check tool:
- Mobile: Tap Audio > Copyright to scan your timeline.
- Desktop: Navigate to the Audio tab on the left and select the Copyright option to run a scan.
- Note: This tool is primarily optimized for TikTok; passing it does not guarantee your video will be safe from YouTube's stricter automated systems.
How do I fix audio drifting or getting out of sync after export?
Audio drifting is typically caused by variable frame rates. To fix this, ensure you export your project at a Constant Frame Rate (e.g., 30 or 60 FPS). Additionally, check your audio settings before exporting and ensure you are using standard formats like AAC or MP3.
Conclusion
Now, armed with the knowledge of how to add YouTube music to your CapCut projects, your creativity knows no bounds. Whether you're producing stunning visuals for social media, telling compelling stories, or crafting educational content, the power of music is in your hands with ViWizard YouTube Music Converter.


Leave a Comment (0)