Video editing is an art that relies not only on visual storytelling but also on the power of sound. The right music can elevate your video content, evoke emotions, and create a memorable viewing experience. When you're on the hunt for the perfect soundtrack, where better to turn than the vast musical library of YouTube?
However, the path to seamlessly integrate YouTube music into your Final Cut Pro projects is not without its challenges. YouTube, like many content platforms, employs Digital Rights Management (DRM) to protect copyrighted music, making it tricky to download and use these audio gems directly in your editing software.
In this guide, we'll walk you through the process of bridging the gap between your YouTube music library and your Final Cut Pro video creations. We'll explore how to legally and efficiently download YouTube music and prepare it for integration into your projects.
Part 1. Can I Add Music from YouTube to Final Cut Pro?
One of the most significant hurdles you'll encounter when attempting to use YouTube music directly in Final Cut Pro is Digital Rights Management, or DRM for short. YouTube implements DRM to protect copyrighted content, which means that even if you find the perfect song for your video, you won't be able to download it or seamlessly incorpporate it into your project.
What adds to this challenge is that Final Cut Pro, much like other video editing software such as CapcCut, has limitations when handling encrypted audio files. It primarily supports several audio formats, including AAC, AIFF, BWF, CAF, MP3, MP4, and WAV. To bring music from YouTube into your Final Cut Pro projects, you'll need to trickle two key obstacles: removing DRM from the content and converting it into one of these compatible formats.
Given these constraints, it becomes essential to seek out an effective solution that allows you to obtain music from YouTube without violating copyright rules. This solution lies in the utilization of YouTube Music downloaders.
Tool Required: ViWizard YouTube Music Converter
One standout among YouTube Music downloaders is ViWizard YouTube Music Converter. This tool empowers you to handpick, download, and prepare your preferred music tracks for seamless integration into Final Cut Pro. What sets it apart? You don't require a YouTube Premium membership. It operates by directly recording the audio playback from the YouTube platform and exporting it into accessible audio files. This way, you can overcome DRM limitations and enhance your video projects with the perfect soundtrack.
Key Features of ViWizard YouTube Music Converter
Free Trial Free Trial* Security verified. 5, 481,347 people have downloaded it.
- Convert YouTube Music to MP3, WAV, FLAC, AAC, and more
- Record songs, albums, playlists, podcasts from YouTube Music
- Support splitting, merging, cutting, and editing YouTube Music
- Detect ID3 tags automatically and allow manual editing of ID3 tags
Part 2. How to Get Music from YouTube to Final Cut Pro
With ViWizard YouTube Music Converter, you can effortlessly bypass YouTube's DRM restrictions and prepare your selected music tracks for flawless integration into your Final Cut Pro video editing projects. This versatile tool grants you access to a vast array of music options, enabling you to enhance your video creations while adhering to copyright regulations.
Step 1Launch ViWizard YouTube Music Converter on Your Mac
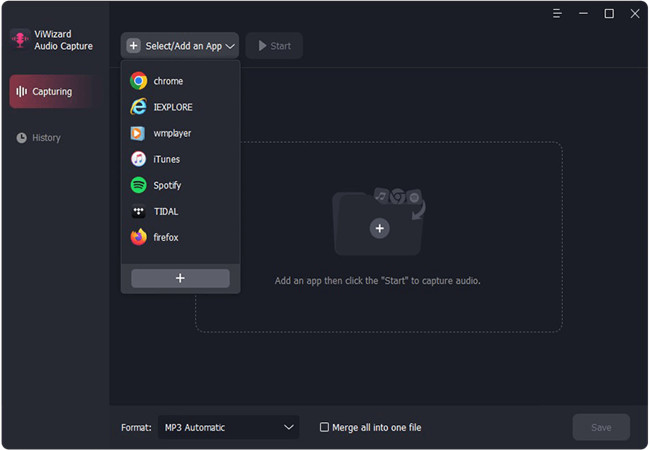
To get started, open ViWizard YouTube Music Converter on your Mac. Upon launching the software, you'll notice a list of programs displayed on its interface. Ensure that your preferred web browser is listed among the programs. If it's not, simply drag and drop your browser icon into ViWizard's main interface.
Step 2Configure YouTube Music Output Settings
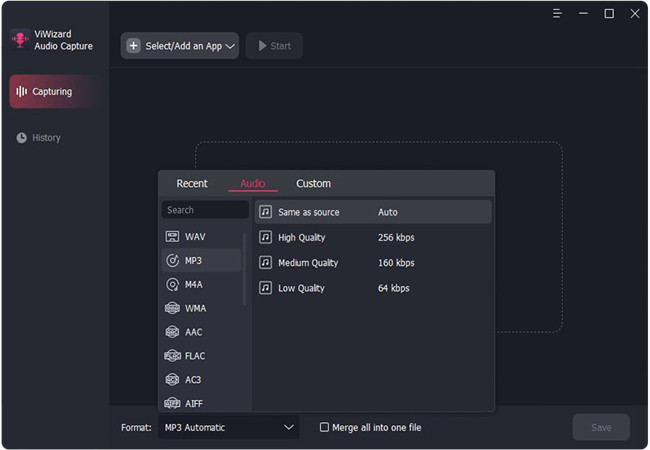
Click on the Format icon within ViWizard to configure the output audio settings. For seamless compatibility with Final Cut Pro, select audio formats such as WAV, AIFF, or MP3. These formats work seamlessly within Final Cut Pro. Once you've made your selection, confirm your choices by clicking the "OK" button.
Step 3Capture and Convert YouTube Music
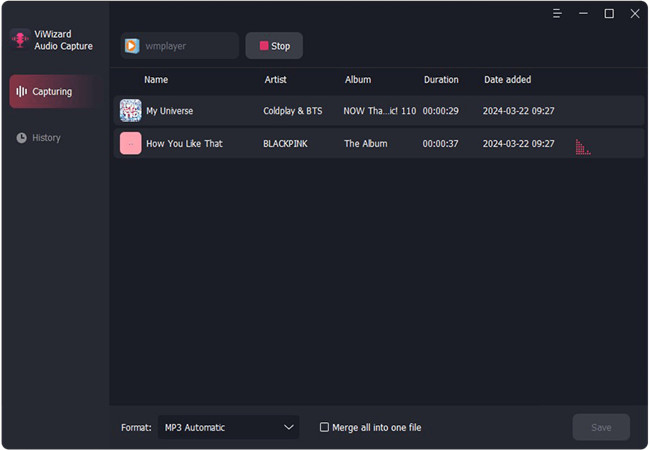
Next, launch your web browser within ViWizard and navigate to the YouTube website. Locate the YouTube Music track you wish to use and start playing it. As the music plays, ViWizard will automatically capture and download the YouTube Music track. Allow a moment for the download to complete. If necessary, you can click the "Stop" button to halt the capturing process.
Step 4Edit Your Captured YouTube Music
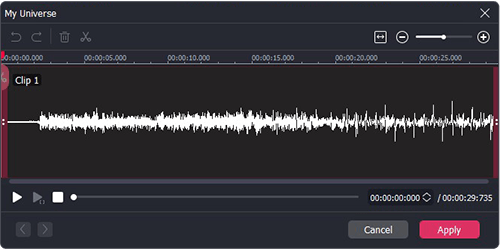
The captured YouTube music will appear in the Capture section of ViWizard. To refine your captured tracks, click the "Edit" button located next to each track. In the editing section, you can trim, merge, and adjust ID3 tags of the downloaded YouTube music to suit your project's needs.
Step 5Save Edited YouTube Music for Final Cut Pro Integration
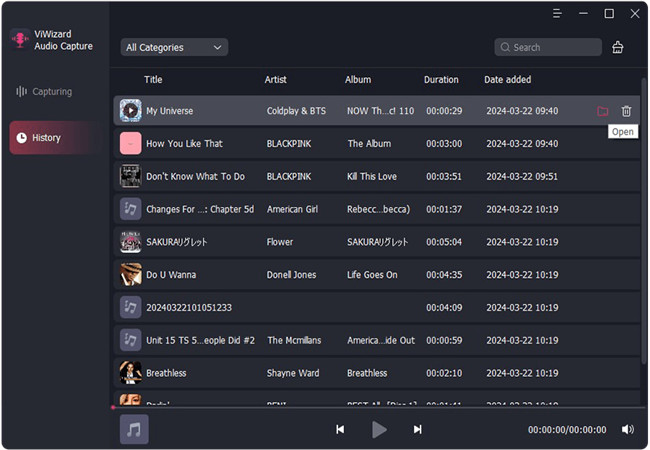
After applying your desired edits, click the Save button to preserve all the edited YouTube music tracks on your Mac computer. These tracks are now ready for seamless integration into your Final Cut Pro projects.
Part 3. How to Import Music from YouTube to Final Cut Pro
Begin by launching Final Cut Pro on your Mac and follow by importing the downloaded YouTube Music audio files to it.
Step 1Access Your Custom Audio Folder
- Locate the folder containing the audio files you want to use in your video project using Finder.
- Select the folder.
- Choose "File" > "Make Alias" (or press Command-L).
Step 2Add Your Custom Audio Folder to Final Cut Pro
- Open Final Cut Pro.
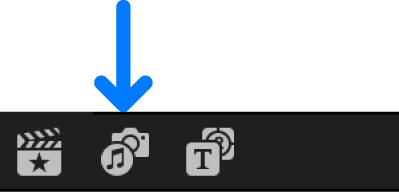
- To open the Media sidebar in Final Cut Pro, click the "Media" button in the top-left corner of the Final Cut Pro window. Or choose "Window" > "Go To" > "Media" (or press Shift-Command-1).
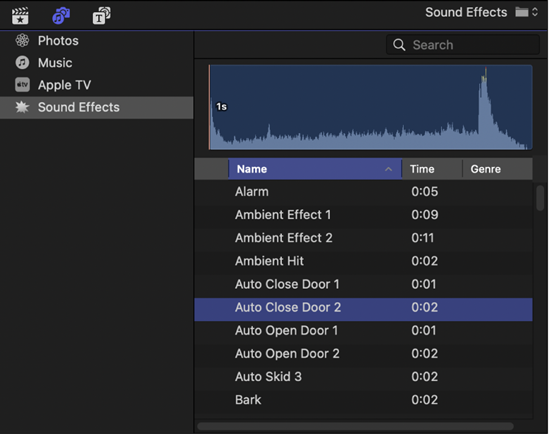
- In the sidebar, click on the "Sound Effects" category.
- Your custom audio folder and any subfolders will appear within the Sound Effects category.
Step 3Access Clips from Your Custom Audio Folder
To find and use clips from your custom audio folder, do any of the following:
- Use the pop-up menu at the top of the browser to filter items. For example, select "Sound Effects," then choose a specific category like "Impacts & Crashes."
- Preview an item by clicking the Play button after selecting it.
- Select multiple items by holding down the Command key and clicking each one.
Step 4Import Clips to Your Timeline
- After selecting the clip or clips you want to use, drag them directly onto the timeline where your video is located for instant inclusion.
- Or, drag them to the sidebar temporarily to add to an event or Keyword Collection. The sidebar will switch back to the Media sidebar afterward.
Conclusion
We've learned how to overcome obstacles such as Digital Rights Management (DRM) and ensure that every note aligns perfectly with our visual storytelling. By utilizing ViWizard YouTube Music Converter and mastering the art of synchronization, you now possess the tools to enhance your video projects with the melodies and rhythms that resonate most with your audience.



Leave a Comment (0)