iTunes library might be damaged for different reasons. No matter how your library became a frustrating mess, there is always something you can do to get your library happy and running again. Here in the following article, we will show you different solutions to fix damaged iTunes library so that you can access your purchased media content once again. Let's check out how to repair damaged iTunes library with ease.
Part 1. What Is iTunes Library?
iTunes is a place where you can access and purchase various media contents, including music, movies, TV shows, books, and more. So, what on earth is iTunes library? In the past, iTunes library was an XML file that contained all of the data on your media library. These days, it has a custom file format ITL and is responsible for keeping more than your playlists straight. If there is any problem happens to this file or your iTunes library is damaged, you'll be prompted with this message as follow when the file cannot be opened properly.

In this case, you could just create a new Library file and then import all of your media files again. But doing so will cause all your play counts to reset, and you may lost all playlists that aren't synced to your iCloud. Therefore, it is important that you need to fix your damage iTunes library. If you have encountered this problem, then you can go on to read this post.
Part 2. 3 Methods to Repair Damaged iTunes Library
In the Apple Community, we have seen lots of threads about fixing damaged iTunes library. It's not easy to restore damaged iTunes library due to some unknown reasons. Fortunately, there are three methods you can try for fixing damaged iTunes library. If you are encountering the damaged iTunes library issue, then you can perform the following steps.
Solution 1. Recover iTunes Library File from iTunes Machine
This method only works for users who are using a Mac computer and have a working Time Machine backup. Time Machine is the built-in backup feature that can automatically back up the data, including apps, music, photos, email, and documents, on a Mac. Here you can restore your iTunes library from a Time Machine backup. You can back up regularly enough not to lost too much data. Otherwise, you should turn to the following solution.
Step 1. Go to iTunes media folder under this path on your computer: /Users/Username/Music/iTunes/.
Step 2. Right-click the iTunes Library.itl file and select Rename, then append the file with old or broken and drag it to your computer.
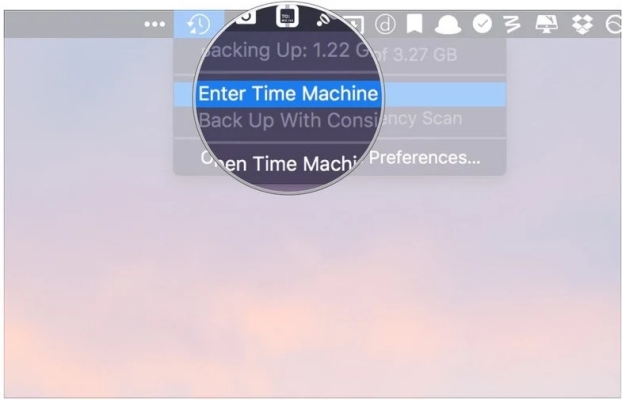
Step 3. Next, navigate to the menu bar of Mac, click the Time Machine icon, and choose Enter Time Machine.
Step 4. A Finder window will pop up displaying each backup with a timeline running up the side. Locate the most recent backup and highlight the library file and click Restore.
Step 5. Open iTunes with the restored version in place and make sure that everything is working. Once you confirm that iTunes is back to normal, delete the broken library file on your computer.
Solution 2. Recreate iTunes Library for Restoring Files
If you don't have any existing backup, then the only choice is to completely recreate your iTunes library. But it's very much possible that you can end up worse off than when you began. Thus, we strongly recommend that you can back up the existing iTunes folder before going any further. Besides, with this method, a few types of information of the original iTunes media files might be lost in the process, such as star ratings, play counts, and date added. If you can live without that, this solution tries to preserve everything else about your iTunes music library.
Step 1. Locate iTunes media folder: Users/Username/Music/iTunes (for Mac) and C:/Users/[User Name]/My Music/iTunes (for Windows).
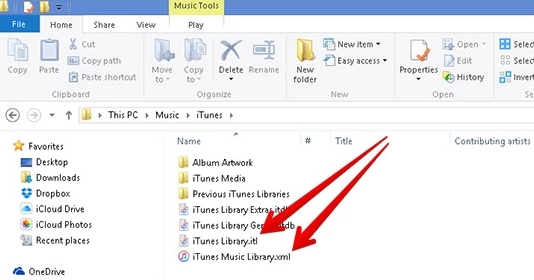
Step 2. Delete the following files: iTunes Library.itl, iTunes Library Genius.itdb, sentinel (make sure you have hidden files shown in Finder), and iTunes Library Extras.itdb.
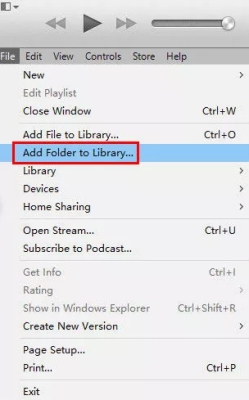
Step 3. If you enabled iCloud Music Library while opening iTunes, click File and select Add to Library. Then navigate to your existing iTunes Media folder, then highlight it and click Open. iTunes will import your existing media files.
Step 4. If you doesn't enable iCloud Music Library, you may get an error message asking you to select a folder for your iTunes library. Then you should select your existing library folder and repeat the steps above to add all of your media files.
Solution 3. Restore iTunes Library from Older Library File
Once updating your iTunes library each time, the file in your iTunes library will be backed up automatically. So, when your iTunes library is damaged, then you can try restoring your library from older library files. Here you can go to find your previous iTunes library and import those older files to your library in iTunes. Now follow the below steps to fix damaged iTunes library.
Step 1. Open a folder on a Windows PC or a Finder on a Mac, then head to Users/Username/Music/iTunes (for Mac) and C:/Users/[User Name]/My Music/iTunes (for Windows).
Step 2. Find the Previous iTunes Libraries folder and check the latest iTunes library file according to the date.
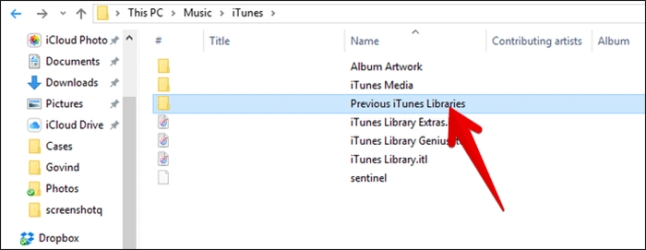
Step 3. Drag the latest iTunes library file to the iTunes folder and delete the date in the file.
Part 3. How to Avoid iTunes Library Missing Songs/Movies
To avoid iTunes library missing songs or movies, you can make a backup of your purchased songs and movies. Before you back up your media, you need to consolidate your iTunes library and download your purchased media to your computer. Then you can back your library and media files in iTunes. Now follow the below steps to get it done.
Step 1. Open iTunes and click File > Library > Organize Library from the menu bar.
Step 2. In the pop-up window, select Consolidate files and click OK.
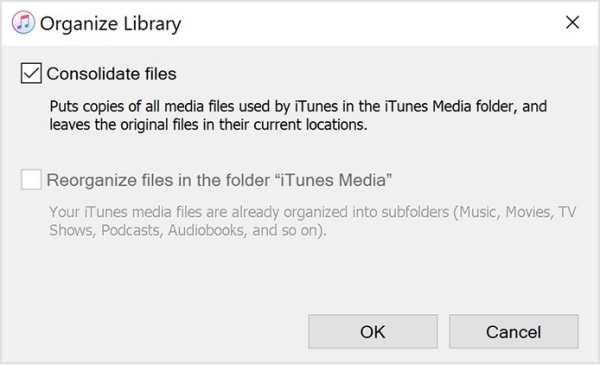
Step 3. Quit iTunes and find your iTunes folder, then right-click on your iTunes folder.
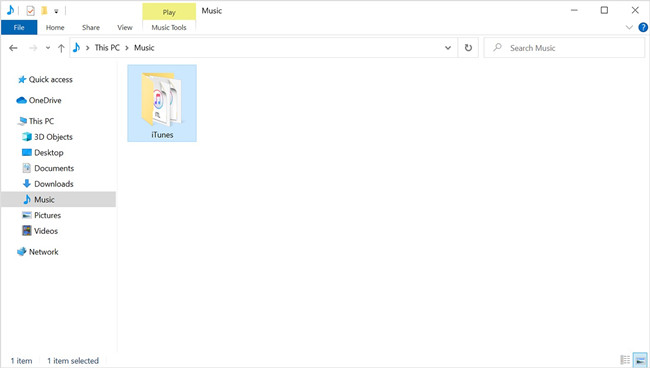
Step 4. Choose Copy and right-click to choose Paste in your external hard drive.
Those iTunes media content you have backed up can be found. But you are only allowed to play your purchases within iTunes. Fortunately, there is a better way for you to back up your iTunes purchases. Here you can use ViWizard M4V Converter for backing up iTunes movies or try ViWizard Audio Converter for backing up iTunes audios and Apple Music. Go to download ViWizard software from the website and have a try of the free trial version.


Leave a Comment (0)