
Dropbox is a file hosting service that offers cloud storage, file synchronization, personal cloud, and client software. With the assistance of Dropbox, you can back up files everywhere, share files quickly, and use your files anywhere by as Dropbox keeps the same files up-to-date on all devices.
In our daily life, we have too many files to save from work to entertainment. Is it possible to back up media files such as movies, eBooks, audiobooks, and music files to Dropbox? Sure, it's easy to make a back up of your media files. Here we'll walk you through how to download Spotify songs to Dropbox for backup.
Part 1. Best Method to Convert Spotify to Dropbox
If you'd like to upload any of your files into Dropbox for backup, you need to make sure that your files are compatible with Dropbox. According to the official website, Dropbox only supports uploading the files in the format of MP3, AAC, FLAC, M4A, WAV, WMA, and OGA. However, streaming music exists in a virtual format that is only available on the streaming platform, especially Spotify.
If you want to keep your favorite Spotify songs to Dropbox forever or make a backup of your liked Spotify playlist to Dropbox, you need to remove the DRM protection from Spotify and convert Spotify music to Dropbox supported formats. ViWizard Spotify Music Converter is a professional tool for you to download Spotify songs to Dropbox. It can easily download and convert music from Spotify to six popular audio formats like MP3.
Key Features of ViWizard Spotify Music Converter
- Convert Spotify music to DRM-free audio format files
- Remove all ads and format limitation from Spotify music
- Download Spotify music without premium subscription
- Save Spotify music with lossless audio quality and ID3 tags
Part 2. How to Add Songs from Spotify to Dropbox
To download Spotify songs to Dropbox, you only need to use ViWizard Spotify Music Converter. With the help of ViWizard software, all of Spotify songs you want could be saved to your Dropbox – it's easier than you might think. Just follow the four steps below.
Step 1Add Spotify songs to the converter
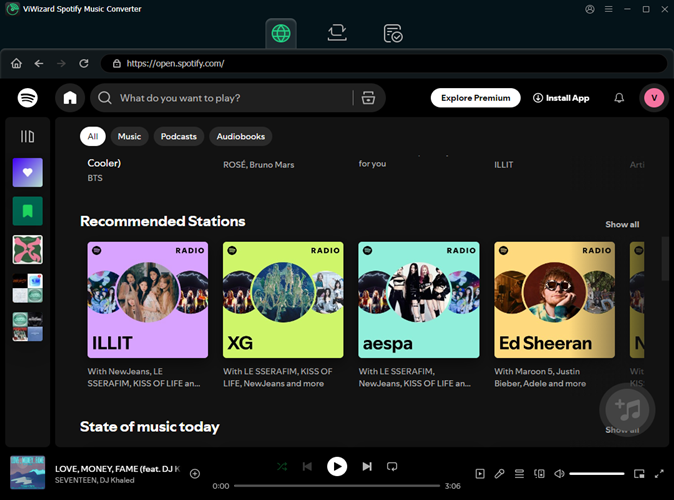
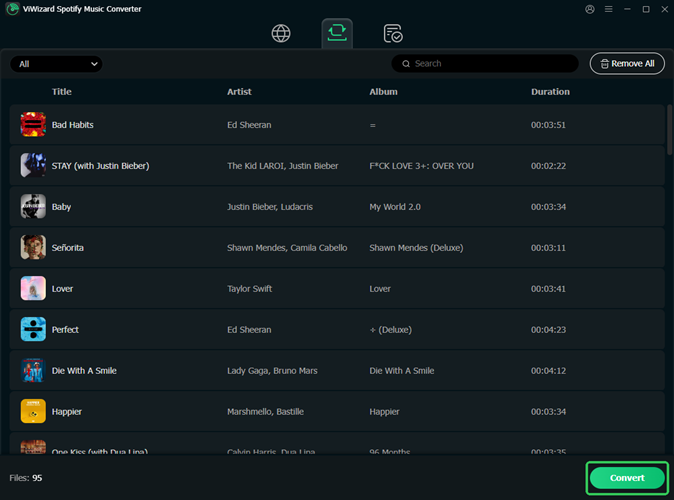
Launch ViWizard Spotify Music Converter on your computer and wait for the automatic opening of the Spotify app. Then go to Spotify and browse your music library to select a playlist you want to save. To add the playlist to the downloading window, you can drag and drop Spotify playlist into the converter. Or you can copy the playlist link and paste it into the search box for loading.
Step 2Change the output audio parameters
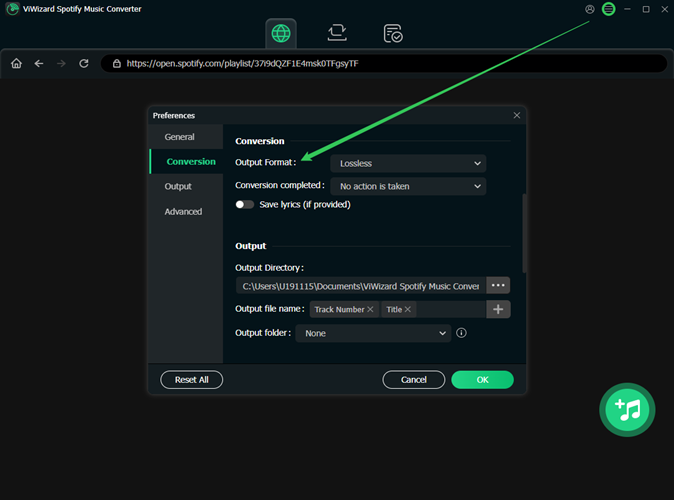
Then go to configure the output audio parameters for Spotify. Click the menu bar, select the Preferences option, then you'll find a popup window. Here you can set the output format. There are several plain formats, including MP3, FLAC, AAC, M4A, WAV, and M4B. You can set any one of these as the output format. Next, continue to adjust the bit rate, sample rate, and channel.
Step 3Download Music from Spotify to MP3
After all the setting is well, you can click the Convert button to download Spotify music and then ViWizard Spotify Music Converter will save the DRM-free Spotify music files to the folder on your computer. After the conversion, you can go to the history list to browse your downloaded Spotify music by clicking the Converted icon. Now you can upload Spotify music into Dropbox.
Step 4Upload Spotify songs into Dropbox
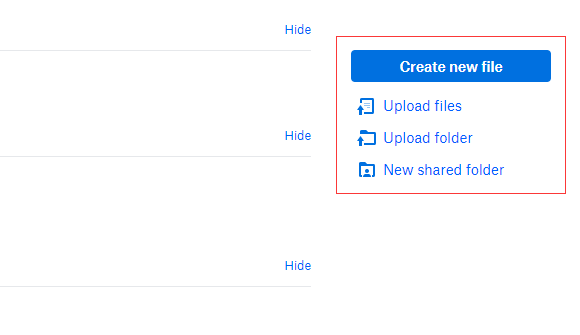
Navigate to www.dropbox.com and sign into your Dropbox account. Click the Upload button and choose the File or Folder option. If you choose the Files option, select as many Spotify music files as you like and click the Open button. Or if you choose the Folder option, select the folder where you save the converted Spotify music files and then click the Upload button. Then all the Spotify music files will be uploaded into Dropbox.
Part 3. How to Add Dropbox Files to Spotify
By using ViWizard Spotify Music Converter, you can easily download songs from Spotify and then transfer Spotify music to Dropbox for syncing your favorite songs. Also, you can download music files from Dropbox and upload them to Spotify for listening. Here's how to add Dropbox files to Spotify.
For Android
Step 1. Launch Spotify on your mobile phone and log into your Spotify account.
Step 2. Tap the gear-shaped icon in the upper-right corner on the Home screen.
Step 3. In the Settings window, scroll down to find the Import option.
Step 4. Under Import, switch on Show local audio files and then go back to your music library.
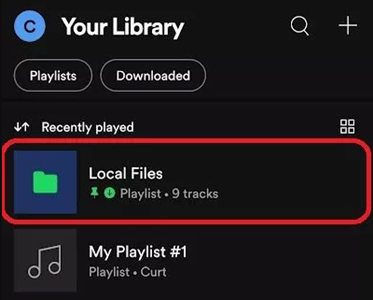
Step 5. Tap Local Files to browse the files you've downloaded from Dropbox and add them to Spotify for playing.
For Mac & Windows
Step 1. Start by opening Spotify on your computer then sign into your Spotify account.
Step 2. Click the profile picture and select the Settings option from the drop-down menu.
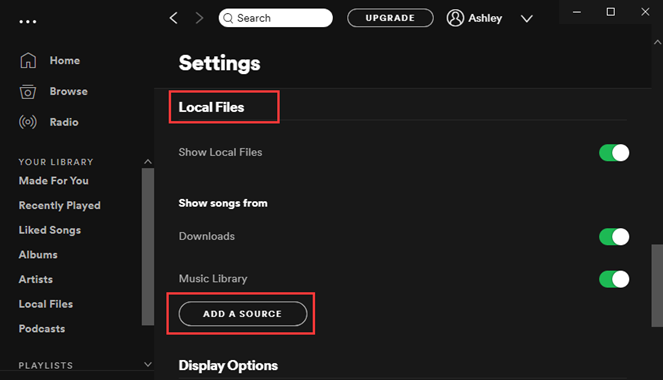
Step 3. Scroll down until you see Local Files and then turn on this feature on Spotify.
Step 4. Click the Add a Source button to find and locate the folder for saving Dropbox files.
Step 5. Select Dropbox files you want to upload and then add them to your music library for playing.
For iPhone
Step 1. Make sure that Dropbox files are uploaded into Spotify on your computer.
Step 2. Open Spotify on your iPhone and log in on your iOS using the same Wi-Fi as your desktop.
Step 3. From the Home screen, press the Settings icon and find Local files under Settings.
Step 4. Switch on Enable sync from desktop and download the playlist with your Dropbox files.
- See Also: How to Upload Local Files to Spotify
Conclusion
Before getting started, you need to know that Spotify is not compatible with Dropbox, so you need to use ViWizard Spotify Music Converter. With the help of ViWizard software, you can easily get Spotify music and then upload Spotify songs to Dropbox for backup. Have a try and you'll find it out.

Adam Gorden is an experienced writer of ViWizard who is obsessed about tech, movie and software.