The album art reveals the images or any pictures related to the songs that carry in it. The Spotify environment comprises a wide range of albums displaying attractive art for easy identification. This album art helps the users to reach for it quickly from millions of song collections on this entertaining platform.
When you struggle with Spotify album art not showing issues, then you can follow the below-discussed methods to resolve it optimally. You don't have to perform any special changes to the Spotify app, a few clicks on the right options will help to sort out this issue. Here you will learn how to solve this album art not showing on Spotify problem wisely. Follow the below guidelines and fix this problem in no time flawlessly.

Wanna know how to change Spotify album cover? Here's a a quick tutorial to help you customize your Spotify album cover with any picture you want to be displayed. And you can play Spotify songs with your DIY album cover anywhere you want.
Part 1. Why Spotify Album Not Showing?
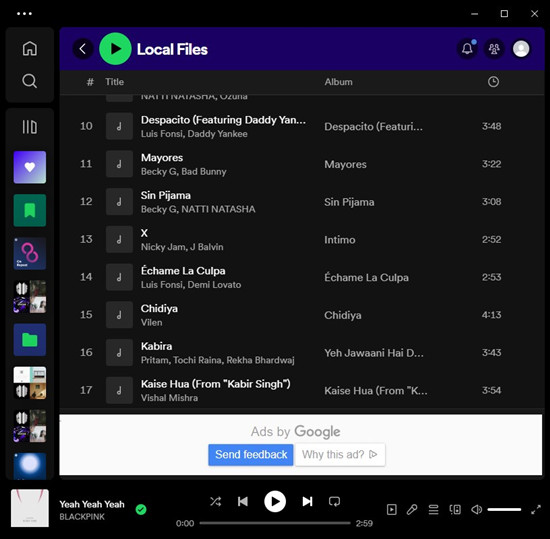
When it comes to Spotify, users often encounter issues where album art fails to display properly. This can happen due to various reasons, primarily stemming from technical glitches within the app or connectivity issues. One common scenario is when the Spotify app fails to retrieve album art from its servers, which can occur due to temporary server issues or network disruptions.
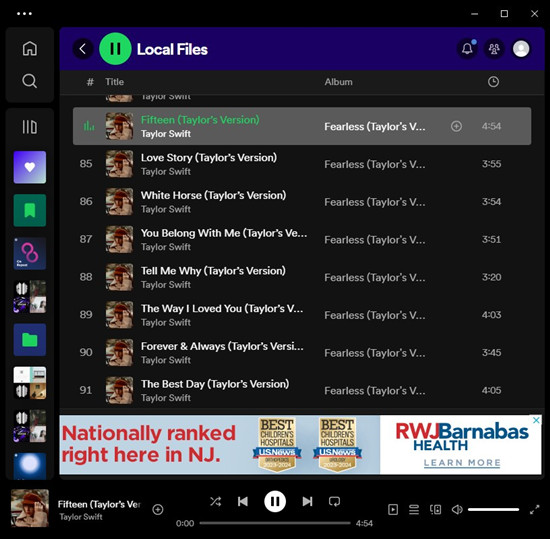
Additionally, users who have uploaded local files to their Spotify library might find that album art associated with these files doesn't show up as expected. This can happen if the local files are not properly tagged with metadata, including album art information, or if there are discrepancies between the metadata of the local files and the information stored in Spotify's database.
In both cases, ensuring a stable internet connection and properly tagged metadata can often resolve the issue, while troubleshooting steps such as clearing cache and data or updating the app may also be necessary to address underlying technical issues within the Spotify application.
Part 2. How to Fix Spotify Not Showing Album Art
Album art not showing on Spotify can be a frustrating experience, but several troubleshooting steps can help resolve the issue. Here are some potential solutions:
-
Restart Spotify:
Sometimes, a simple restart of the Spotify app can resolve various technical glitches, including issues with album art not displaying. Interestingly, some users have reported that restarting Spotify twice in a row can be particularly effective in resolving stubborn issues. Simply close the Spotify app completely and reopen it. If the issue persists, close it again and reopen for a second time.
-
Update Spotify:
Outdated versions of the Spotify app may contain bugs or compatibility issues that can prevent album art from displaying correctly. Updating the app to the latest version can often resolve such issues and improve overall performance.
- Open the respective app store on your device (e.g., App Store for iOS, Google Play Store for Android, or Microsoft Store for Windows).
- Search for "Spotify" and navigate to its page.
- If an update is available, you'll see an "Update" button next to the app. Tap on it to initiate the update process.
- Once the update is complete, relaunch Spotify and check if the album art now displays correctly.
-
Clear Cache:
Cached data can sometimes become corrupted, leading to issues with album art display. Clearing the cache can help refresh the app and resolve such issues.
- Open the Spotify app on your device.
- Tap on your profile icon located in the top right corner.
- Scroll down and select "Settings."
- Under the "Storage" section, tap on "Clear Cache," depending on your device.
- Confirm the action by tapping on "OK" or "Clear." This will remove any cached data.
- Once completed, restart the Spotify app and check if the album art displays properly.
-
Clean Uninstall Spotify:
If the above steps fail to resolve the issue, a clean uninstall and reinstall of Spotify may be necessary. This ensures that any corrupted files or settings causing the problem are completely removed before reinstalling the app.
For Windows:
- Go to your computer's "Settings."
- Select "Apps" or "Apps & Features."
- Find and click on "Spotify" from the list of installed apps.
- Follow the on-screen instructions to uninstall Spotify.
- Press "Win + R" to open the Run dialog box.
- Type "%AppData%" and press Enter.
- Locate and delete the "Spotify" folder.
- Again, open the Run dialog box using "Win + R."
- Type "%LocalAppData%" and press Enter.
- Delete the "Spotify" folder in this directory.
- Restart your computer to complete the process.
For Mac:
- Open Finder and go to the "Applications" folder.
- Drag "Spotify" from the list of applications to the Trash to uninstall.
- Click on "Go" in the top menu bar and select "Go to Folder."
- Enter "~/Library/" and press Go.
- Delete the following folders:
- Caches/com.spotify.client
- Caches/com.spotify.client.helper
- Application Support/Spotify
- Empty the Trash to remove all Spotify-related files.
- Restart your Mac to complete the process.
For Android:
- Go to your Android device's "Settings."
- Select "Apps" or "Apps & Notifications."
- Find and tap on "Spotify" from the list of installed apps.
- Tap on "Storage & cache."
- Tap on "Clear Data" to remove all app data.
- Go back to the "Apps" settings.
- Tap on "Storage" again and select "Clear Cache."
- Navigate to "Settings" > "Storage" > "Spotify."
- Tap on "Clear Data" to remove all data associated with Spotify.
- Go back to the home screen and navigate to "Settings" > "Storage" > "Android" > "Data" > "com.spotify.music."
- Delete this folder to remove any leftover data.
- Restart your Android device to complete the process.
For iOS:
- Go to your iOS device's "Settings."
- Tap on "General" > "iPhone Storage" (or "iPad Storage").
- Find and tap on "Spotify" from the list of apps.
- Tap on "Offload App" to remove the app but keep its documents and data.
- Go back to "Settings" > "General" > "iPhone Storage."
- Tap on "Spotify" and then tap "Delete App" to remove it completely.
- Restart your iOS device to complete the process.
Part 3. How to Fix Spotify Local Files Album Art Not Showing
-
Verify File Formats:
Spotify supports various audio file formats, but some may not display album art correctly. Ensure your local files are in supported formats like MP3, M4A, or FLAC. Spotify supports .mp3, .mp4, and .m4p files but does not support .mp4 files that contain video or the iTunes lossless format (M4A). Additionally, some tracks may be protected in restricted formats. Install QuickTime on your desktop to allow most of these tracks to be played on Spotify. Make sure the files aren't DRM-protected and check if they're stored in a location accessible to Spotify and that they're not corrupted or damaged.
-
Check Metadata:
If the album art is missing or incorrect in the metadata of your local files, you can manually add it using music management software. Search for the correct album art online, download it to your computer, and then use software like iTunes or Mp3tag to add the album art to the corresponding files.
- Search for the album art online and download it to your computer. Make sure it's in JPEG or PNG format.
- Launch iTunes on your computer.
- Click "File" > "Add File to Library" and select the song you want to add album art to.
- Right-click on the song in iTunes and select "Get Info."
- Go to the "Artwork" tab and click "Add Artwork." Choose the image you downloaded.
- Note: Keep the album art under 300x300 px for local files.
- Click "OK" to save the changes.
- Open Spotify and check if the album art appears. If not, refresh the app by closing and reopening it.
-
Re-Import Local Files into Spotify:
Sometimes, reimporting local files into Spotify can refresh the app's database and resolve album art display issues. Remove the affected files from your Spotify library, then re-add them by following these steps:
- In Spotify, go to "Settings" > "Local Files."
- Toggle off "Show Local Files" to hide your local files.
- Close and reopen Spotify.
- Toggle on "Show Local Files" to display your local files again.
- Re-add the affected files to your Spotify library by selecting them from your local files directory.
- Check if the album art now displays correctly for the re-imported files.
If you're experiencing album art issues primarily on the mobile app, try syncing your local files with the Spotify mobile app. Connect your device to the same Wi-Fi network as your computer, and ensure both devices are logged into the same Spotify account. Then, follow the same steps as on desktop to import local files. This ensures that the files and their associated metadata, including album art, are correctly transferred to your mobile device.
Part 4. How to Convert Spotify Album to MP3
To download Spotify music without premium, there is a reliable music downloading tool called ViWizard Spotify Music Converter. It is a sophisticated tool that helps to download your favorite songs, albums, and playlists from Spotify for playing anywhere. This efficient converter can remove the protective format of the Spotify music and converts to the desired format to overcome compatible issues.
The ease of usage of this program triggers the users to opt for this converter without any hesitation. And there are the remarkable functionalities of this tool. Follow the below instructions to download and convert Spotify songs to enhance accessibility when required.
Key Features of ViWizard Spotify Music Converter
Free Trial Free Trial* Security verified. 5, 481,347 people have downloaded it.
- Download Spotify songs, playlists, podcasts, and audiobooks extremely fast at up to 15x speed
- Convert Spotify into MP3, FLAC, WAV, AIFF, M4A, and M4B losslessly
- Lets you play Spotify tracks offline on any device without restrictions
- Works seamlessly on Windows and macOS, supporting the built-in Spotify Web Player
Step 1Add Spotify Music to Download
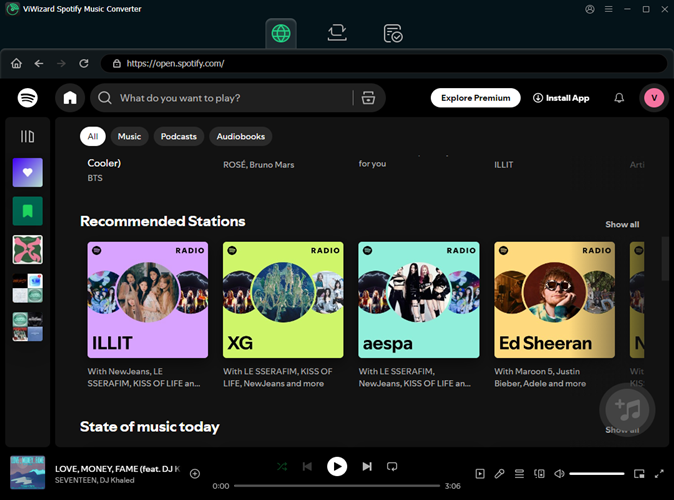
Go to the official website and download the correct version of this tool according to your system operating system. Then install ViWizard Spotify Music Converter and launch it. From the home page of Spotify, choose your favorite songs and add them into the converter by pasting the link and clicking the + icon. Or directly drag Spotify songs into the interface of the converter.
Step 2Configure the Audio Parameters
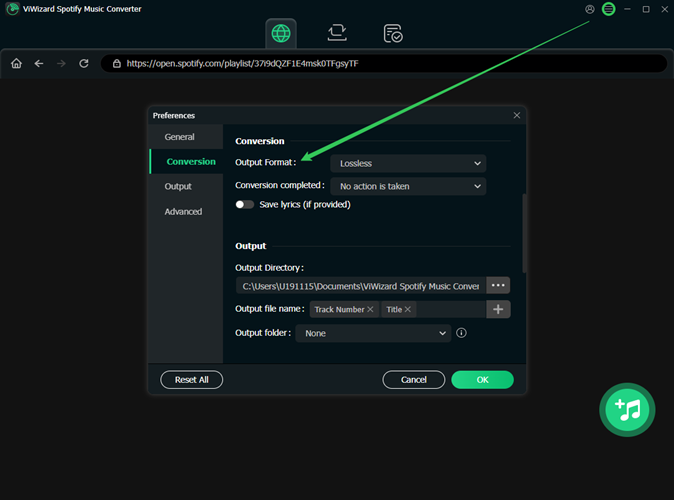
Next, go to set the output audio parameters for Spotify music. Launch the menu bar, and select the Preferences option from the drop-down menu. In the pop-up window, you can set the conversion attributes like output audio format, bit rate, sample rate, and conversion speed. Click the OK button to save the changes in the output conversion settings.
Step 3Start the Conversion of Spotify
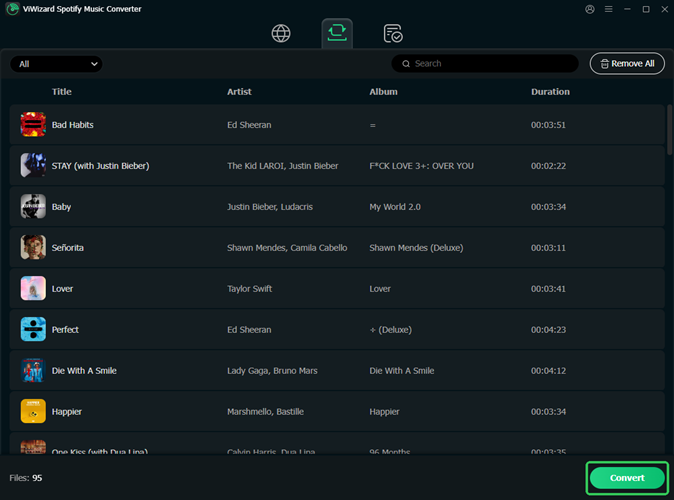
Finally, click the Convert button to start the conversion process. Wait for a few minutes until the conversion and download process are complete successfully. After conversion, you can click the Converted icon to launch the history list where you can view the converted Spotify music. The downloaded songs are available at the local drive of your computer for offline listening. You can also stream them to any media player without any file compatible issues.


Leave a Comment (0)