Spotify makes it easy to enjoy your favorite music with its curated playlists and personalized recommendations. But sometimes, you might want a bit more control over your experience. Have you ever enjoyed a Spotify playlist, but felt the intro of a song just didn't fit the vibe? Or maybe you've spent time curating the perfect playlist, only to realize a few tweaks could make it even better?
Those basic edits can be easily done directly within the app. You can reorder songs, add new tracks, or update playlist details like the name or cover art. But what if you're looking for something more—like full audio editing? Luckily, there are still plenty of ways to personalize your listening experience. Whether it's adjusting the audio or fine-tuning a playlist, there are simple tips and tricks to help you customize your music and playlists today.

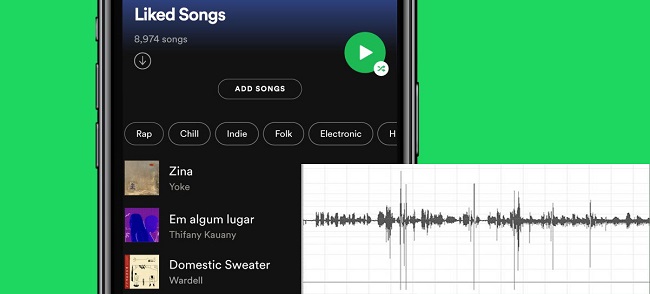
Have you ever wanted to customize music on Spotify and make it your special one? Here's how to cut music from Spotify.
Part 1. How to Edit Spotify Music by Modifying Audio
Option 1: Equalizer Settings

Spotify's Equalizer feature lets users customize the sound profile of their music, giving control over the bass and treble for a personalized listening experience.
To access the Equalizer, open the Spotify app, go to "Settings," and select "Equalizer." Adjust the bass for depth (ideal for hip-hop or EDM) or the treble for a crisper sound (great for acoustic or classical). This feature lets you customize your audio to suit any music genre or environment.
The Equalizer has several frequency bands you can adjust:
Sub-bass (20-60 Hz): Boosting this range adds deep, warm bass, enhancing genres like hip-hop or EDM.
Bass (60-250 Hz): Increasing this range gives your music more fullness and power.
Low Midrange (250-500 Hz): Slight adjustments can reduce muddiness, making your sound clearer.
Midrange (500 Hz - 2 kHz): A small dip here can help avoid harshness, allowing vocals and instruments to sound more natural.
Upper Midrange (2-4 kHz): Boosting this range can improve the clarity of vocals and lead instruments.
Presence (4-6 kHz): Adjusting this band affects the definition and clarity of vocals and instruments.
Brilliance (6-20 kHz): Boosting this range adds sparkle and airiness to your music.
Read More: How to Use Equalizer on Spotify (Best EQ Settings)
Option 2: Audio Quality Settings
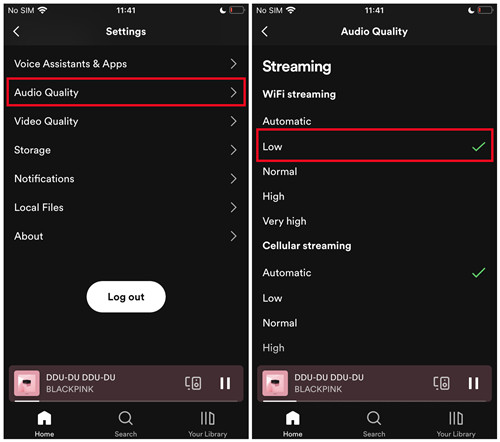
Spotify offers audio quality settings that allow users to adjust the sound quality and manage bandwidth depending on their needs.
To access these settings, open the Spotify app, go to "Settings," and select "Audio Quality." If you're on mobile data, lower the audio quality to save bandwidth. For better sound, increase the quality for a richer listening experience. Premium users can also choose between Quiet, Normal, or Loud modes to adjust volume based on your surroundings.
Read More: How to Stream the Best Audio Quality on Spotify
Option 3: Using ViWizard + Audacity [Recommended]
Here comes one of the more challenging aspects, as direct editing of songs on Spotify isn't possible due to licensing restrictions and digital rights management (DRM) protections. However, with the right tools, you can still gain full control over the audio you're listening to. If you've ever wanted to trim a song or adjust its audio parameters, software like ViWizard and Audacity can help.
You may have already heard of Audacity—it's a free, open-source audio editor that allows users to record and modify audio from various sources. However, it doesn't support direct importing of online streams or processing the original ID3 tags. That's why you need ViWizard Spotify Music Converter. It's an excellent tool for those who want not only audio editing capabilities and offline music library organization but also the ability to convert music into different formats like MP3, M4A, M4B, WAV, AIFF, and FLAC.
Why ViWizard?
ViWizard is key for removing DRM, allowing you to fully control your Spotify music. It also boasts a fast conversion speed of up to 15x faster than the real-world recording process. What's great about ViWizard is that it preserves crucial song details like ID3 tags, ensuring that metadata stays intact even after conversion. You'll retain important track information, like artist names and album details, which is vital for organizing your music collection.
Key Features of ViWizard Spotify Music Converter
Free Trial Free Trial* Security verified. 5, 481,347 people have downloaded it.
- Convert Spotify music to common audio format like MP3
- Function as a Spotify music downloader, converter and editor
- Get rid of all digital rights management protection from Spotify
- Preserve ID3 tags and other metadata information of Spotify music
A brilliant Spotify music downloader designed to download and convert Spotify songs, playlists, albums, artists, podcasts, and audiobooks to MP3, FLAC, WAV, AIFF, M4A, and M4B losslessly. The sound stays as clear as the original, and all track details are preserved, offering a seamless experience to enjoy your Spotify music offline on any player or device.
To Convert Tracks using ViWizard:
- Download the correct version of ViWizard Spotify Music Converter for your computer (Mac or Windows) and follow the on-screen instructions to install it. Once installed, launch the program to begin.
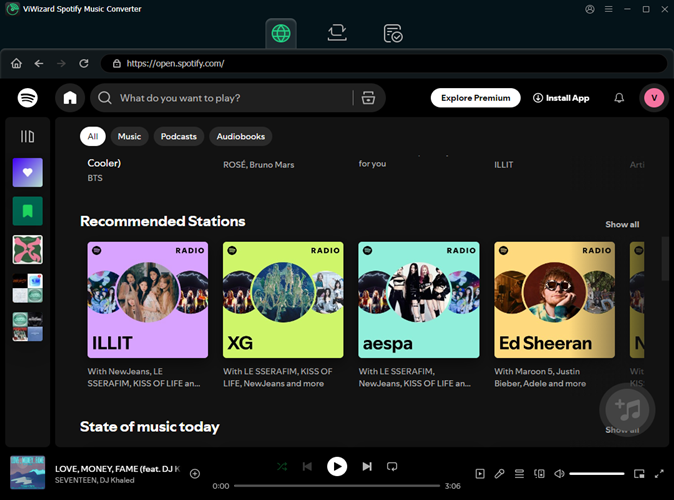
- Open ViWizard and log in to your Spotify account (whether free or premium) to access your music library.
- Browse through your library and click the "+" button to add the tracks you want to convert. The software will automatically analyze and load them for conversion.
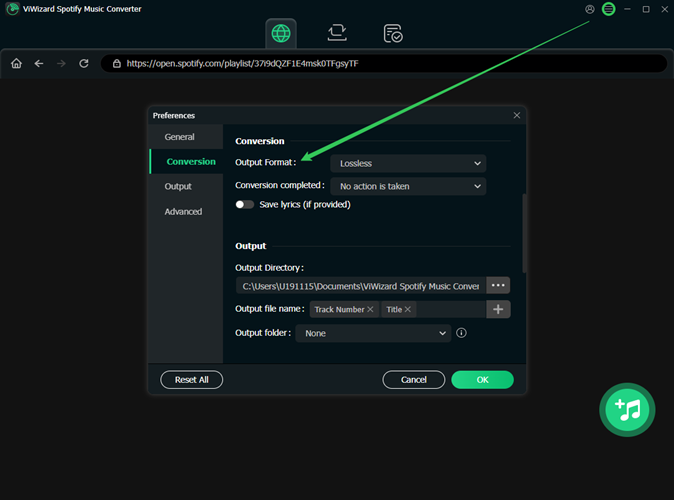
- In the settings menu, choose MP3 as the output format. You can also adjust the bitrate (up to 320 kbps) for better sound quality.
- After configuring your settings, click the "Convert" button. ViWizard will quickly convert and download the selected tracks at speeds of up to 15x.
- Once the conversion is complete, open the output folder to find your MP3 files. You can now transfer them to any device for offline listening.
To Edit Tracks using Audacity:
- Ensure Audacity is installed on your computer. Locate the converted Spotify files in the designated folder on your system.
- Open Audacity and import the song you want to edit. You can either go to File > Import > Audio or simply drag and drop the file into Audacity.
- Your song will appear as a waveform. Use the following simple tools in Audacity to make edits:
- Selection Tool: Click on the Selection Tool and select the region of the track you want to edit. Press the Delete key to remove the selected section.
- Envelope Tool: Click the Envelope Tool and drag the audio to adjust volume. You can also add envelope points to create fade-ins or fade-outs.
- Draw Tool: Click the Draw Tool, and zoom in on the track to manipulate individual audio samples.
- Multi-Tool: The Multi-Tool lets you use all the above tools together. Simply click on it and make the desired adjustments.
- Additional edits you can make:
- Trim the track: Click Edit > Remove Special > Trim Audio to cut unwanted parts.
- Move the audio to the beginning: Click Tracks > Align Tracks > Start to Zero to start the track from the beginning.
- Fade out the last second: Click 1 second before the end of the track, select Region > Cursor to Track End, then go to Effects > Fade Out. You can also explore other editing features under the Effects menu.
- Once you're happy with your edits, save the project by clicking File > Save Project.
- Export your final version by selecting File > Export > Export Audio, and choose your desired format.
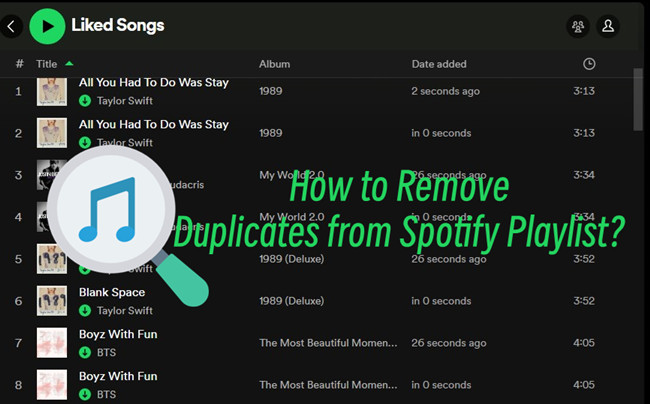
Part 2. How to Edit Spotify Playlists by Recording Tracks
If you're looking to customize your playlists for a more personalized listening experience, one option is to rearrange the songs—moving them up or down—to suit your preference. You can create a new playlist from scratch or simply record and reorder tracks by dragging them into your desired positions.
There are two ways to arrange your tracks, but keep in mind that this feature is available to Premium users on mobile, while anyone using the desktop app can make these changes and have the order synced across devices:
- Sort: Automatically sorts your playlist by song title, artist, or release date.
- Custom Order: Gives you complete control, allowing you to manually drag and drop songs into the playlist in any order you like.
For Windows/Mac:
- Spotify desktop users can rearrange the song order using either the "Sort" or "Custom Order" options.
- Open the Spotify app on your Windows or Mac computer.
- In the left menu, go to the playlist whose order you want to edit.
- You have two options to change the song order in the playlist:
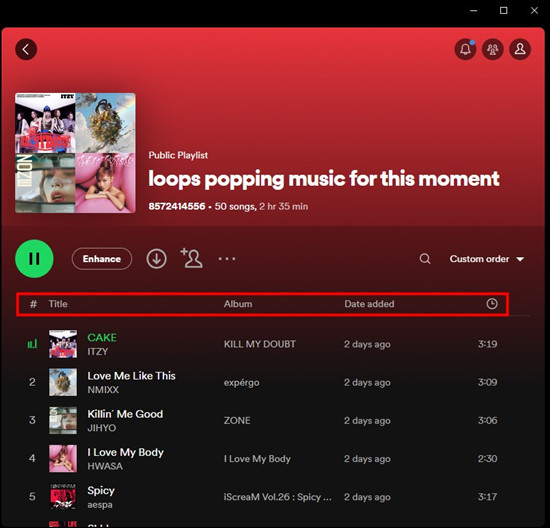
- Sort the songs in the playlist: Click on the column headers (e.g., Title, Album, Date Added, Duration) to automatically sort the songs by those categories. You can also click the downward Chevron icon to select sorting options like Custom Order, Title, Artist, Album, Date Added, or Duration from the dropdown menu.
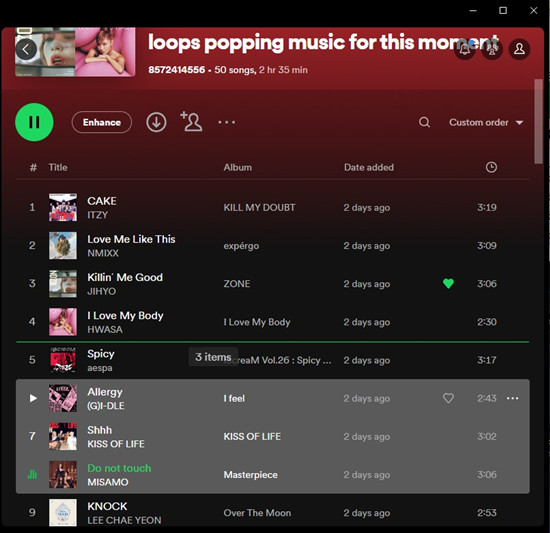
- Customize the song order: Select a song (or multiple songs) and drag them to your preferred position in the playlist.
For iOS/Android:
If you've already rearranged the song order in the Spotify desktop app, you don't need to do it again on your mobile device. Spotify will sync these changes to the mobile app automatically. While both Premium and free users can reorder songs on desktop, only Premium users can use the "Edit" feature to sort songs on mobile.
- Open the Spotify app on your iOS or Android device.
- Go to Your Library.
- Enter the desired playlist.
- Tap the "More options" button (three dots).
- Scroll down and select the "Edit" option.
- Hold and drag the songs to reorder them as you prefer.
- Once done, tap the "Save" button to confirm the changes.
Part 3. How to Edit Spotify Playlists by Customizing Playlist Information
Personalizing your playlists is a great way to tailor them to specific moods, events, or preferences by editing details like the name, description, or display photo. To edit a playlist, you'll need to use a device like a computer, as editing on mobile devices can be more limited. Once you make changes, Spotify will sync the updates across other devices connected to your account.
For Windows/Mac:
Windows and Mac users can edit the name, description, and display photo of their playlists. You can choose to edit one specific item or all the details at once.
To Edit the Playlist Name, Description, or Photo:
- Open the Spotify app on your Windows or Mac computer.
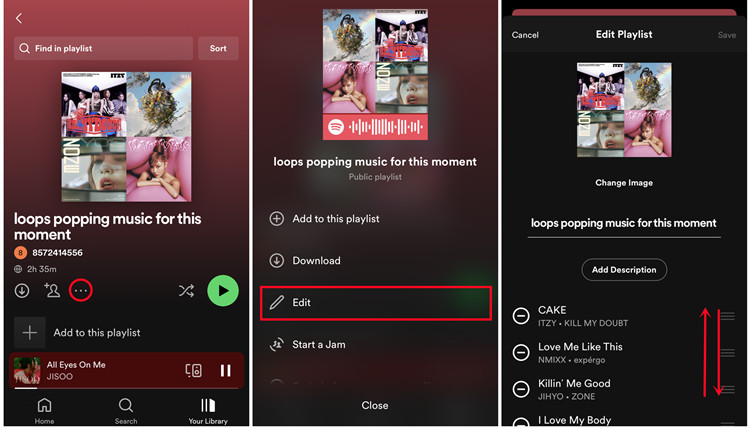
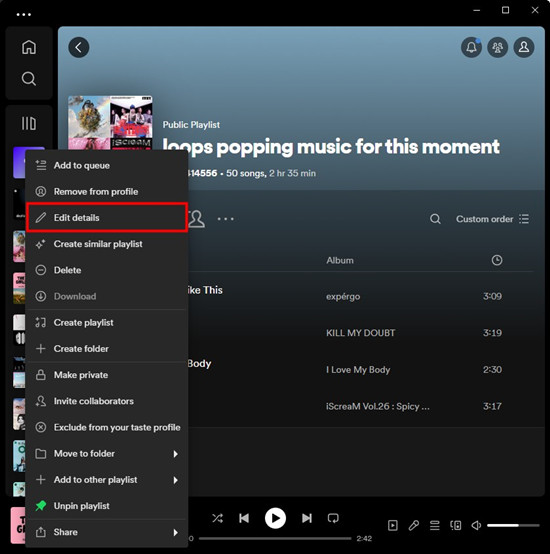
- In the left menu, locate and select the playlist you want to edit. Right-click on the playlist and choose Edit Details to begin.
- Alternatively, click directly on the playlist's name. If the playlist is yours, the "Edit Details" window will appear.
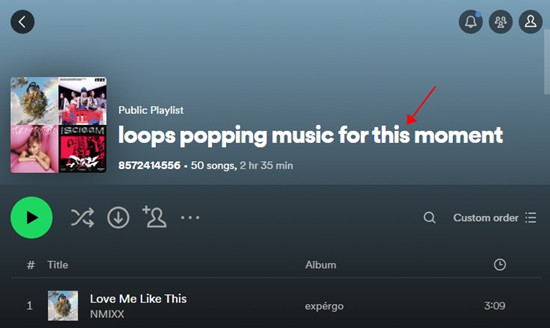
- From here, you can customize your playlist:
- To change the name of the playlist: Click the "Name" field and enter the new name you want for the playlist.
- To add or change the description: Click the "Description" field and enter your preferred description.
- To change the display photo: Click the "Playlist Display Photo" section (click Choose Photo) and select the desired file in the pop-up window.
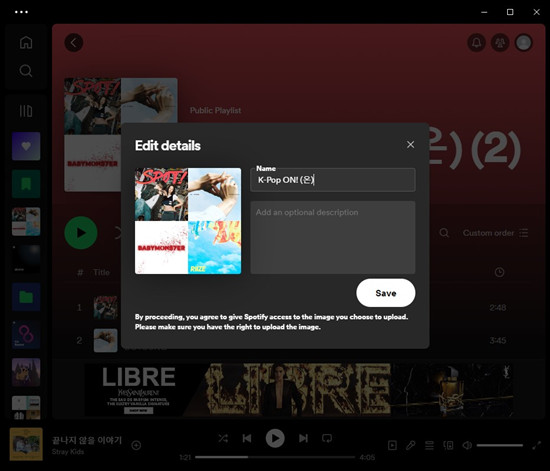
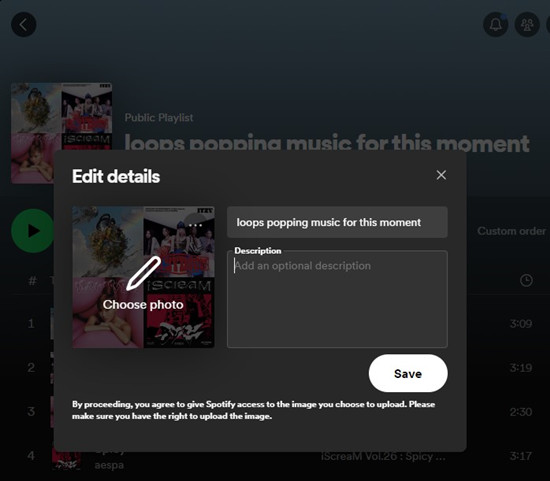
- Once you've made the changes, click the "Save" button to confirm and keep the updates.
To Edit Only the Playlist Description:
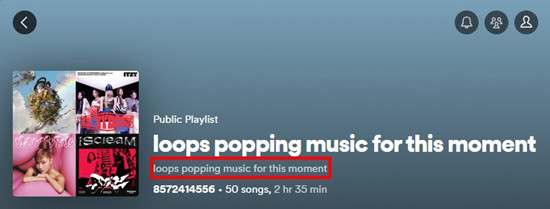
- On desktop, open the desired playlist from the side menu.
- In the upper section of the playlist, click the description under the playlist's name.
- In the pop-up, edit the description.
- Click "Save" to confirm the change.
To Edit Only the Playlist Photo:
- On desktop, go to the playlist you want to edit from the side menu.
- In the upper section of the playlist, click the display photo (click the Choose Photo button).
- In the pop-up window, navigate to the photo you want to use for the playlist.
- Once selected, click "Open".
- Click "Save" to finalize the change to the playlist photo.
For iOS/Android:
You can also edit your playlist directly through the Spotify mobile app on iOS or Android devices.
To Edit the Playlist Name, Description, or Photo:
- Open the Spotify app on your iOS or Android device.
- Go to Your Library.
- Scroll to find the playlist you want to edit.
- Select the playlist.
- Tap the More button (three dots icon) and then tap Edit to begin editing the information:
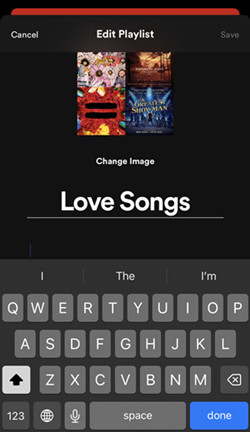
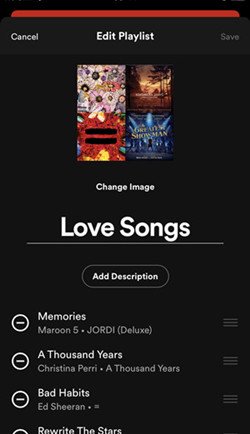
- To change the name of the playlist: Tap the "Name" field and enter the new name for the playlist.
- To add or change the description: Tap the "Description" field and enter your preferred description.
- To change the display photo: Tap "Playlist Display Photo" and choose either Choose from Library or Take Photo to select or capture a new image for the playlist.
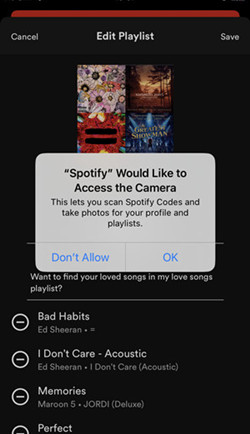
- For Take Photo, you'll need to grant Spotify access to your device's camera.
- For Choose from Library, make sure you have permission to upload the image.
- Once you've made the changes, tap Save in the upper-right corner to confirm and apply the updates.
Conclusion
In this post, we have offered a solution for editing your Spotify music. Even though Spotify doesn't provide a direct way to edit its tracks, you can follow this article and learn how to edit your music in Spotify. You, first, need to convert Spotify songs with ViWizard Spotify Music Converter and then enable direct editing via Audacity Audio Editor. It is not that hard actually. Moreover, once you have the converted songs, you can play Spotify in your car or any other device. Just come and try the ViWizard and enjoy the music!
You May Be Interested


Adam Gorden, the digital media specialist at ViWizard, is dedicated to providing the best solutions for digital media management, including audio and video conversion, file optimization, and media workflow enhancements.
Leave a Comment (0)