
- Nogueira from Reddit
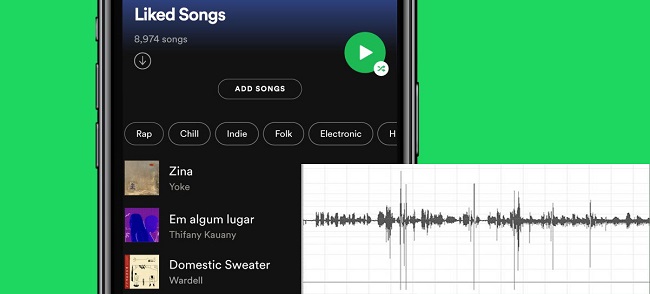
I've noticed that Spotify users, like Nogueira, often want to share specific parts of a song that really resonate with them—whether it's a lyric, a beat, or a moment that perfectly matches their mood. We long for a feature similar to iTunes, where you can customize the start and stop points of a track every time you play it. A "Cut" feature could let you skip the sections that break your immersion, creating a more personalized listening experience… not on Spotify. And it's not as simple as just changing the order of songs in a playlist. We're still waiting for Spotify to take such requests seriously. Until then, we'll have to rely on workarounds.
While you can't trim songs directly in the app, there are tools available that let you cut unwanted sections and keep only the parts you love. Whether on your computer or phone, these solutions let you shape your music the way you want.
Don't know how to edit a playlist or song on Spotify? Check this out. We'll tell how to edit your playlists and songs on Spotify or make them editable.
Part 1: Why Can't I Cut Music on Spotify?
Spotify is designed for streaming, not editing. While services like iTunes may offer this feature, Spotify doesn't allow you to cut songs due to Digital Rights Management (DRM). DRM protects music from being copied, altered, or redistributed. Even if you download songs as a Premium user, they're encrypted, which prevents easy editing with tools like Audacity, Adobe Audition, or GarageBand.
To cut Spotify songs, you typically need to download, convert, or record them in a format that removes DRM. The key is getting your music into an editable format like MP3 so you can cut, slice, and customize it however you like. Let's take a look at tools like ViWizard that give you the freedom to personalize your Spotify tracks using audio cutters.
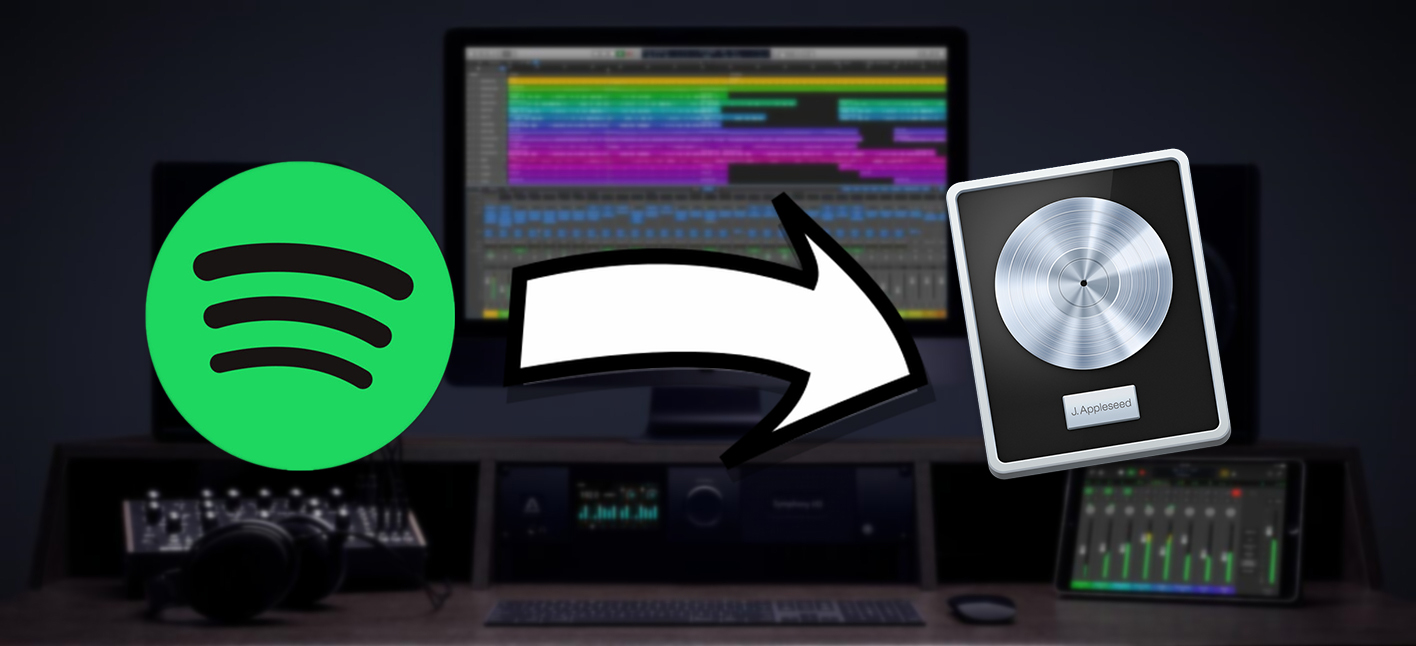
Part 2: How to Cut Spotify Songs by Downloading Tracks
Alright, you've got a song on Spotify you're itching to cut — maybe for a ringtone, a remix, or just to trim out a long intro. First, you'll need to get that song into a format your editing software can actually work with.
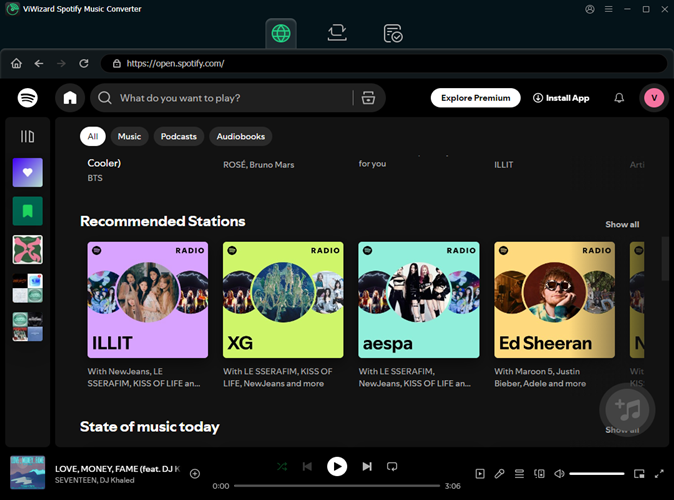
Download Songs from Spotify with ViWizard Spotify Music Downloader
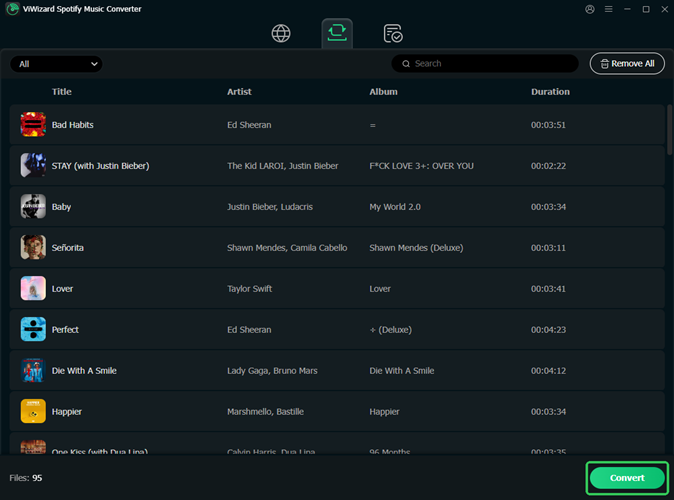
That's where ViWizard Spotify Music Converter comes in. Open it up, and you can add any Spotify track, album, or playlist directly from the built-in Spotify Web Player. Choose your output format — MP3, WAV, FLAC — and click Convert. In just a few moments, you'll have DRM-free files that are fully editable. Best of all, there's no loss in fidelity — bit rates go up to 320Kbps, so your edits won't sound muddy or distorted. The music stays crisp, clean, and ready for customization.
Once you've got your files, import them into your editor of choice. Audacity? Adobe Audition? Doesn't matter — they'll all recognize the file now. You can start trimming out sections, adding fades, or splicing in loops.
Key Features of ViWizard Spotify Music Converter
Free Trial Free Trial* Security verified. 5, 481,347 people have downloaded it.
- Download Spotify songs, playlists, podcasts, and audiobooks extremely fast at up to 15x speed
- Convert Spotify into MP3, FLAC, WAV, AIFF, M4A, and M4B losslessly
- Lets you play Spotify tracks offline on any device without restrictions
- Works seamlessly on Windows and macOS, supporting the built-in Spotify Web Player
Pro tip: if you want a more seamless experience, try ViWizard Audio Capture instead. It works a little differently from ViWizard Spotify Music Converter — it records Spotify songs in real-time and includes a built-in splitting feature.
A multifunctional audio recording tool that captures any sound playing on your computer, including streaming music, live radio, game sounds, background music, and online meetings, with built-in auto-splitting and advanced editing features to save recordings in MP3, WAV, and other formats while maintaining the highest quality and embedding track details.
Just remember: these edited files are for personal use only. But if you're into customizing your music experience, this method opens the door.
Step 1Download and Install the Music Converter
Start by downloading ViWizard Spotify Music Converter, selecting the correct version for your operating system (Windows or Mac). After the download completes, run the installer and follow the on-screen instructions. Once installed, open the software to begin converting your Spotify music into permanent audio files that can be edited using external audio cutters or editing tools.
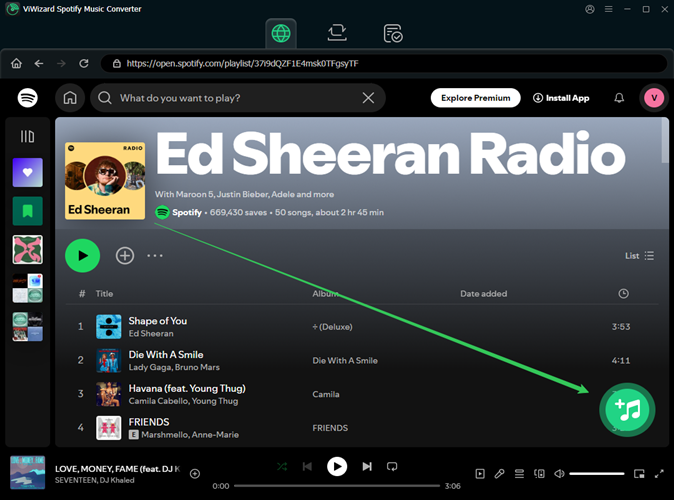
Step 2Log in to Your Spotify Account and Select Music
Open ViWizard and log in with your Spotify credentials. You'll now have access to your entire Spotify library, including playlists, albums, and tracks. Use the search bar or browse through your library to find the specific songs or albums you want to convert. Select the desired tracks and add them to the conversion queue by clicking the "+" or "Add" button.
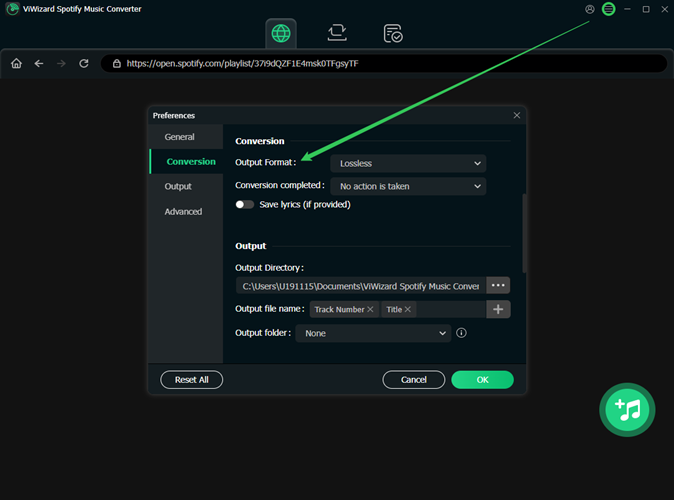
Step 3Choose the Output Format and Customize Settings
To ensure your music is compatible with external audio editors or cutters, select an output format that is commonly supported. MP3 is ideal for most audio editing software. In the settings, you can customize your preferences, such as choosing 320kbps for high-quality sound. You can also adjust other parameters like sample rate and audio channels, depending on the quality you want for editing purposes. After making your selections, click OK to save your settings.
Step 4Start the Conversion Process
Once you've set everything up, click the Convert button to begin the conversion process. ViWizard will convert your chosen Spotify tracks quickly, often much faster than traditional conversion tools. After the conversion completes, go to the output folder on your device, where your tracks are now saved as standard audio files. These files are now ready to be imported into external audio editing software, where you can use tools like Audacity or other audio cutters to further customize your tracks.
Part 3: How to Cut Spotify Songs by Recording Tracks
If messing with downloads and editors feels like a bit much, you're not out of options. There's a simpler way. Recording tools like ViWizard Audio Capture or Audacity let you record Spotify tracks and cut them right on the spot — no need to juggle multiple apps. Of course, make sure your edits are for personal use only. Recording copyrighted music for anything else can land you in hot water, so always use these tools responsibly.
Cut Songs from Spotify with ViWizard Audio Capture
If you'd rather record and cut Spotify songs directly, ViWizard Audio Capture keeps things simple. It lets you capture and splice your favorite tracks in one place — no switching between apps, no extra steps.
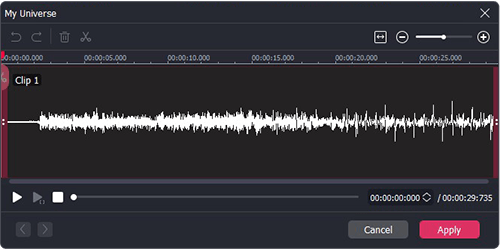
Just open ViWizard, launch the Spotify desktop app or the Spotify Web Player inside the app, and hit play. The recording starts automatically. Once you're done, you can trim or split the audio right on the timeline. Want to cut a long intro or silence at the end? Just drag to select and hit Remove — that's it.
It also comes with smart settings: you can skip short clips, ignore silence, and even filter out ads if you're using a free account. So you won't have to worry about cleaning up extra noise or interruptions later.
Even if you're just making something simple like a ringtone for yourself, it's worth listening through one more time to make sure everything flows the way you want. Then save the track in your preferred format — MP3, WAV, M4A, FLAC, you name it.
Key Features of ViWizard Audio Capture
Free Trial Free Trial* Security verified. 5, 481,347 people have downloaded it.
- Record any audio from streaming services, live broadcasts, and system sounds easily
- Support multitrack recording and save files in MP3 and more formats
- Automatically detect and retain ID3 tags while allowing manual editing
- Offer flexible audio splitting and merging tools for full customization
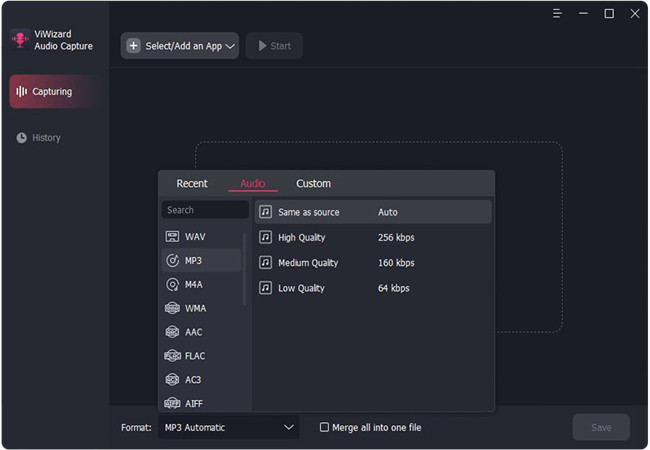
Step 1: Download and install ViWizard Audio Capture on your Windows PC. Open the program and go to Preferences to set the folder for saved files, and adjust audio settings like format, bitrate, and sample rate.
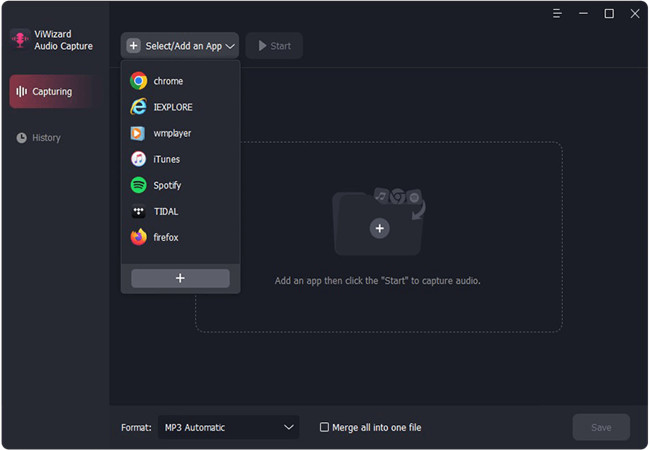
Step 2: Ensure your media player (Spotify) is open. If it's not listed, click "+" to add it, or drag the player into ViWizard. Click Start to begin recording when the music plays.
Step 3: ViWizard will automatically start recording when the music plays. Click Stop when you're done. If recording multiple tracks, choose "Merge all into one file" to combine them before saving.

Step 4: To trim the recording, click the Trim icon, highlight unwanted parts, and click Remove. Once finished, click Save to store your recordings in your chosen folder.
Cut Songs from Spotify with Audacity
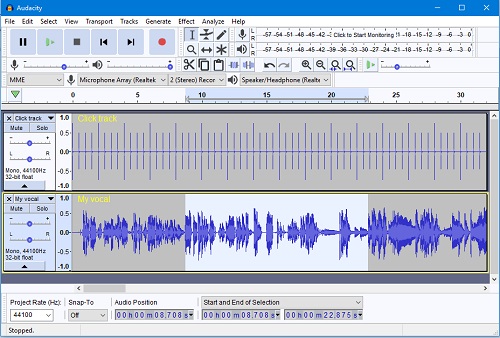
Audacity is a free, open-source tool that works on Windows, Mac, and Linux — and best of all, it supports Spotify playback. While it doesn't download songs directly, you can capture audio in real time from the Spotify app or Web Player.
Setup involves configuring the right input settings so Audacity can record your system audio. Once that's in place, recording is straightforward. Afterward, Audacity displays your audio as a waveform. Use the selection tool to highlight unwanted parts — like long intros or ads — and delete them. For more detailed edits, tools like fade in/out or noise reduction are available, but they're not essential for basic cuts.
When your edits feel right, export the final version in any format Audacity supports — MP3, WAV, and more. Pro tip: make a quick test edit, hit play, and see how it feels. If something sounds off, just undo and try again. And don't forget to save your progress as you go — especially after a big cut.
Step 1: Download and install Audacity on your Windows or Mac computer.
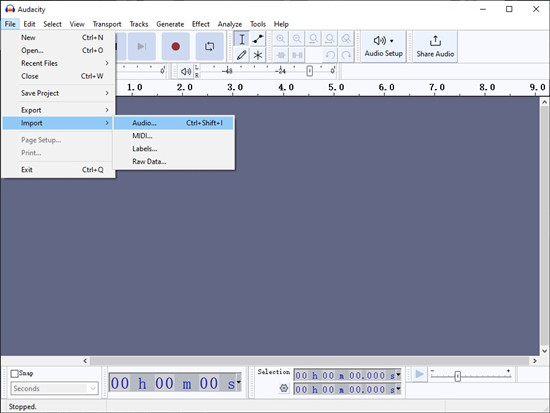
Step 2: Open Audacity and click File > Import to load your downloaded Spotify music file into the program.
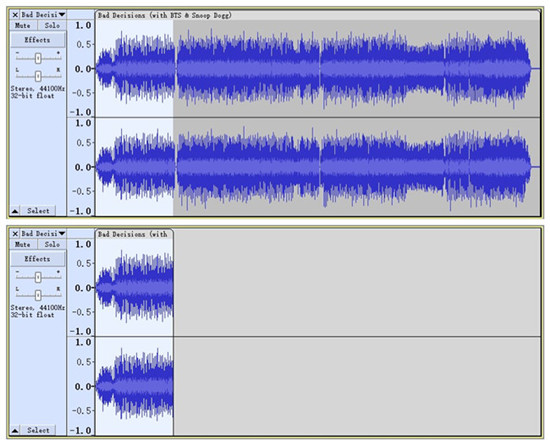
Step 3: Use Audacity's editing tools to trim or cut your music. Select the portion to remove and click Delete. Once finished, go to File > Export to save your edited track in your desired format.
Read More: How to Record Spotify Music with Audacity (With Pictures)
Part 4: How to Cut Spotify Songs Using Crossfading
The Crossfade feature lets songs blend into each other, so one track fades out as the next one fades in. This helps skip long pauses or slow intros without needing to cut the music yourself.
To turn on Crossfade, open the Spotify app, go to "Settings", then scroll to "Playback." Find "Crossfade" and switch it on. You'll see a slider that lets you choose how many seconds the songs will overlap. If you set it to a short time (like 2–3 seconds), the songs will mix smoothly. A longer time (like 7–10 seconds) gives a more DJ-like feel — great for parties or background music.
This is a simple way to make your songs flow better without editing them. It doesn't change the actual files, so it's safe and easy to use anytime you want a smoother listening experience.
Part 5: How to Cut Spotify Playlists by Inserting Blank Tracks
If you want to split up your Spotify playlist without removing or editing songs, try adding a blank track. We came across this simple trick from a Reddit post by user use_vpn_orlozeacount, and it works like a divider between different sections of your playlist. Some users use it to mark where they left off or to organize long playlists by mood, album, or artist.
To add a blank track, go to your playlist and tap the search bar where it says "Let's find something for your playlist." Then type year:2023 artist:ㅤ (with an invisible character). Or to make it easier, just use this link: blank track. Click and add it to your playlist — then drag it wherever you want.
For example, you can insert one blank track after every 5 or 10 songs to act like a pause or separator.
This trick works across devices and can be used in a few creative ways — like marking a break between albums, remembering where you stopped listening, or just giving your playlist some clean structure. It's simple, helpful, and surprisingly effective.
Part 6: Best Audio Cutters for Cutting Spotify Songs
1. Adobe Audition
For precise, professional audio editing
Key Features: Multi-track editing, spectral view, noise reduction, podcast tools
Platforms: Windows, macOS
Pros: Powerful toolset, great for vocals and music, integrates with Adobe Creative Cloud
Cons: Paid subscription, can be overwhelming for beginners
Adobe Audition is a top choice for editing Spotify songs you've downloaded locally. With its spectral frequency display and advanced effects, you can easily trim intros, outros, or even remove silence. It's ideal for musicians, podcasters, and audio editors who want full control.
Step 1: Launch Adobe Audition.
Step 2: Go to File > Open, and select your audio file.
Step 3: Use the Selection Tool to highlight the part to cut.
Step 4: Press Delete or use Edit > Delete Selection.
Step 5: Go to File > Export > File to save the edited version.
2. GarageBand
For Mac users looking for simple editing
Key Features: Multi-track editing, loops, live instruments
Platforms: macOS, iOS
Pros: Free on Apple devices, beginner-friendly, music creation tools
Cons: Mac-only, limited advanced features
GarageBand is great for cutting songs quickly, especially if you're on a Mac. It's simple enough for beginners and powerful enough for hobbyist producers. Just drop the track in, trim what you don't need, and export your custom version.
Step 1: Open GarageBand and start a new Empty Project.
Step 2: Drag your audio file into the timeline.
Step 3: Click and drag the edges of the track to trim.
Step 4: Go to Share > Export Song to Disk to save your cut.
Read More: How to Add Spotify Music to GarageBand on Mac & iPhone
3. Pro Tools
For high-end studio-quality audio editing
Key Features: Non-destructive editing, plugins, automation
Platforms: Windows, macOS
Pros: Industry-standard, professional-grade tools
Cons: Expensive, learning curve
Pro Tools is used in music and film studios worldwide. If you're serious about cutting and processing your audio from Spotify downloads, this is one of the best tools out there — just be ready for a steeper learning curve.
Step 1: Launch Pro Tools and create a new session.
Step 2: Import your audio with File > Import > Audio.
Step 3: Select the part to cut using the Selector Tool.
Step 4: Hit Delete or split with Command+E / Ctrl+E.
Step 5: Export via File > Bounce to Disk.
4. Ferrite Recording Studio
For mobile editing on the go
Key Features: Touch editing, voice recording, multi-track support
Platforms: iOS (iPhone, iPad)
Pros: Fast, mobile-friendly, great for podcasts
Cons: iOS-only, advanced features require in-app purchase
Ferrite is perfect if you want to trim songs directly on your iPhone or iPad. It's fast, intuitive, and especially handy for spoken-word edits or slicing up downloaded music without needing a desktop.
Step 1: Open Ferrite and import your file from Files or iCloud.
Step 2: Tap the waveform and drag handles to trim.
Step 3: Use the Split or Delete tools for more precise cuts.
Step 4: Export via Share > Export Audio.
Conclusion
Although you're not allowed to directly cut music from Spotify, ViWizard Spotify Music Converter can help you download Spotify music then you can cut Spotify music on your computer or phone with ease. If you don't find a possible way to cut Spotify music, just try using ViWizard Spotify Music Converter, and you'll find it out.
You May Be Interested


Adam Gorden, the digital media specialist at ViWizard, is dedicated to providing the best solutions for digital media management, including audio and video conversion, file optimization, and media workflow enhancements.
Leave a Comment (0)