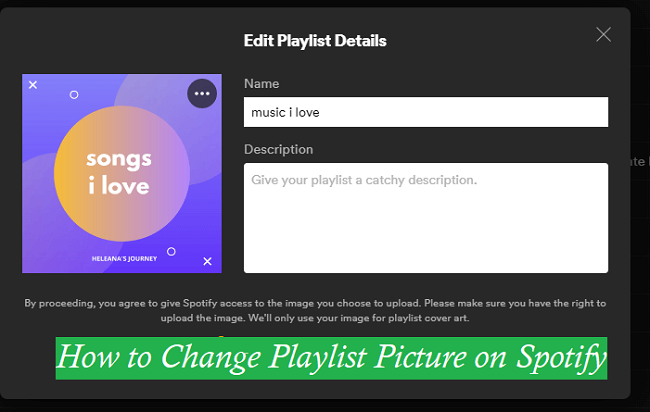
One of the highlights of Spotify is the playlist. Spotify will make a customized playlist weekly for premium users. To make your Spotify playlists more fun, Spotify allows premium users to customize playlist covers on Spotify. You can add an image of lovely bears or others as your preference.
Do you want to try it? If you want to know more details about how to change playlist picture on Spotify, here's the right place. In this post, you will see how to change playlist picture on Spotify with different devices. And you will also get a bonus tip to save your Spotify playlist permanently on your device. Without further ado, let's get straight to it.
Part 1. How to Change Playlist Picture on Spotify
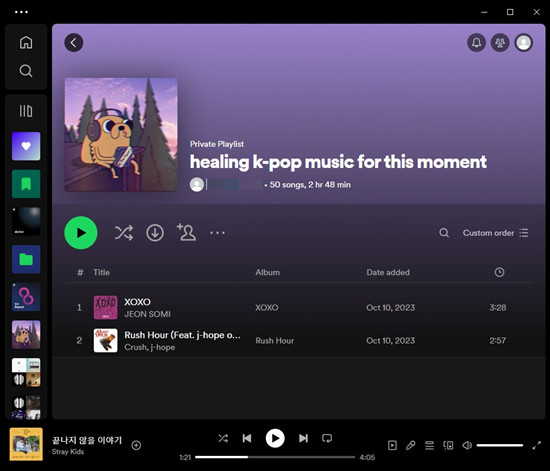
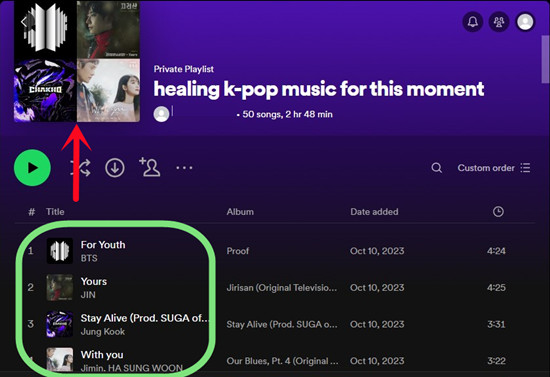
Your playlist picture serves as the visual representation of your playlist on Spotify. By default, Spotify generates a playlist picture by combining the album covers of the top four songs in your playlist and extracting the background color from the top song. However, you have the option to customize your playlist picture by uploading your own image from local sources. Additionally, if you prefer a randomized playlist picture, you can achieve this by changing the order of songs within the playlist.
Option 1: Upload an Image to Change Playlist Picture
For Desktop:
- Open Spotify on your desktop browser and log in to your account.
- Navigate to the playlist you want to customize.
- Click on the playlist name to open it.
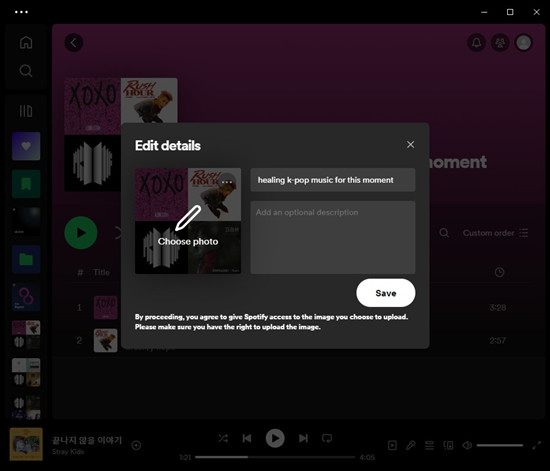
- Hover over the playlist picture and click on the pencil icon.
- Select "Choose Photo."
- Spotify will prompt you to open Windows File Explorer or Finder. Choose the image you want to use from your computer and click "Open."
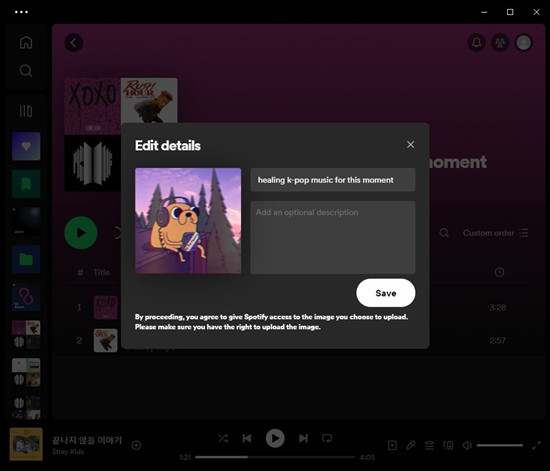
- Adjust the positioning and cropping of the image if necessary.
- Click "Save" to apply the changes to your playlist picture.
For Mobile:
- Open the Spotify app on your mobile device and log in to your account.
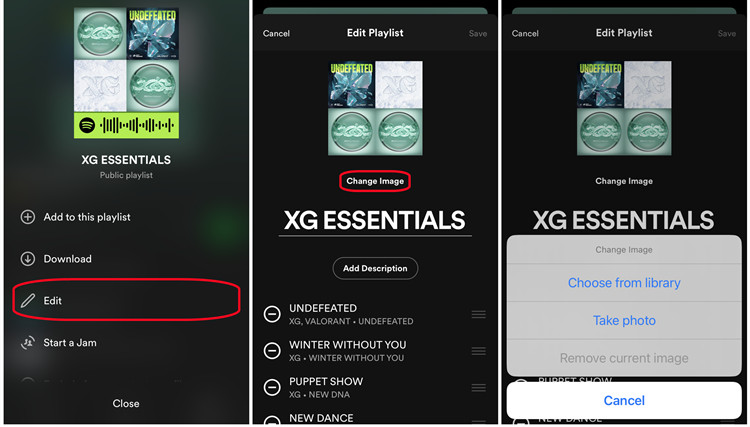
- Go to Your Library > Playlists and choose the playlist you wish to customize.
- Tap on the playlist name to open it.
- Tap on the three dots (...) in the top-right corner of the screen.
- Select "Edit."
- Tap on the "Change Image" button or the existing playlist picture directly.
- Choose "Choose from library" or "Take photo" based on your preferences.
- Select the desired image from your device's photo library.
- Adjust the positioning and cropping of the image if needed.
- Tap "Save" to confirm the changes to your playlist picture.
Option 2: Change Playlist Order to Change Playlist Picture
Note: If you already uploaded a photo and wish to revert to a randomized one, you should remove your uploaded photo first.
For Desktop:
- Open Spotify on your desktop browser and log in to your account.
- Go to the playlist you want to customize.
- Click on the playlist name to open it.
- Click on the song title to select it and drag it to a different position within the playlist.
- Repeat this process with other songs until the desired album covers are displayed as the top four songs.
For Mobile:
- Open the Spotify app on your mobile device and log in to your account.
- Go to the playlist you wish to customize.
- Tap on the playlist name to open it.
- Tap on the three dots (...) in the top-right corner of the screen.
- Select "Edit playlist."
- Tap and hold the hamburger icon next to a song, then drag it to a new position.
- Repeat this process with other songs until the desired album covers are displayed as the top four songs.
Tip: To ensure the best results for your playlist picture, consider selecting songs with visually appealing album covers or arranging the order strategically to achieve the desired combination of album covers.
Part 2. How to Add Playlist Description on Spotify
Alongside customizing the playlist picture, users can enrich their playlists on Spotify by adding a description. This description serves as a means to provide context, share insights about the playlist's theme or mood, and foster engagement with other listeners. When set to public, a well-crafted playlist description can enhance the discoverability of your playlist, potentially increasing likes and followers.
For Desktop:
- Open Spotify on your desktop browser and log in to your account.
- Navigate to the playlist you wish to customize.
- Click on the playlist name to open it.
- Tap on your playlist name at the top of the profile.
- In the "Edit Details" window, locate the description field.
- Click inside the description field and start typing your desired description. It's recommended to provide relevant information about the playlist, such as its theme, mood, or intended listening experience.
- Once you're satisfied with the description, click "Save" to apply the changes.
For Mobile:
- Open the Spotify app on your mobile device and log in to your account.
- Go to Your Library > Playlists and select the playlist you want to customize.
- Tap on the playlist name to open it.
- Tap on the three dots (...) in the top-right corner of the screen.
- Select "Edit."
- Tap on the "Add Description" button.
- Type your desired description inside the description field. You may want to include keywords relevant to your playlist's genre or theme.
- Once you've crafted the description, tap "Save" to confirm the changes.
Bonus Tip: How to Convert Spotify Playlist to MP3
Spotify outperforms the rest of the streaming providers. Spotify is presently the most popular music streaming service in the world. Millions of users have been drawn in by the large collection and good listening experience. You can download Spotify music for offline listening once you have upgraded to a premium account. Spotify music, on the other hand, can only be listened to with a subscription. So, how can you preserve your Spotify playlists permanently? All you need to do is simply convert Spotify music from encrypted OGG to MP3 or any open format.
ViWizard Spotify Music Converter is a high-quality Spotify music converter that converts Spotify music to MP3, WAV, AAC, FLAC, M4A, and M4B. This tool's user interface is simple and straightforward, even for a novice. The change may be completed in only three steps. After the conversion, the ID3 tags and original quality will be preserved. The 5x conversion speed might also help you save time. Simply enter the settings panel to modify the Spotify music. Set the sample rate, bit rate, codec, channel, loudness, ID3 tags, and other parameters for your Spotify music.
Key Features of ViWizard Spotify Music Converter
Free Trial Free Trial* Security verified. 5, 481,347 people have downloaded it.
- Download Spotify songs, playlists, podcasts, and audiobooks extremely fast at up to 15x speed
- Convert Spotify into MP3, FLAC, WAV, AIFF, M4A, and M4B losslessly
- Lets you play Spotify tracks offline on any device without restrictions
- Works seamlessly on Windows and macOS, supporting the built-in Spotify Web Player
Step 1Load Music from Spotify
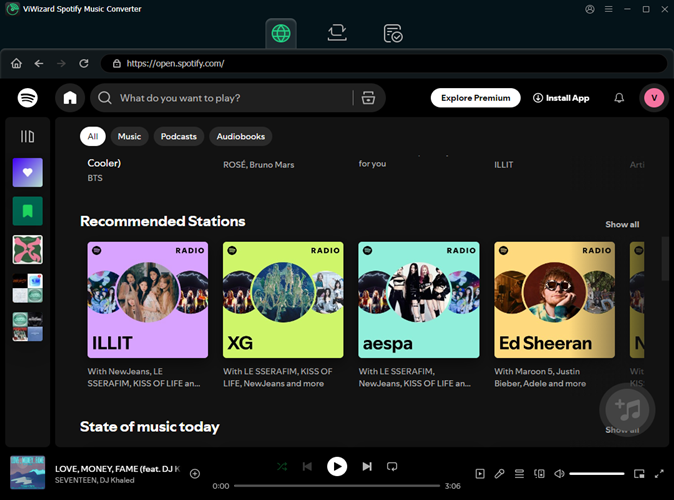
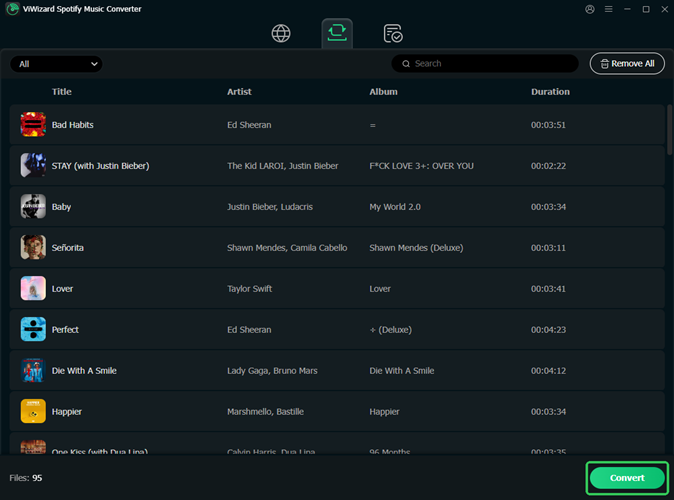
Install both the Spotify app and ViWizard Spotify Music Converter on your computer. The Spotify application is launched immediately when you run ViWizard Spotify Music Converter. Then go to the albums you want to save, copy the playlist URL, and enter it into the converter's search bar. You may also just drag and drop Spotify playlists into the converter's interface.
Step 2Set Output Formats and Parameters
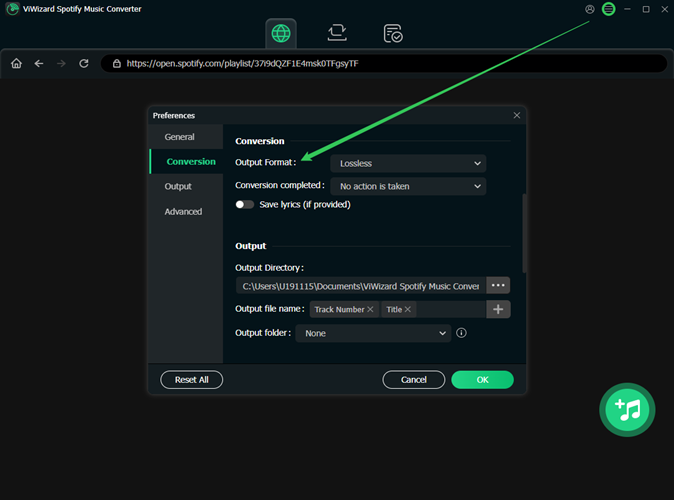
The most important step before converting is to configure the music settings. You may alter the output audio format, channel, sample rate, and bit rate by choosing Preferences from the menu bar. As an output format, you have the option of selecting MP3. Then, hit the OK button to confirm the changes.
Step 3Click to Start Converting Spotify Music to MP3
To begin downloading and converting Spotify songs, click the Convert button. ViWizard will then download and store Spotify songs to your PC in the format you want. After converting Spotify to MP3, click the Converted icon to enter the history list, where you can explore all converted Spotify tracks. You can open the folder with the converted Spotify music on your computer.
The Final Word:
In this article, we have shown you how to change playlist picture on Spotify on phone and computer. We will be pleased if you can follow the guide above to have a try. It is not so difficult, right? We have also shown you a tool called ViWizard Spotify Music Converter. With this tool, you can easily get MP3 Spotify files and you can enjoy them on the device you like effortlessly. Just tap the button below to start a free trial of ViWizard, and you will get more.


Leave a Comment (0)