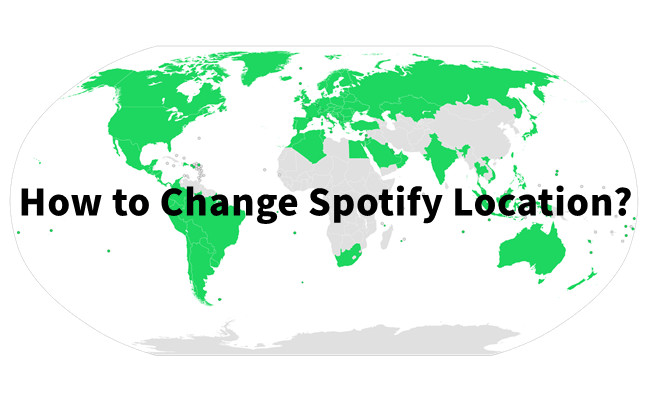
Ever wished you could listen to music that's popular in another part of the world? Or maybe you've moved countries and want your Spotify to match your new location? Changing your Spotify location can make all this happen. Fortunately, Spotify allows you change your Spotify country easily, though the process is a slightly different on different subscription tiers. Before you can do this easily, it's important to figure out when's the right move for you. The decision often depends on your subscription plan and specific needs. Let's dive in!
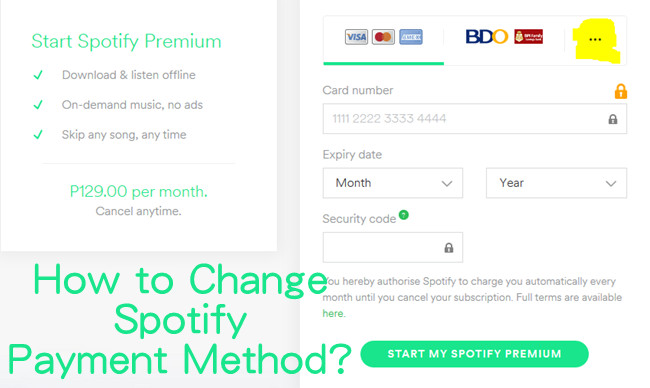
Learn how to seamlessly pay, update payment methods, and check payment history on Spotify. Discover ViWizard Spotify Music Converter for a premium-like experience.
Part 1. How to Change Spotify Country on Spotify Premium
If you're using a Spotify Premium subscription, things are a bit more flexible, especially when it comes to traveling abroad. Even when you're abroad, your Premium subscription stays intact. No need to adjust with your payment method, which always defines the country of your Premium account. You can enjoy your music as if you never left home. However, you have to confirm your destination is still within Spotify's reach. For example, that work trip to Paris? Your Premium subscription means your favorite playlists and podcasts are right there with you, no matter where your business takes you.
Now, if you're making a more permanent move, it's time to think about changing your Spotify country. Why? Well, you might stumble upon new tunes that weren't available in your old country. Plus, you'll want to update your payment method to match your new location for smooth sailing with your Premium account.
Alright, if you're ready to change your Spotify country or location for an even richer music experience, follow these simple steps. Just remember, any changes you make will kick in from your next billing cycle.
If you encounter issues updating your payment methods, you can consider canceling your subscription first, then resubscribe with the updated details. Just ensure to do this before your next billing date to avoid any disruptions in your Premium access.
Step 1: Head over to the Spotify website and log in to your account. Make sure you're using a web browser - this won't work on the mobile app.
Step 2: Once logged in, click on your profile name in the top right corner. From the drop-down menu, select "Account."
Step 3: In your account settings, find the "Payment" section. From here, select "Manage your plan" and you'll see your plan.

Step 4: Click on the "Update" button next to your current payment method. This will take you to the payment details page.
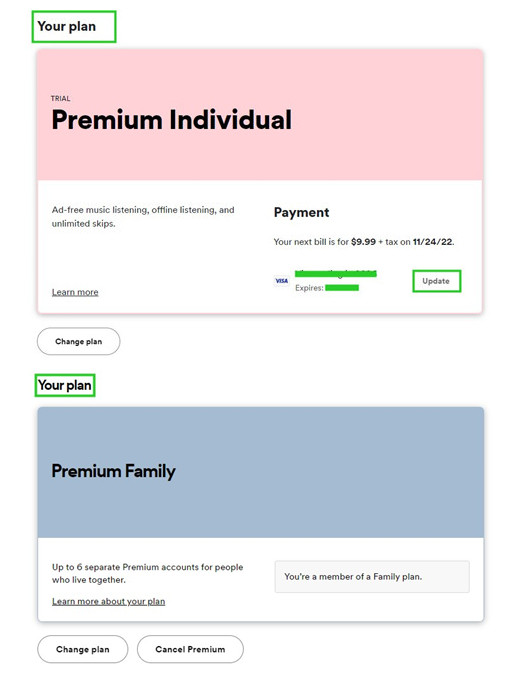
Note: You won't be able to update your payment method if you're not the manager of your Duo or Family plan. Consider switching to available plans like the Individual plan.
Step 5: Click on the "Edit" button to change your payment details. Follow the prompts to enter a payment method that matches your new location.
Step 6: Spotify will ask you to confirm your new payment details. Verify everything is correct, and confirm the changes.
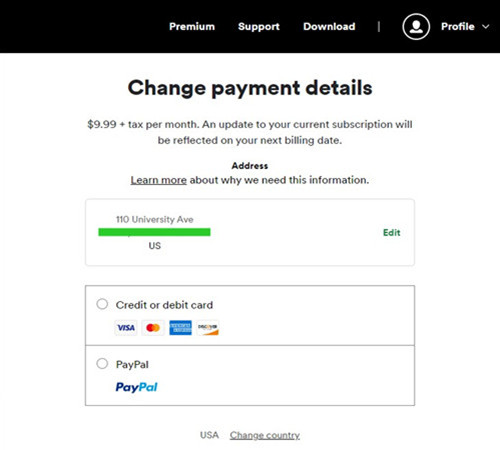
Note: Remember, any changes you make, including updating payment methods and changing your country, will take effect from the next billing cycle. Until then, your current settings and content will remain unchanged.
Part 2. How to Change Spotify Country on Spotify Free
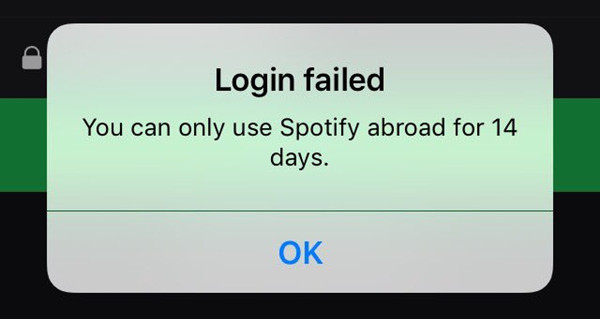
For those on the free Spotify plan, the rules are a bit more straightforward, but with a few limitations. While Premium users have to update their payment methods, free users can adjust their country or location settings directly on their account page. Changing your Spotify country becomes necessary when you are traveling abroad. You can only access Spotify for up to 14 days. You may encounter this error message saying "You can only use Spotify abroad for 14 days." Beyond that, you face login issues due to location restrictions. If your travels are short-term, you're good to go without changing your country.
If you're making a more permanent move or you're tired of the 14-day limit, it's time to manually change your Spotify country.
Step 1: Open your preferred web browser and go to the Spotify website.
Step 2: Log in to your account.
Step 3: Click on your profile name in the top right corner and choose "Account" from the drop-down menu.
Step 4: In the account settings, click the "Edit Profile" section.

Step 5: Find the "Country or region" section. Here, you can select your new country from the drop-down menu.
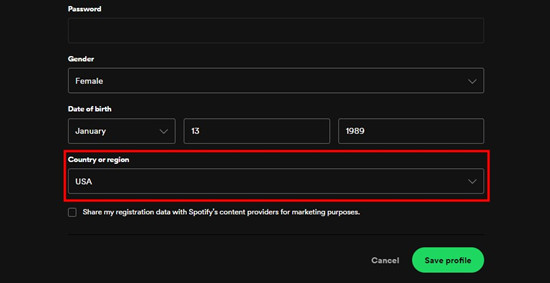
Step 6: After choosing your new country, click "Save" at the bottom of the page.
It's important to note that if Spotify isn't available in your current location (for instance, in China), you might not be able to update your country directly on the account page. In such cases, consider using a VPN to access Spotify or explore alternatives like Spotify downloaders, such as ViWizard Spotify Music Converter, for offline listening.
Part 3. How to Use Spotify Abroad on Spotify Premium/Free with VPN
Alternatively, for both Premium and Free users, if the idea of changing your Spotify country feels like a hassle, you can turn to VPNs for temporary adjustments. Studying abroad or working in Asian countries like China? You better not change your Spotify country but use a VPN there, meaning you don't miss out on the latest hits from back home.
Step 1: Before anything else, ensure you have a trustworthy VPN service. There are many options available, both free and paid. Opt for a service known for its speed, security, and reliability.
Step 2: Download and install the VPN application on your device. Open the app and log in if required. Choose a server location in your home country or any region where Spotify is accessible.
Step 3: With the VPN connection in place, open your Spotify or visit the Spotify web player. You should now have access to the content available in the selected region.
Step 4: Start listening to your favorite tracks, playlists, and podcasts just like you would back home. The VPN disguises your location, giving you the freedom to enjoy Spotify as if you never left.
While using a VPN is a great way to access Spotify abroad, keep in mind that some countries, like China, have strict internet regulations. In such cases, even with a VPN, you may experience interruptions or difficulty accessing certain online services. Consider using tools like ViWizard Spotify Music Converter to download your playlists for offline listening on other media players. This way, you can enjoy your music without worrying about location restrictions.
Part 4. How to Use Spotify Abroad on Spotify Premium/Free without VPN
If the VPN route isn't your style or you find it too complicated, don't worry - there's another fantastic option. Whether you're a Premium user or enjoying the free vibes, ViWizard Spotify Converter allows you to download your favorite playlists and podcasts to MP3 without worrying about location restrictions.
For Premium users, your downloads won't disappear, even if you decide not to continue your Spotify Premium subscription. It's like having a permanent backup of your Spotify music library that you can access anytime, anywhere. Even for Free users, ViWizard provides a premium-like experience. You can download Spotify music without a paid subscription. This allows you to enjoy your favorite tracks offline, just like Premium users. By downloading your Spotify playlists and podcasts to MP3, you can import the downloaded files to your phone and listen to Spotify music with any media player.
Key Features of ViWizard Spotify Music Converter
Free Trial Free Trial* Security verified. 5, 481,347 people have downloaded it.
- Download Spotify songs, playlists, podcasts, and audiobooks extremely fast at up to 15x speed
- Convert Spotify into MP3, FLAC, WAV, AIFF, M4A, and M4B losslessly
- Lets you play Spotify tracks offline on any device without restrictions
- Works seamlessly on Windows and macOS, supporting the built-in Spotify Web Player
Step 1Import Spotify Tracks to ViWizard
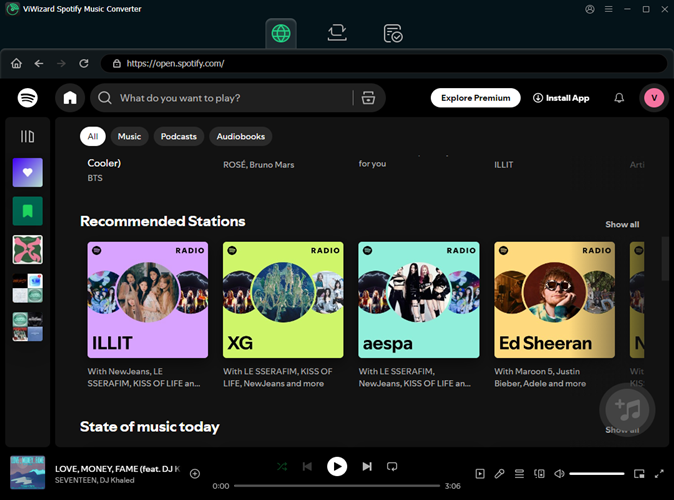
Open ViWizard Spotify Music Converter and wait until ViWizard launches Spotify simultaneously. Browse through Spotify and select the songs, albums, or playlists you want to download. Drag and drop them directly into the main interface of the ViWizard software.
Step 2Configure Audio Settings
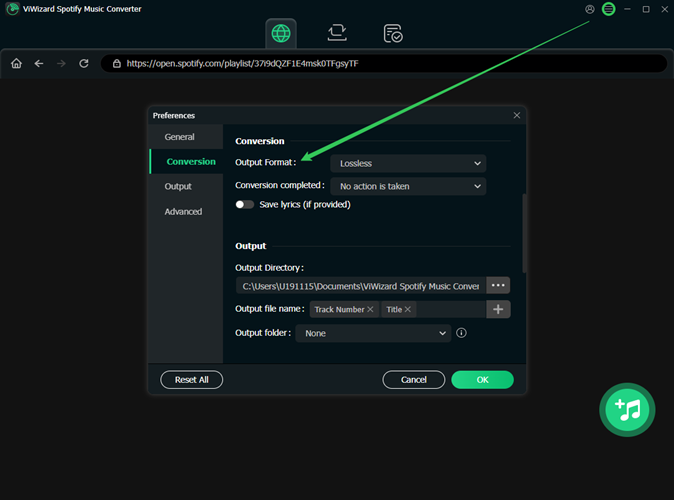
After adding your chosen Spotify content, configure the audio parameters according to your preferences. Choose the desired output format (MP3, AAC, FLAC, etc.) and set the output bit rate, sample rate, and channel. To access these settings, click on the menu bar, select "Preferences," and adjust the settings in the pop-up window.
Step 3Initiate Spotify to MP3 Conversion
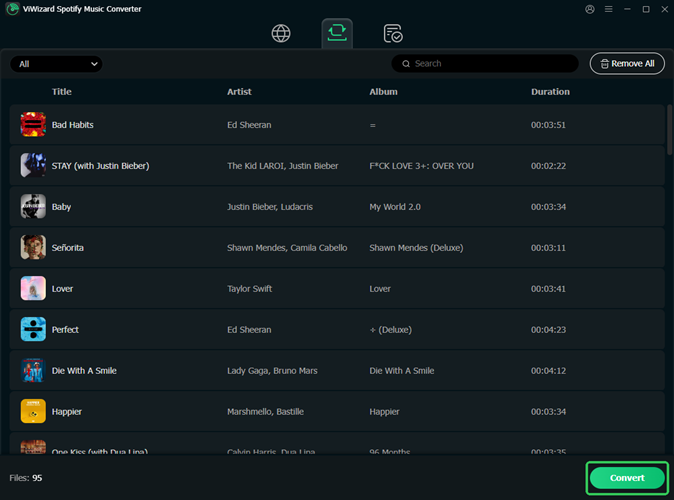
Once you've set up your preferences, click the "Convert" button to start the conversion process. ViWizard will efficiently download the selected Spotify songs, and the converted MP3 files will be saved and exported to your computer. You can review all the converted songs in the history list by clicking the "Converted" button.
Step 4Enjoy Spotify Songs Anywhere
Now, you can take the downloaded Spotify songs with you wherever you go. Transfer them to your iPhone or Android device for playback using any music player on your device. These songs are not bound by country restrictions, allowing you to enjoy your favorite tunes hassle-free, whether you're at home or on a trip.
Conclusion:
Now, as you embark on your musical journey, whether it's a road trip, a study abroad adventure, or just chilling at home, take your curated Spotify playlist with you. No country restrictions, no VPN hassle – just your favorite tunes, wherever life takes you.


Leave a Comment (0)