
Great albums are hard to come by these days, so when I want to preserve my favorite songs, burning them to a CD seems like a solid idea. But when it comes to music we find through streaming services like Spotify, it's definitely worth exploring.
Spotify is one of the top streaming platforms, giving us easy access to millions of songs. It's widespread, convenient, and lets us build our own music collections with all kinds of music on almost every device. However, it doesn't sell music like iTunes or offer a built-in way to burn CDs. So how can you burn those tracks directly to a CD?
Don't worry, though! That doesn't mean you can't make it happen. The secret is finding the right tool—a special software that converts the music into CD-compatible formats and lets you transfer your music. In this guide, I'll walk you through how to easily burn Spotify music to a CD, whether it's for your car, at home, or anywhere you like.
Part 1. Can You Burn a CD from Spotify?
Burning your Spotify music to a CD comes with some great advantages. While streaming is convenient, a CD lets you listen to your music anywhere, like in your car if it doesn't support streaming apps like Apple CarPlay or Android Auto. Plus, it's safer than messing around with your phone while driving. Your burned Spotify CD also gives you a physical copy of your favorite tracks, which is reassuring in case any songs ever disappear from the service.
When you think about burning music to a CD, you probably imagine taking files from your computer and putting them directly onto a blank disc. But with Spotify, it's a bit more complicated. While Spotify gives you access to millions of songs, it doesn't allow you to burn them directly to a CD because of something called DRM (Digital Rights Management) protection.
ViWizard unlocks the ability to burn a CD off Spotify
DRM locks music tracks from digital music services, meaning you can't easily drag and drop them into a CD burner. Usually, when Premium subscribers try to find their downloaded music on their PC, they end up with cached files in a format that won't burn to a CD. So, even though you're paying for Premium, you can't just do that. That's why you need software like ViWizard Spotify Music Converter to remove DRM and convert them into formats like MP3 or WAV—formats compatible with CD burning, even without a Premium subscription.
A brilliant Spotify music downloader designed to download and convert Spotify songs, playlists, albums, artists, podcasts, and audiobooks to MP3, FLAC, WAV, AIFF, M4A, and M4B losslessly. The sound stays as clear as the original, and all track details are preserved, offering a seamless experience to enjoy your Spotify music offline on any player or device.
Check the legality of burning music to a CD
Now that we know ViWizard is a lifesaver, what about the legality? In most cases, it's perfectly fine to back up music onto special Audio CD-Rs, mini-discs, or digital tapes for personal use. As long as it's not for commercial purposes, you're generally in the clear because royalties are usually paid on these formats.
Keep in mind that burning music from Spotify isn't a feature Spotify itself offers, so you'll need ViWizard to make it happen. Once you've converted your music to the right format, burning it to a CD is simple, and you'll be able to play your favorite songs on any CD player.
Part 2. How to Download Music from Spotify for CD Burning [MP3/WAV]
What You'll Need:
- A Spotify account (Premium or free).
- ViWizard Spotify Music Converter to convert music into a CD-compatible format (MP3 or WAV).
- An active internet connection to download and convert your Spotify music.
- Spotify tracks, albums or playlists you wish to burn.
To burn music from Spotify onto a CD, you first need to download it in a format that works with CD burning software, like MP3 or WAV. The easiest way to do this is by using a tool like ViWizard Spotify Music Converter. Whether you're a Premium subscriber or a free user, it lets you convert any track, album, or playlist into MP3 or WAV files. It bypasses the DRM protection, and the best part is that it retains the original sound quality, so your music will sound just as good as it does on Spotify. Plus, all the song details, like artist names and track titles, are preserved with ID3 tags, so your music stays organized.
There's no limit on how many songs you can convert, so you can download entire playlists, albums, or even your whole music library without running into restrictions. Just keep in mind that a CD can only hold about 80 minutes of music, so be sure to check the duration of a playlist or album on Spotify (right on its details page) before you start converting.
Key Features of ViWizard Spotify Music Converter
Free Trial Free Trial* Security verified. 5, 481,347 people have downloaded it.
- Download Spotify songs, playlists, podcasts, and audiobooks extremely fast at up to 15x speed
- Convert Spotify into MP3, FLAC, WAV, AIFF, M4A, and M4B losslessly
- Lets you play Spotify tracks offline on any device without restrictions
- Works seamlessly on Windows and macOS, supporting the built-in Spotify Web Player
Step 1Download and Install ViWizard Spotify Music Converter
Start by downloading ViWizard Spotify Music Converter for your computer. Be sure to choose the correct version for your operating system (Windows or Mac). Once the download is complete, open the installer and follow the simple on-screen instructions to install the software. After installation, launch ViWizard to begin converting your Spotify tracks into editable formats that are perfect for burning to a CD.
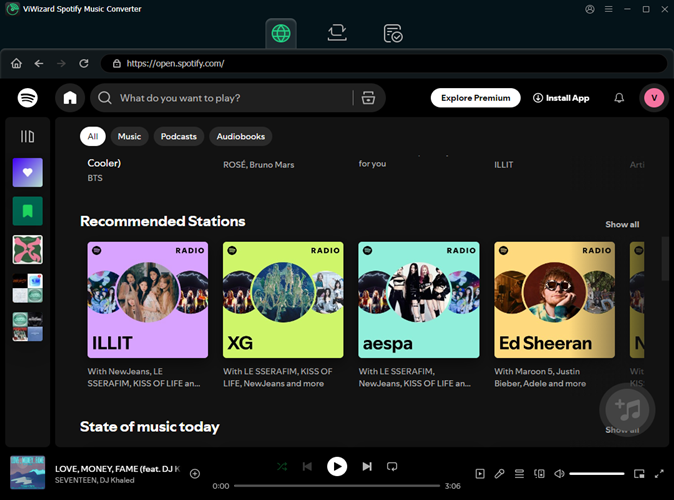
Step 2Log In and Add Spotify Tracks for Conversion
When ViWizard opens, log in to your Spotify account to access your music library. You can browse through your playlists, albums, or select your favorite songs that you want to burn onto a CD. Once you've selected the tracks, click the "+" button located at the bottom-right corner of the interface. This action will load the chosen tracks into ViWizard, preparing them for conversion.
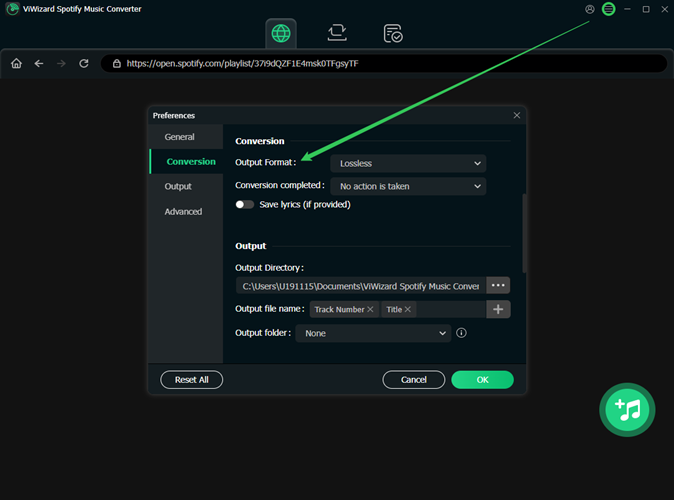
Step 3Choose Output Format and Settings
Now that you've selected your tracks, click the three horizontal lines in the top-right corner of the app to open the Preferences menu. Under the "Conversion" section, choose a compatible format for CD burning, such as MP3 or WAV. For the best sound quality, set the bitrate to 320kbps. You can also customize other settings, such as sample rate and channels, to ensure your music is top-notch and ready for burning.
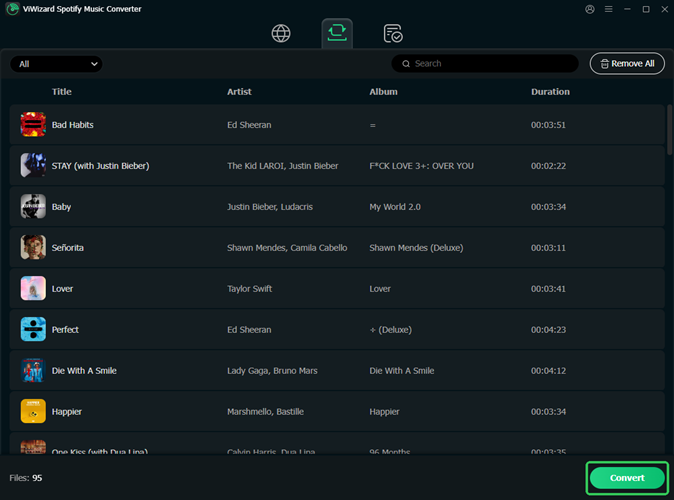
Step 4Convert and Download Spotify Music
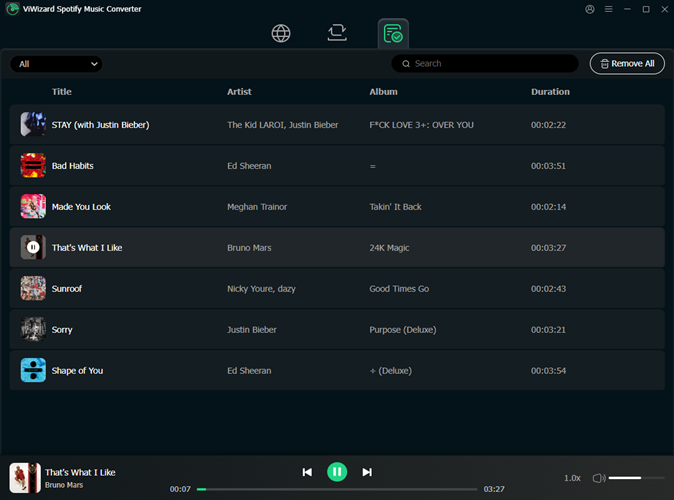
Once your settings are configured, hit the "Convert" button to start the conversion process. ViWizard converts your Spotify tracks up to 15x faster than standard converters, so you won't have to wait long. As the conversion progresses, you can monitor each track's status. Once the process is complete, head to the output folder where your newly converted files are saved in the format you selected.
Part 3. Best Tools to Burn Spotify Music to a CD
Now that your Spotify tracks are in the right format, you're ready to burn them onto a CD. Open your preferred CD burning software and import the converted MP3 or WAV files. From here, you can arrange the tracks, create your playlist, and begin the burning process.
What You'll Need:
- A computer equipped with a CD burner.
- Blank CDs (CD-R or CD-RW), depending on whether you want a one-time-use or reusable CD.
- CD burning software installed on your computer.
- Converted audio files in CD-compatible format you wish to burn.
There are several popular CD-burning software options available for both Windows and macOS users.
Way 1: Using iTunes [Windows/macOS]
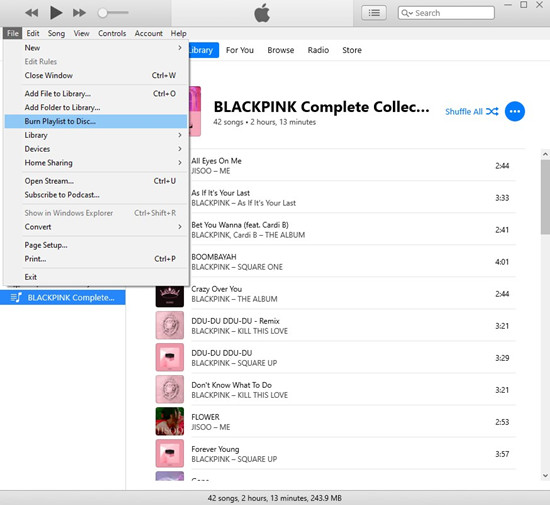
- Open iTunes on your computer.
- Create a new playlist by selecting "File" > "New" > "Playlist" and give it a name.
- Drag the songs you've converted from your Spotify playlist to this new playlist in iTunes.
- Insert a blank CD into your computer's CD/DVD drive.
- Select the newly created playlist.
- Click on "File" in the top-left corner and choose "Burn Playlist to Disc."
- Configure your CD burning settings (e.g., preferred disc format, burn speed).
- Click "Burn" to start the CD burning process.
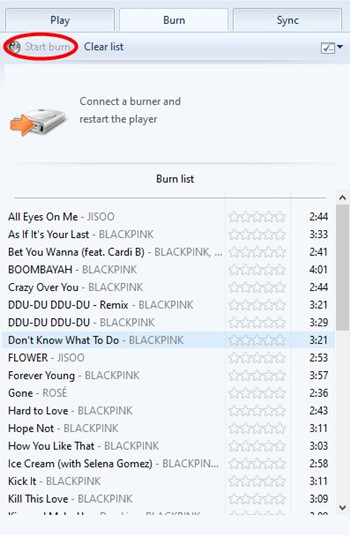
Way 2: Using Windows Media Player [Windows]
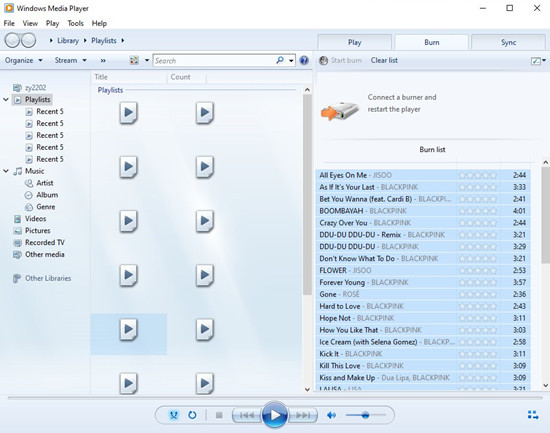
- Open Windows Media Player on your PC.
- Click the "Burn" tab located in the top-right corner.
- Drag and drop the ViWizard-converted Spotify tracks into the Burn List on the right-hand side.
- Insert a blank CD into your computer's CD/DVD drive.
- Configure your CD burning settings as desired (e.g., burn speed, track order).
- Click the "Start Burn" button to begin the CD burning process.
Way 3: Using VLC Media Player [Windows/macOS/Linux]

- Open VLC Media Player.
- Click on "Media" in the top-left corner and select "Convert/Save."
- Click the "Add" button and select the ViWizard-converted Spotify tracks you want to burn.
- Click "Convert/Save."
- In the "Profile" dropdown menu, choose "Audio CD."
- Click "Start" to begin the CD burning process.
Way 4: Using BurnAware [Windows]
- Open BurnAware.
- Select "Audio CD" from the main interface under the "Create" section.
- Drag and drop your ViWizard-converted Spotify tracks into the BurnAware window.
- Arrange the tracks in the desired order.
- Insert a blank CD into your computer's CD/DVD drive.
- Select your preferred burn speed and other settings.
- Click "Burn" to start the CD burning process.
Part 4. How to Play Spotify Music from Your Burned CD
Now that you've successfully burned your Spotify music onto a CD, you can enjoy your favorite tracks in various settings. Whether you're driving, relaxing at home, or using a standalone CD player, follow these steps to get the best experience.
1. Playing the Burned CD in Your Car
Many older vehicles and even some newer ones still have built-in CD players, making it easy to enjoy your burned Spotify playlist on the road. Here's how to ensure smooth playback:
- Make sure your vehicle has a working CD player and that it's clean and free of dust. Some modern cars only support MP3 CDs, so confirm compatibility.
- Before driving, insert the CD while stationary to ensure it plays correctly and doesn't skip.
- If your car doesn't switch automatically to the CD player, select it manually.
- It should slide in smoothly without resistance.
- If playback doesn't start automatically, manually select the CD as the audio source. Use your car's controls to skip tracks or adjust the volume.
- If the CD skips or doesn't play, check for scratches, dirt, or compatibility issues with your car's system. Some factory CD players may not support burned CDs due to anti-piracy measures.
Pro Tip: If your car lacks a built-in CD player, consider using an external USB-powered CD drive with an AUX or Bluetooth adapter.
Read More: 5 Easy Ways to Play Spotify in Car [Step-by-Step]
2. Playing the Burned CD at DVD Player
- Ensure your home stereo, DVD/Blu-ray player, or even an old laptop with a CD drive supports standard audio CDs. Some devices only support MP3 CDs, so check your format.
- Open the disc tray and place the CD label-side up.
- If using a multi-function player, switch the audio source to "CD."
- Tweak the volume, bass, and treble for the best sound quality.
Pro Tip: If your home speaker system doesn't have a CD player, you can rip the CD to your computer and stream it to smart speakers via Bluetooth, AirPlay, or Chromecast.
3. Playing the Burned CD on a CD Player
- Ensure it has fresh batteries or is plugged into an outlet.
- Most players require the disc to be placed with the label facing up.
- Many CD players will start playback automatically, but you can also use the play button.
- Skip tracks, pause, or rewind using the player's built-in buttons.
Conclusion
Can you burn songs from Spotify to a CD? Sure! You are able to make a CD from Spotify by using ViWizard Spotify Music Converter. After completing the conversion, you can burn Spotify songs to CD through iTunes, Windows Media Player, and VLC media player. Have a try, and you'll find it out.
You May Be Interested


Adam Gorden, the digital media specialist at ViWizard, is dedicated to providing the best solutions for digital media management, including audio and video conversion, file optimization, and media workflow enhancements.
Leave a Comment (0)