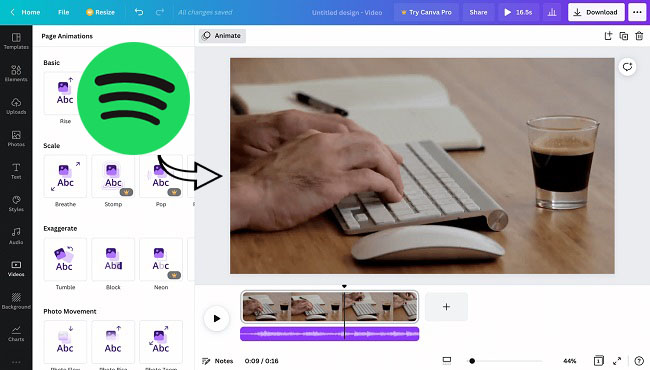
There's something almost magical about the right song dropping into the background of a video. You're stitching together clips from a trip you'll never forget. Or maybe it's a video diary, or just something fun for a public post. And boom—add the perfect track, and suddenly it all clicks. That beat, that hook, that mood. It turns shaky footage into something you actually want to share.
Naturally, the first place most people turn for that kind of music is Spotify. You've already built your playlists. You know exactly which song fits the vibe. It should be easy, right? Just grab that track and drop it into your video project. Except… it isn't.
Part 1. Can You Add Spotify Music to a Video?
You open your video editor, search around for a way to import it—and nothing. No Spotify. No direct import. And no, downloading the song in the Spotify app doesn't help either. Most editors only give you royalty-free stuff—stock music that sounds like an ad for bottled water. Not bad, just not your song.
Frustrating? Absolutely. But not impossible to work around.
How Can I Add Spotify Music to My Videos?
If you're looking to use Spotify music in your videos, there are ways to make it work. You'll just need to convert the songs into a compatible format and use video software that supports custom audio.
Why? You've got your favorite Spotify song ready to go. Maybe you even hit "Download" in the app, thinking it'd show up like a regular music file. But when you try to find it on your device? Still nothing but cached files. No MP3. No WAV. No audio file you can actually use. Just a bunch of unreadable, hidden files buried in Spotify's system—and locked behind DRM (Digital Rights Management).
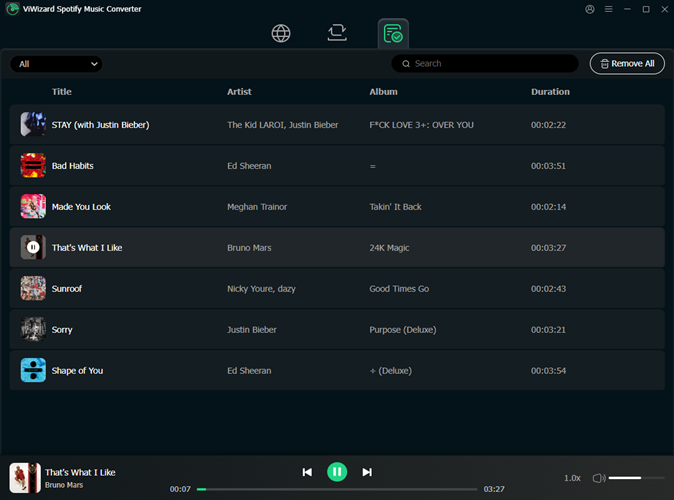
That's why content creators looking to add Spotify tracks to their videos always hit the same wall—unless they meet ViWizard Spotify Music Converter. It takes the Spotify songs you love and turns them into real audio files—something your editing software can actually understand. Something like MP3, WAV, or FLAC.
A brilliant Spotify music downloader designed to download and convert Spotify songs, playlists, albums, artists, podcasts, and audiobooks to MP3, FLAC, WAV, AIFF, M4A, and M4B losslessly. The sound stays as clear as the original, and all track details are preserved, offering a seamless experience to enjoy your Spotify music offline on any player or device.
Part 2. How to Convert Spotify Music to MP3 for Use in Videos
Now that you know why you need to convert Spotify music, let's talk about how to do it. The easiest way is with ViWizard Spotify Music Converter.
Why ViWizard Spotify Music Converter?
ViWizard Spotify Music Converter is a simple, powerful tool designed to convert your favorite Spotify tracks into usable audio files. You don't need a Premium subscription—just your Spotify account—and it lets you download any song you want in formats like MP3, FLAC, WAV, AIFF, M4A, or M4B.
Many users prefer ViWizard over ripping tools like Audacity because it automatically removes ads, tags tracks with important metadata, and preserves the original quality—up to 320Kbps. You also get control over the audio settings, such as bitrate, sample rate, and audio channels. This flexibility ensures your music sounds great and is perfect for use as background music in videos.
Key Features of ViWizard Spotify Music Converter
Free Trial Free Trial* Security verified. 5, 481,347 people have downloaded it.
- Download Spotify songs, playlists, podcasts, and audiobooks extremely fast at up to 15x speed
- Convert Spotify into MP3, FLAC, WAV, AIFF, M4A, and M4B losslessly
- Lets you play Spotify tracks offline on any device without restrictions
- Works seamlessly on Windows and macOS, supporting the built-in Spotify Web Player
Here's how it works: Choose your preferred format (MP3 is ideal for most video editors), tweak the settings if you like, and click "Convert." ViWizard will download the song in the format you selected, ready to be added to your video project. First, download the Windows or Mac version, then follow the easy steps for a seamless process.
Limited-Time Offer for Spotify Music Converter
Get 20% off your monthly license. Use the code at checkout.
Step 1Download and Install ViWizard Spotify Music Converter
Begin by downloading ViWizard Spotify Music Converter for your operating system (Windows or Mac). After the download completes, open the installer and follow the on-screen prompts. Once installed, launch the software, and you're ready to convert your Spotify tracks.
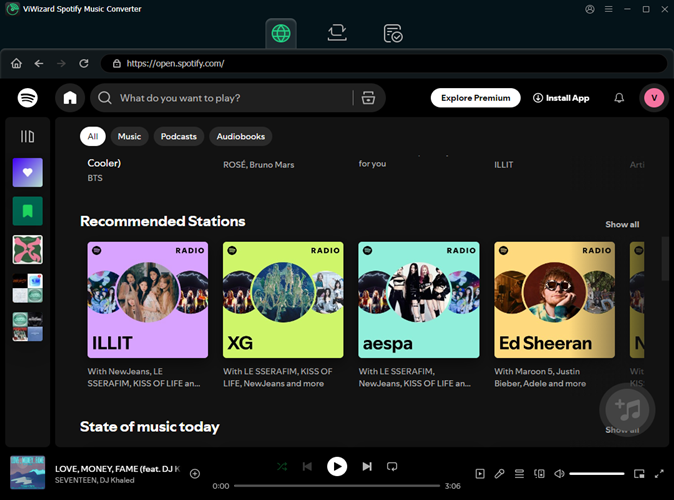
Step 2Log in and Choose Your Spotify Music
Log into your Spotify account directly within ViWizard. Browse your Spotify library—whether it's specific tracks, playlists, or albums—and select the content you want to use. You can either search for your favorite songs or browse through your saved playlists. After you've selected your tracks, simply click the "+" button to add them to your conversion queue.
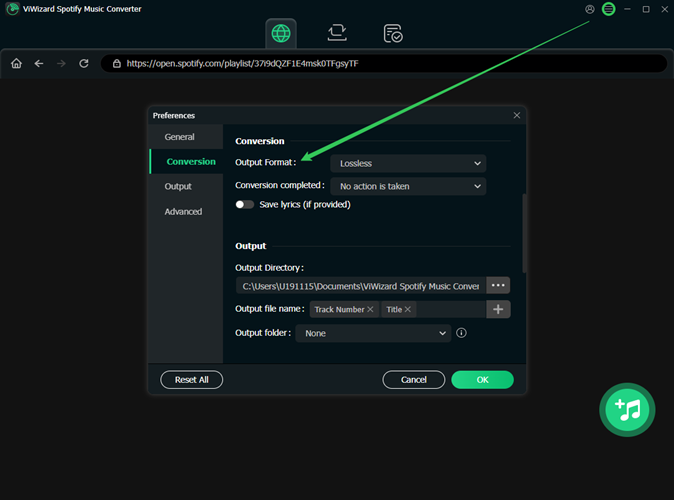
Step 3Customize Your Settings for Video Editing
Before converting, go to the settings by clicking the three horizontal lines in the top-right corner. Under the "Conversion" tab, choose the output format that works best for your video project. MP3 is a great choice, as it's widely compatible with video editors. For the highest audio quality, set the bitrate to 320kbps. Adjust other settings, like sample rate or audio channels, to suit your project's needs.
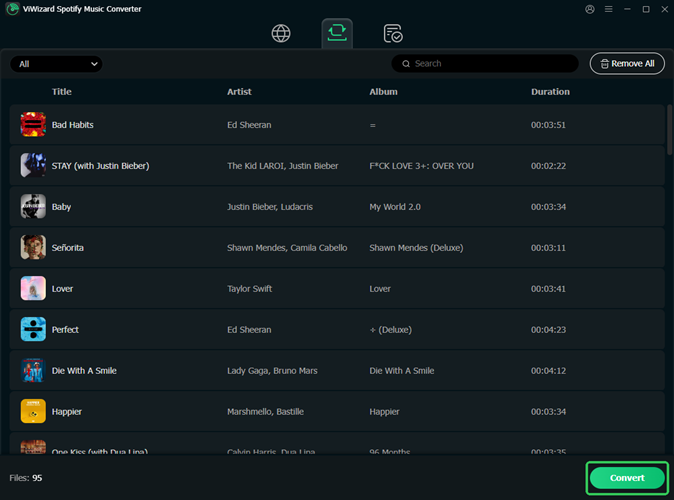
Step 4Convert Spotify Music to Audio Files
Click the "Convert" button to start the process. ViWizard will convert your selected tracks at high speeds, ensuring you get your audio files quickly. Once the conversion finishes, go to the output folder where your converted Spotify music is saved. Now you have permanent, offline-ready audio files that you can seamlessly integrate into your video editing projects.
Part 3. How to Add Spotify Music to a Video as BGM on Desktop
If you've already converted your Spotify music to MP3 or WAV, it's ready to become part of your story. Adding Spotify music to a video on desktop gives you full creative control. Whether you're using iMovie, Premiere Pro, Final Cut, or Shotcut, the process is simple and familiar:
- Open your video editor and create a new project.
- Import your video footage—this is your canvas.
- Add the converted Spotify track—your emotional layer.
- Drag the music into the timeline to sync with your visuals.
- Adjust volume or trim the track to fit the rhythm and tone.
- Preview and export your finished project.
1. Adobe Premiere Pro
For professional-grade editing

Key Features: Multi-track editing, advanced color grading, motion graphics, Adobe integration
Platforms: Windows, macOS
Pros: Industry standard, plugin support, cloud integration
Cons: Expensive subscription
Adobe Premiere Pro is a powerhouse for professionals tackling complex video projects. It supports multi-track editing, advanced color grading, and tight integration with Adobe tools like After Effects and Photoshop. Ideal for high-level workflows and collaborative teams, it's a go-to for serious editors. However, beginners might find the interface overwhelming, and the full experience requires a paid subscription.
- Launch Adobe Premiere Pro.
- Select New Project, name it, and choose a save location.
- Go to File > Import, select your local files, and click Open.
- Or use the Media Browser to find and import files.
- Drag media from the Project panel to the Timeline to start editing.
2. DaVinci Resolve
For color correction enthusiasts
Key Features: Color correction, VFX, audio post, multi-cam editing
Platforms: Windows, macOS, Linux
Pros: Powerful free version, unmatched color grading
Cons: Steep learning curve, heavy on system resources
DaVinci Resolve shines in color grading but also offers full editing, visual effects, and audio tools. Professionals love its precision, and beginners can explore advanced features without paying—thanks to its robust free version. Just be prepared for a more technical experience.
- Open DaVinci Resolve and click New Project, name it, and hit Create.
- Go to the Media workspace.
- In the Media Pool, right-click and choose Import Media.
- Select files from your device and click Open.
- Switch to the Edit workspace and drag files to the Timeline.
3. Final Cut Pro
For macOS power users
Key Features: Magnetic Timeline, multi-cam editing, 360° video
Platforms: macOS
Pros: Fast, intuitive, Mac-optimized
Cons: Mac-only, higher upfront cost
Final Cut Pro is Apple's premium editor, built for speed and smart workflows. From casual creators to professionals, Mac users will appreciate its seamless performance. iPad users can opt for a $5/month subscription, while Mac users pay a one-time $300 for lifetime access.
- Launch Final Cut Pro.
- Go to File > New > Library and File > New > Project.
- Click Import Media or press Command-I.
- Choose your files and click Import Selected.
- Drag media from the Browser to the Timeline to edit.
4. Filmora
For beginners and quick edits
Key Features: Drag-and-drop editing, effects, transitions, music
Platforms: Windows, macOS
Pros: Simple interface, budget-friendly, rich template library
Cons: Limited pro features
Filmora is perfect for quick edits and easy-to-use workflows. It includes built-in effects, transitions, and royalty-free music. While it lacks the depth of tools like Premiere Pro or Final Cut, it's ideal for beginners or content creators on a deadline.
- Open Filmora and click New Project.
- Click Import > Import Media Files.
- Choose your files and click Open.
- Drag media to the Timeline and begin editing.
5. Lightworks
For professional workflows
Key Features: Multi-camera editing, real-time effects, high-res export
Platforms: Windows, macOS, Linux
Pros: Free version is powerful, good for collaborative work
Cons: Learning curve, export limits in free version
Used in high-end productions, Lightworks brings powerful tools like real-time editing and multi-cam support. The free version handles most basic tasks, while the Pro edition unlocks more export and format options. However, its interface may take time to master.
- Launch Lightworks and create a new project.
- In the Log panel, go to the Local Files tab.
- Click Add, select your media, and hit OK.
- Drag files to the Timeline to start editing.
6. InVideo.AI
For AI-powered video creation
Key Features: AI-assisted editing, templates, stock media
Platforms: Web-based
Pros: Fast, beginner-friendly, loaded with templates
Cons: Limited manual control, subscription required
InVideo.AI uses artificial intelligence to streamline video creation. It's ideal for marketers or social media creators needing quick results. While it's efficient and easy to use, it may lack the flexibility pros need for custom edits.
- Log in to InVideo.AI.
- Click Create New and pick a template.
- Hit Upload Media and select your local files.
- Click Open to upload.
- Drag files onto the Timeline to begin editing.
Part 4. How to Add Spotify Music to a Video as BGM on Mobile
Not every story starts at a desk. Sometimes inspiration hits when you're on the move—and mobile editors like CapCut, Kinemaster, or iMovie for iOS make it easy to bring music and video together in your hands.
- First, you'll need to move the converted Spotify music to your phone:
- For Android: Connect your phone via USB, enable file transfer, then copy the converted songs into the Music or Downloads folder.
- For iPhone: Use iTunes or Finder to sync the songs to your device, or transfer them directly with AirDrop, Documents by Readdle, or VLC.
- Open your mobile video editor and start a new project.
- Import your video footage.
- Add the Spotify track from your local files.
- Trim or reposition the audio to match the visuals.
- Preview and export the final cut.
1. CapCut
For social media creators
Key Features: AI tools, transitions, music, text animations
Platforms: iOS, Android
Pros: Free, user-friendly, perfect for TikTok/Instagram
Cons: Limited advanced editing tools
CapCut is a favorite for quick, casual edits—especially TikTok-style videos. Its AI features, music integration, and slick transitions make it easy to create engaging short-form content. However, it lacks depth for complex editing.
- Open CapCut and tap "New Project."
- Tap "+" and select "From Device" to add video, images, or audio.
- Tap "Add" to import them to the timeline.
- Drag and adjust clips for editing.
2. Kinemaster
For flexible mobile editing
Key Features: Layered video, chroma key, multi-track audio
Platforms: iOS, Android
Pros: Intuitive interface, pro-level tools
Cons: Watermark on free version, limited without subscription
Kinemaster balances user-friendliness with powerful features. It supports multi-layer editing, green screen, and advanced audio—ideal for users who want more control without switching to desktop software.
- Open Kinemaster and tap "+" to start a new project.
- Choose your aspect ratio.
- Tap "Media" to import files.
- Tap "Done," then drag files to the timeline to begin editing.
3. Adobe Premiere Rush
For simple, quick edits
Key Features: Multi-clip editing, templates, cloud sync
Platforms: iOS, Android, Windows, macOS
Pros: Easy to use, cross-platform, Creative Cloud integration
Cons: Lacks advanced tools of Premiere Pro
Rush is Adobe's beginner-friendly editor, great for creating polished social content quickly. Its seamless sync across devices is perfect for editing on the go.
- Launch Rush and tap "+" to start a new project.
- Name your project, tap "Create Project."
- Tap "Media" to select and import files.
- Files appear in the media panel—drag them to the timeline to start editing.
4. LumaFusion
For iOS professionals
Key Features: Multi-track editing, color grading, advanced audio
Platform: iOS only
Pros: Full-featured, ideal for creators on the go
Cons: iOS-only, higher upfront cost
LumaFusion offers pro-level editing on iOS, great for mobile journalists and vloggers. With robust tools like color correction and multi-track audio, it's the most powerful mobile editor for iPhone and iPad users.
- Open LumaFusion and tap "+" to create a project.
- Choose your settings and name the project.
- Tap "Import Media," browse local/cloud storage, and select files.
- Imported media appears in the Library—drag to the timeline to edit.
5. iMovie
For simple projects
Key Features: Templates, slow-mo, audio tools
Platforms: iOS, macOS
Pros: Free on Apple devices, very easy to use
Cons: Limited for advanced editing, Apple-only
iMovie is Apple's go-to editor for beginners. It's great for trimming, adding music, and simple effects—ideal for personal use or casual content creation.
- Open iMovie and tap "Create Project" > "Movie."
- Tap "+" to add clips from your Photos library.
- Tap "Add Media" to import, then tap on clips to place them in the timeline.
6. VivaVideo
For quick and fun edits
Key Features: Templates, filters, collages, text effects
Platforms: iOS, Android
Pros: Fun and simple, great for casual use
Cons: Watermark in free version, limited features without upgrade
VivaVideo is made for users who want fast, eye-catching edits without diving into complex tools. It's great for quick posts and stories with lots of built-in effects.
- Open VivaVideo and tap "Create New Project."
- Tap "Import" to add media from your device.
- Tap "OK" to confirm.
- Imported files appear in the library—drag them to the timeline to edit.
Conclusion
And voila! From the above method, you would know how to add music from Spotify to a video. After learning the process, it should be a quick and reliable method. If you want to learn how to cut music from Spotify and use Spotify music with those video editors in detail, just go to read the related post.
You May Be Interested


Adam Gorden, the digital media specialist at ViWizard, is dedicated to providing the best solutions for digital media management, including audio and video conversion, file optimization, and media workflow enhancements.
Leave a Comment (0)