Twitch stands out as a premier platform for live broadcasting, encompassing a wide array of content such as gaming, real-life interactions, musical performances, and creative endeavors. Users can engage with their preferred broadcasters and immerse themselves in a variety of content including live streams, highlight clips, and videos.
At times, you might find yourself desiring to capture the audio from someone else's video for later listening, perhaps to revisit a memorable commentary or to enjoy the soundtrack of a stream. Despite this, Twitch's terms do not allow for the direct downloading of clips or streams from its platform, making it seem impossible to save your preferred content.
So, is there a way to extract audio from Twitch clips and convert it to MP3 format? Indeed, there are several methods available to achieve this. This extensive guide will walk you through four distinct approaches to successfully download Twitch clip audio as MP3 files. Before embarking on any method, it's crucial to understand the nuances of each technique to ensure you choose the most suitable one for your needs. Let's dive in and explore the details.
Part 1. Download Twitch Clip to MP3 with Dedicated Downloader
In search of a reliable and efficient solution for capturing audio, look no further than ViWizard Audio Capture - the premier Twitch clip audio downloader. This robust tool specializes in recording any audio that plays through your computer's sound card, including live broadcasts on Twitch, in-game sounds, videos from popular streaming platforms such as Facebook, TikTok, Instagram, and even music from online streaming services.
ViWizard is designed to cater to both Windows and Mac users, boasting the capability to download and convert Twitch clip audio into various formats like MP3, AAC, WAV, FLAC, and more, all while maintaining the original quality of the sound. Additionally, ViWizard offers extensive customization options for audio parameters, including sample rate, bit rate, channel, and codec, ensuring a tailored experience for your specific needs.
To use ViWizard, simply locate and play the Twitch clips you wish to capture; the software will automatically retrieve these tracks simultaneously, preserving the ID3 tags for your convenience. Subsequently, you can store the downloaded Twitch audio on your computer and seamlessly transfer it to any other device or music player for enjoyment at any time.
Key Features of ViWizard Audio Capture
Free Trial Free Trial* Security verified. 5, 481,347 people have downloaded it.
- Record any audio from streaming services, live broadcasts, and system sounds
- Support multitrack recording and save files in MP3 and more formats
- Automatically detect and retain ID3 tags while allowing manual editing
- Offer flexible audio splitting and merging tools for full customization
Now, let's embark on a user-friendly journey with ViWizard. Begin by selecting the appropriate version for your system and downloading the ViWizard Audio Capture onto your computer. Once installed, follow the concise guide provided to start capturing your favorite audio moments with ease.
Step 1Open ViWizard Program
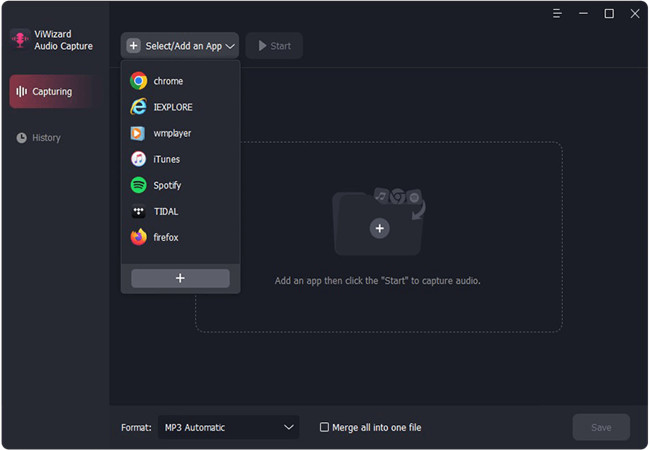
Activate the ViWizard software by double-clicking its icon on your desktop. Upon launching, you'll be greeted by a list of program icons on the ViWizard interface. Verify if the browser you use to access Twitch is present in the list. If not, click the 'Plus' button to add it, or drag and drop the browser icon directly from your desktop into the ViWizard window.
Step 2Customize Output Parameters for Twitch Clips Audio Downlaods
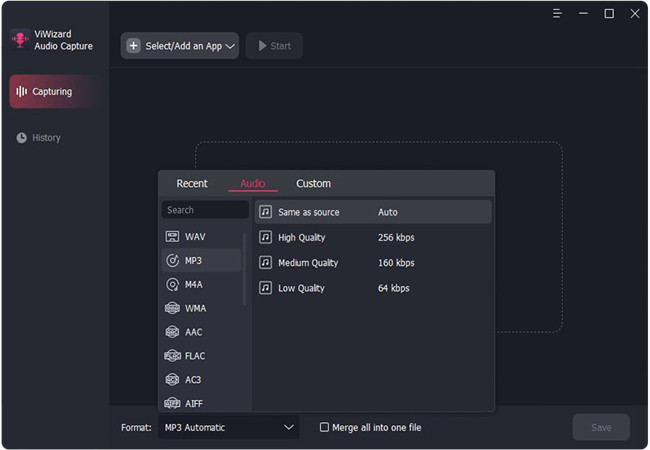
Now, fine-tune the audio format and settings to suit your preferences. By clicking the 'Audio' icon, you'll open the settings where you can select your desired output format, such as MP3, WAV, AAC, FLAC, etc. MP3 is highly recommended for its broad compatibility with various devices and players. Further customize by adjusting the sample rate, bit rate, channel, and codec if necessary. Once satisfied, confirm your choices by hitting the 'OK' button.
Step 3Play and Download Audio from Twitch Clip to MP3
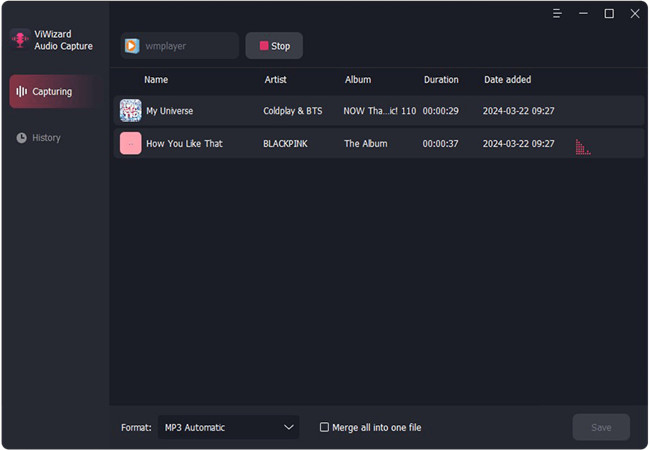
Return to the ViWizard main screen and navigate to the Twitch website using the designated web browser. Play the specific Twitch clip or video stream you wish to capture and convert to MP3. ViWizard Audio Capture will then automatically commence extracting and downloading the audio from the Twitch clips. You can monitor the progress of the recording and download it in real time within the application's recording window.
Step 4 Edit and Save Twitch Clip Recordings
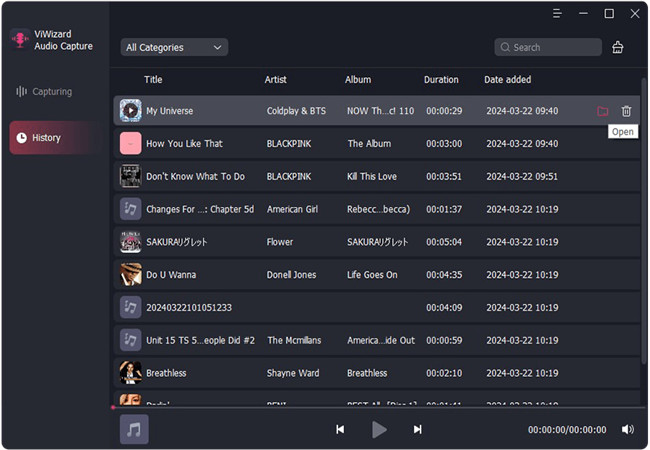
Once ViWizard has successfully downloaded all the Twitch clip audio you desire, halt the process by clicking the 'Stop' button or closing the web browser entirely. For further customization, you have the option to click the 'Edit' button to trim the audio files, refine the ID3 tags, or make additional adjustments. When ready, secure your Twitch clip audio downloads on your computer by clicking the 'Save' icon. To locate and review your downloaded content, simply click the 'Converted' button to access the History list.
Part 2. Download Twitch Clip to MP3 with Online Tools
In addition to installing third-party applications, you can also use an online Twitch clip audio downloader to download and convert Twitch video clips to MP3. No download and installation are required. However, it is inevitable that you will encounter some annoying ads in these online tools. If you find it acceptable, just check the online Twitch clip audio downloaders we listed for you.
2.1 Clip Ninja
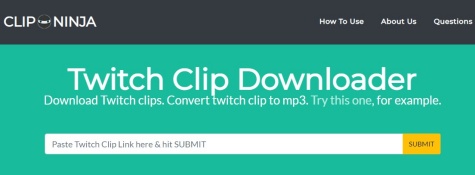
The first Twitch to MP3 online tool we recommend is Ninja Twitch Clip Audio Downloader. Clip Ninja is a powerful tool for downloading Twitch clips. Its downloading process is straightforward and quick. With just a few clicks, you can download Twitch clips to MP3 or MP4. Moreover, Clip Ninja is compatible with various devices for downloading and sharing Twitch clips, including phones, computers, tablets, etc.
- Head to the Twitch website to browse and find the clip you want to download.
- Right-click on the address bar and select the 'Copy' option in the menu.
- Visit the official Clip Ninja website and paste the URL into its input bar.
- Click the 'Submit' button to extract and download the Twitch clip audio to MP3.
- Wait for a few seconds, you can get the Twitch clip audio downloads on your computer.
2.2 Tuberipper
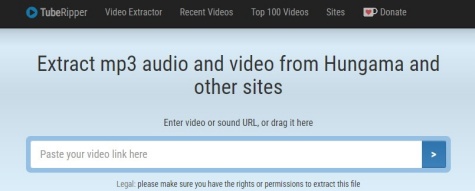
Tuberipper is a free online Twitch audio downloader that allows users to download and extract all kinds of Twitch videos and audio to MP3 without any limitations. No installation and registration are required. You just need to get the URL of the Twitch audio or videos, and then you can get the clip audio from it with ease.
- Open the Twitch website and find the video clip you want to download on Twitch.
- Copy the URL of the clip and paste the link to the search box.
- Hit the 'Download' button and the Twitch clip audio downloader will automatically download the Twitch clip to MP3.
2.3 Amoyshare
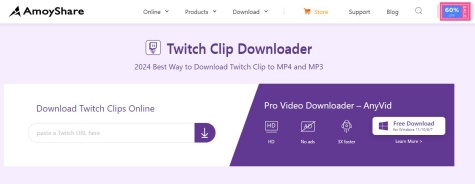
AmoyShare Twitch clip download online tool is a reliable service that provides an excellent user experience. You can use it to download Twitch videos of various kinds. It is easy to convert Twitch clips to MP3 and MP4. Just paste the clip link, and you can download Twitch clips effortlessly. It is worth noting that this free online Twitch downloader also allows you to download Twitch streams to multiple devices, including iPhone, Android, Mac, or PC devices for offline viewing.
- Navigate to the Twitch website and find the clip audio you wish to download.
- Copy the URL from Twitch.
- Head to the AmoyShare website and paste the URL into its search box.
- Hit the Download button, pick an MP3 resolution, and save the Twitch clip to MP3 instantly.
Part 3. Comparison of Twitch Clip Download Ways
In fact, each method has its own set of benefits and limitations. To assist you in making the ultimate choice, we have summarized the characteristics of these two Twitch clip download methods. Refer to the chart provided below.
| Twitch Clip Download Way | ViWizard Audio Capture | Free Online Twitch Clip Downloader |
| High-quality Downloads | √ | × |
| Output Formats | MP3, AAC, WAV, FLAC, M4A, and M4B | MP3 and MP4 |
| Download in Batch | √ | √ |
| Support Device | Windows and Mac | Windows, Mac, Android, and iOS |
| Edit Twitch Clip MP3 Downloads | √ | × |
Extra Tip: How to Create and Share Clips
Clips allow you and your viewers to you and your audience to encapsulate and disseminate the most distinctive moments from your Twitch broadcasts. By sharing these concise segments on social media, you can provide prospective viewers with a glimpse of your channel's essence and entice them to join your next live session. This section aims to guide you through the process of creating and sharing clips on social platforms to enhance your channel's growth.
-
How to Create Clips:
- To initiate the creation of a clip in a new tab, click on the clip icon (as shown above) during a live stream or within a recorded broadcast. This will open the editing interface in a new tab. If you're streaming from a mobile device, you may need to tap the video to make the icon appear.
- Use the slider beneath the video playback area in the editing interface to select the desired length for your clip, up to a maximum of 60 seconds.
- Once you've captured the perfect moment, label your highlight reel with an appropriate title and proceed by clicking the Publish button.
- Well done, you clipped it.
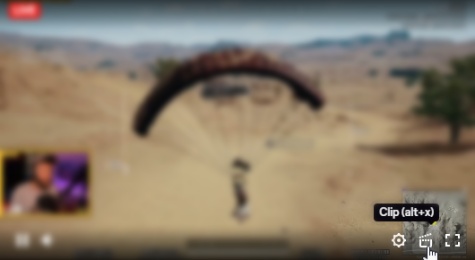
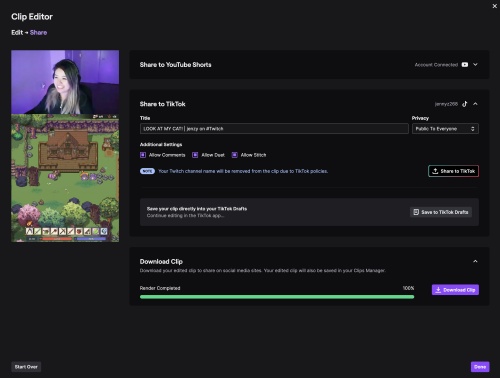
After publishing, you'll be provided with a unique URL for your highlight reel, which you can copy and share with others. You can also access previously created highlight reels through the Clips Manager in the Creator Dashboard. For sharing on social media, streamers have the option to edit their highlight reels into vertical video formats using the built-in Clip Editor.
-
How to Share Clips:
- A. Download your clip to transfer it across various social media platforms. Once the editing process is complete and the video has been rendered, the Download button will change from grey to purple, indicating that you can save the edited clip to your device and share it on your preferred social networks to reach a broader audience with your top content.
- B. Share directly to YouTube Shorts. If your Twitch account is linked to YouTube, you have the convenience of directly sharing your clip to YouTube Shorts. The title and description fields are pre-filled with suggested text to optimize your post's visibility and to direct viewers back to your stream. Should you prefer custom text, you can overwrite the suggestions by typing into the respective fields.
- C. Share directly to TikTok. Similarly, if your Twitch account is connected to TikTok, you can share your clip on TikTok. The title and description fields are pre-populated with recommended text to enhance your post's discoverability and encourage viewers to revisit your stream. If you wish to use different text, you have the option to replace the recommendations by entering your own content.
Conclusion
Twitch clip downloaders have become indispensable for dedicated Twitch viewers, providing seamless methods to save and share cherished moments from the platform. For an all-encompassing solution, a dependable integrated video editing suite like ViWizard Audio Capture is indispensable. It enables you to record, refine, and effortlessly download your preferred Twitch clips in MP3 format. Commence editing and archiving your Twitch highlights with ViWizard today! Moreover, you can craft or refine a Twitch clip using its extensive collection of editing tools and multimedia resources. Give it a try now!



Leave a Comment (0)