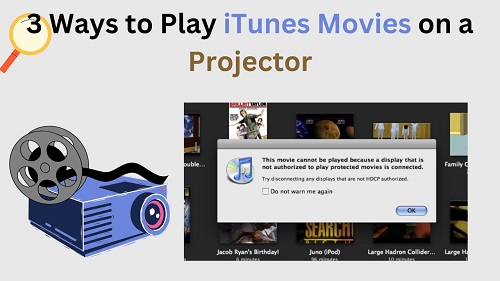
Watching movies on a big screen can enhance your viewing experience, but playing iTunes movies on a projector can sometimes be tricky due to HDCP (High-bandwidth Digital Content Protection) restrictions. Sometimes, you will be getting a message saying "This movie cannot be played because a display that is not authorized to play protected movies is connected." Don't worry, there are several ways to successfully project iTunes movies. In this article, we will provide you with three effective methods and guide you in solving the problem of iTunes movies not playing on projector.
Part 1. Can You Watch iTunes Movies on Projector?
Yes, you can watch iTunes movies on a projector, but it depends on the compatibility of your devices. Many projectors support HDCP, which is required for playing protected content like iTunes movies. If your projector does not support HDCP, you may encounter issues such as a black screen or error messages indicating that the content cannot be played. To ensure a smooth experience, consider the following methods to bypass these restrictions.
Part 2. 3 Ways to Play iTunes Movies on a Projector
Method 1. Play iTunes Movies on a Projector via ViWizard
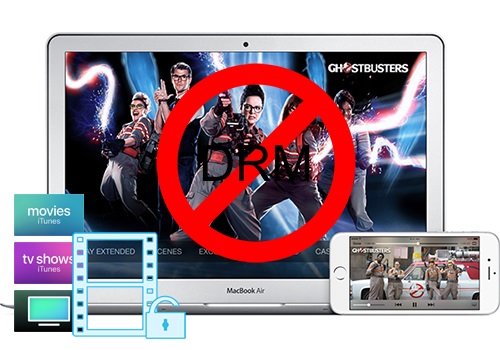
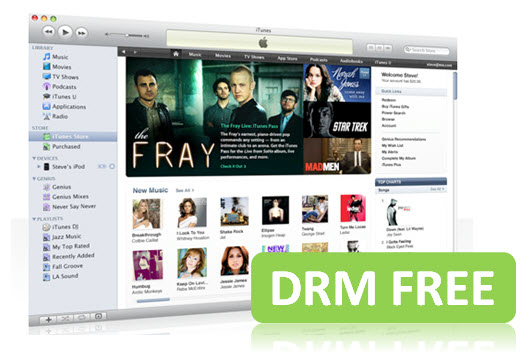
Most iTunes movies are protected by Digital Rights Management (DRM), a technology used to prevent unauthorized copying or playback. This DRM protection often causes compatibility issues when trying to play iTunes movies on projectors, as many projectors lack the necessary support for HDCP (High-bandwidth Digital Content Protection).
Without purchasing additional adapters or compatible devices, the quickest and simplest solution is to convert iTunes movies into a standard format like MP4, which removes DRM and ensures smooth playback on any projector.
This is where ViWizard iTunes M4V Converter, a professional DRM removal tool, comes in. Here's how ViWizard can assist you:
- Remove DRM Protection:
- Wide Compatibility:
- Preserve 100% Original Quality:
- Super-Fast Conversion Speed:
ViWizard strips DRM from your purchased or rented iTunes movies, making them playable on any device, including projectors.
It converts iTunes M4V movies to widely supported formats like MP4, MOV, and AVI, ensuring seamless playback without quality loss.
All video and audio details, including 1080p HD resolution, Dolby 5.1 surround sound, subtitles, and closed captions, are retained during conversion.
ViWizard offers up to 30X faster conversion speed, saving you time while maintaining excellent quality.
Key Features of ViWizard iTunes M4V Converter
Free Trial Free Trial* Security verified. 5, 481,347 people have downloaded it.
- Convert iTunes movie rentals and purchases to common videos
- Handle the conversion of iTunes M4V videos at 30× faster speed
- Preserve multilingual subtitles, closed captions, chapters, and more
- Support playing iTunes M4V videos anywhere and anytime
Step-by-Step Guide to Removing DRM from iTunes Movies via ViWizard
Step 1Add iTunes M4V Movies to ViWizard
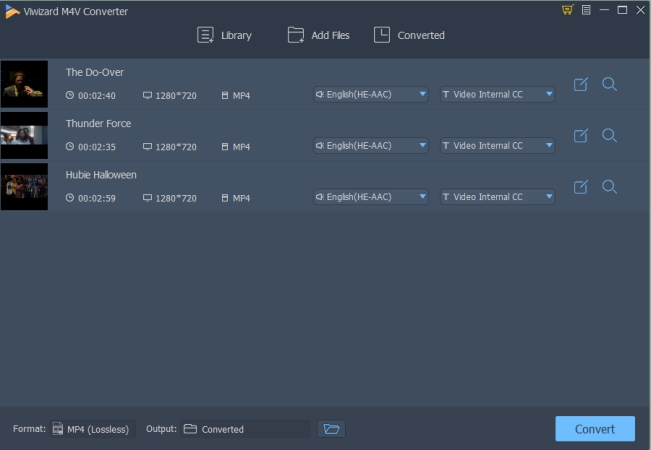
First, download and install ViWizard iTunes M4V Converter on your computer. Next, click "Library" to import the iTunes movies. Make sure all your target iTunes movies have already been downloaded from iTunes store and can play in iTunes.
Step 2Adjust Output Settings
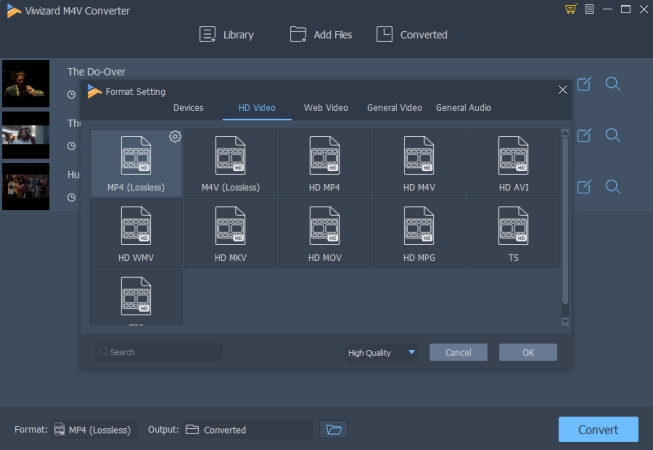
Next you can click the "Format" tab to select an output format such as MP4 (Lossless). Additionally, you can also configure the audio track and subtitle for each movie.
Step 3Start the Conversion
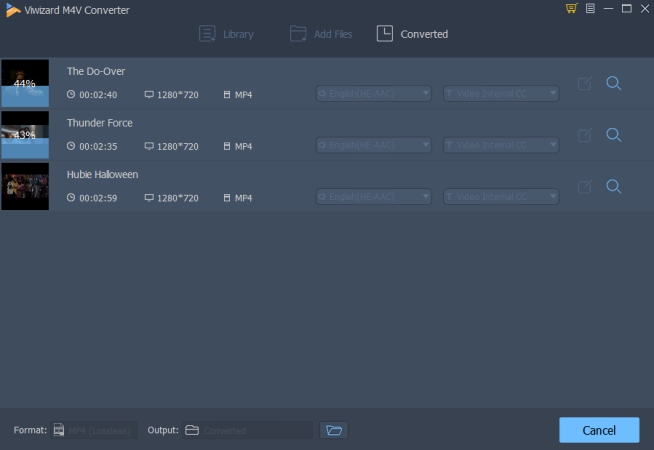
After you complete the Output setup, click the "Convert" button to start removing DRM lock from the iTunes movies and convert the M4V to DRM-free MP4 format at 30x faster high speed with lossless quality.
Step 4Transfer and Play iTunes Movies on Projector
After the conversion, the DRM-free iTunes movies will be successfully stored in your local files. You can now start to transfer the converted iTunes movies to your projector
Before you transfer the converted iTunes movies to your projector, do following:
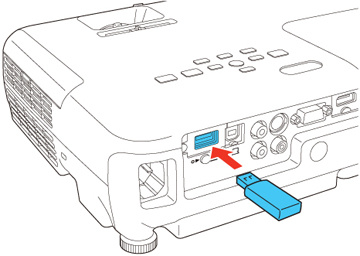
- Ensure that your projector has a USB port and supports video playback from USB drives.
- Format your USB drive to exFAT or FAT32 if necessary, as some projectors have file size limitations.
- Copy the converted iTunes movies onto the USB drive.
- Insert the USB drive into the projector's USB port.
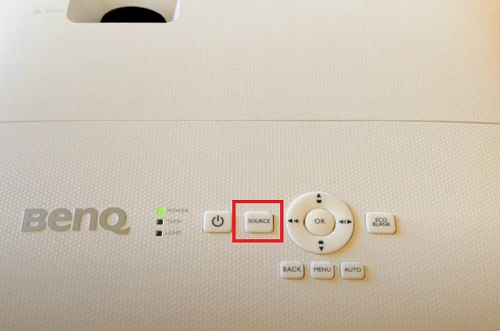
- Press the "Source" or "Input" button on the projector's remote. Select the USB option.
- Use the arrow keys on the projector's remote to select the video you want to play.
- Press the "Play" button to start watching.
- Pros
- Removes DRM protection
- Works for most projectors and devices
- No internet interruptions while streaming
- Maintains high video quality
- Cons
- Requires software installation
Method 2. Play iTunes Movies on a Projector via AppleTV
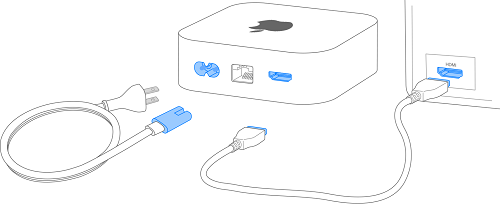
Using an Apple TV is one of the easiest ways to play iTunes movies on a projector while bypassing HDCP restrictions.
- Use an HDMI cable to link Apple TV to your projector.
- Switch the projector's input source to HDMI.
- Open the Apple TV menu and sign in with your Apple ID.
- Navigate to your purchased or rented movies and start playback.
- The movie will project onto your screen.
- Pros
- Easy setup with HDMI connection
- Bypasses HDCP restrictions
- User-friendly interface
- Streams directly from iTunes library
- Cons
- Requires purchase of Apple TV
- Dependent on Wi-Fi connectivity
- Limited to Apple ecosystem
- Possible latency issues with wireless streaming
Method 3. Play iTunes Movies on a Projector via AirPlay is a wireless option for playing iTunes movies from your iPhone, iPad, or Mac directly to a projector connected to an AirPlay-compatible device.
Note
To play your iTunes movies via AirPlay, you'd do the following in advance:
- Ensure that your projector has built-in AirPlay support or connect an Apple TV if necessary.
- Make sure both your projector (if applicable) and your Apple device are connected to the same Wi-Fi network.
- Activate AirPlay on the connected device (e.g., Apple TV or AirPlay-enabled projector).
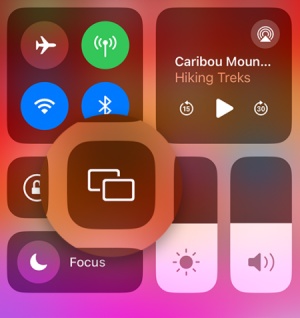
- On your Apple device, tap the AirPlay icon (on Mac) or select Screen Mirroring icon (on iPhone or iPad).
- Choose the projector or connected device from the list.
- Open the iTunes movie on your device, and it will display on the projector.
To play your iTunes movies via AirPlay, you'd do the following in advance:
- Ensure that your projector has built-in AirPlay support or connect an Apple TV if necessary.
- Make sure both your projector (if applicable) and your Apple device are connected to the same Wi-Fi network.
- Pros
- No additional hardware needed if using compatible projector
- Simple screen mirroring process
- Direct access to iTunes library
- Cons
- Requires strong Wi-Fi connection
- May experience lag or buffering during playback
- Compatibility issues with non-AirPlay devices
- Limited to Apple devices for streaming
Part 3. How to Fix iTunes Movies Won't Play on a Projector
If you've tried these methods above, and your iTunes movies won't play on your projector, you may get those common error messages on the screen. If so, consider trying the troubleshooting tips below:
Common Error Messages & Solutions
For HDCP Errors:
"This movie cannot be played because a display that is not authorized to play protected movies is connected." "HDCP Not Supported" or "This display/HDTV does not support HDCP." This error often occurs when the projector does not support HDCP, or the connection method does not meet HDCP requirements.
Solutions:
- Check Projector Compatibility: Ensure that your projector supports HDCP and has a resolution of at least 1024x768.
- Use a Compatible HDMI Cable: Make sure you are using an HDMI cable that is HDCP compliant. If you're using an HDMI splitter, ensure it is designed to bypass HDCP restrictions.
- Switch to a Different Connection: If you're using VGA or DVI, switch to an HDMI connection as these formats are more likely to support HDCP.
- Use AirPlay for Streaming: If you have an Apple TV, try using AirPlay to stream the movie directly from your device to the projector instead of using a wired connection.
For Playback Errors:
"There's a problem loading this content." This can happen if there are compatibility issues between the device and the projector.
Solutions:
- Update Software: Ensure that both iTunes and your operating system (Windows or macOS) are updated to the latest versions. This can resolve compatibility issues.
- Lower Video Quality: If you're trying to play a HD movie, consider downloading a standard definition (SD) version instead. Right-click on the movie in iTunes and select "Standard Definition" under Versions if available.
- Restart Devices: Sometimes, simply restarting your computer and projector can resolve playback issues.
- Check Your Internet Connection: Ensure that your device is connected to the internet, especially if streaming content.
Part 4. Conclusion
Playing iTunes movies on a projector is entirely possible with the right tools and methods. Whether you choose to use ViWizard iTunes M4V Converter for DRM removal and universal video formats, stream through Apple TV, or utilize AirPlay with compatible projectors, each method offers a straightforward way to enjoy your favorite films on a larger screen. By following these steps carefully, you can bypass HDCP restrictions and enhance your movie-watching experience!

Leave a Comment (0)