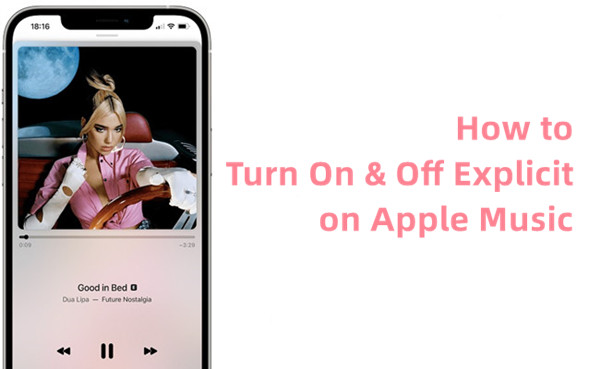
Picture this: you're browsing through Apple Music, excited to check out some new tracks, and you keep noticing a little "E" next to certain songs. If you see this "E" symbol everywhere, don't worry - it's normal! It just means that explicit content is enabled, and no filters are in place to block it.
Wanna get the clean version on Apple Music or find it for your favorite songs that has the Explicit tag? Check this guide.
Part 1. How Does Apple Music Explicit Work?
But what does explicit content really mean? It's music with strong language or mature themes that might not be suitable for everyone, especially kids. For parents, these tracks can be a concern if their children are using Apple Music to listen to music freely. The "E" label is a way for Apple Music to let you know that a song might have words or themes you'd rather avoid - or maybe not want your kids to hear.
Luckily, Apple Music makes it pretty easy to control this. It has a setting called the Explicit Filter, which lets you decide if explicit songs can play or not. When the filter is turned on, it means explicit content is allowed - you'll hear the songs with those mature lyrics. But if you turn off the filter, then any explicit songs get blocked from your playlists or searches.
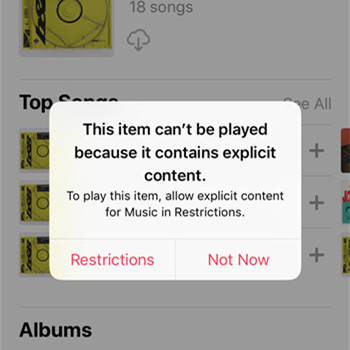
Now, you might sometimes run into a message like this: "This item can't be played because it contains explicit content. To play this item, allow explicit content for Music in Restrictions." This means the song is flagged as explicit, and Apple Music is blocking it due to the current settings. Before you go straight to Restrictions to change that setting, take a moment to think about whether you want that kind of content accessible on your device.
Part 2. Turn On/Off Apple Music Explicit on Web
If you use Apple Music through a web browser, you can manage explicit content easily. Here's what to do:
- Open music.apple.com in your preferred browser.
- Click the Sign In button at the top-right and enter your Apple ID if not already signed in.
- Click your profile icon in the top-right corner and choose Settings from the dropdown.
- Look for Parental Controls towards the bottom of the settings page.
- Toggle Content Restrictions to On, and set up a passcode if prompted. This ensures others cannot change these settings.
- Under Music, choose Explicit to allow explicit songs or Clean to block them.
- The changes will apply automatically, and you can close the page.
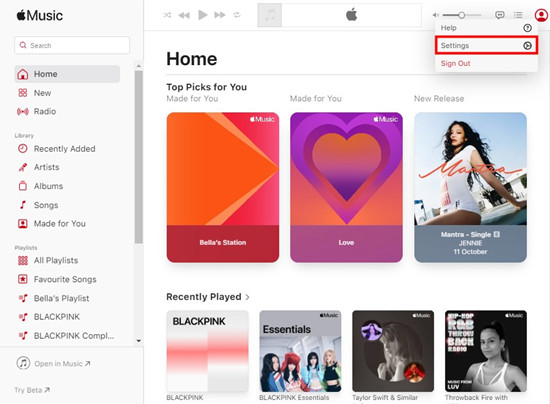
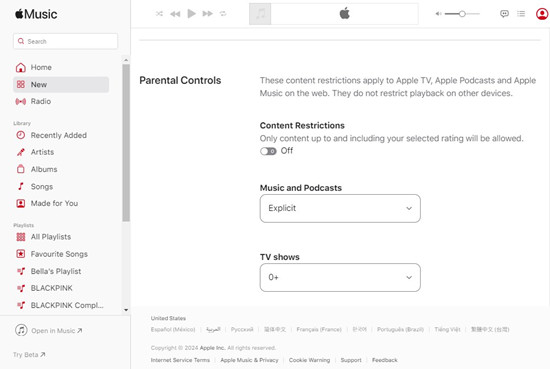
With these steps, you can manage explicit content for Apple Music through the web!
Part 3. Turn On/Off Apple Music Explicit on Windows
If you're using Apple Music on a Windows computer through the iTunes app, you can control explicit content this way:
- Launch iTunes on your Windows device.
- In the top menu, click Edit > Preferences.
- In the Preferences window, select the Restrictions tab.
- To block explicit music, check the box next to Restrict explicit content under Music.
- Click the padlock icon at the bottom-left to lock these restrictions with a password, if desired.
- Click OK to save your changes.
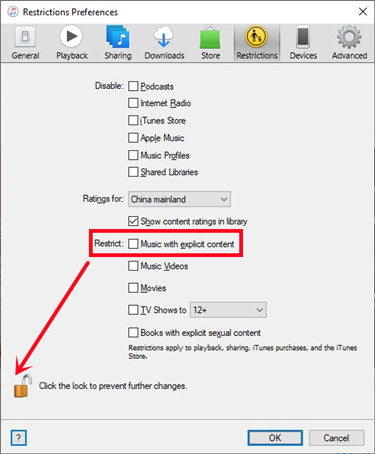
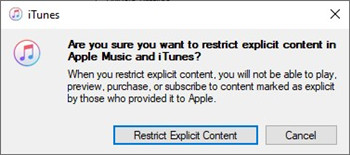
Now your Windows device will follow the explicit content settings you've selected for Apple Music.
Part 4. Turn On/Off Apple Music Explicit on iPhone/iPad
You can manage explicit content directly from your iPhone or iPad through the Screen Time settings:
- On your iPhone or iPad, tap Settings and select Screen Time.
- If it's not turned on, follow the prompts to enable it and select This is My iPhone.
- Tap Content & Privacy Restrictions and turn it On.
- Under this section, tap Music, Podcasts & News.
- Tap Clean to restrict explicit content or Explicit to allow it.
- Set up a Screen Time passcode to prevent others from changing these settings.
- Your choices take effect right away, so you can close the Settings app.
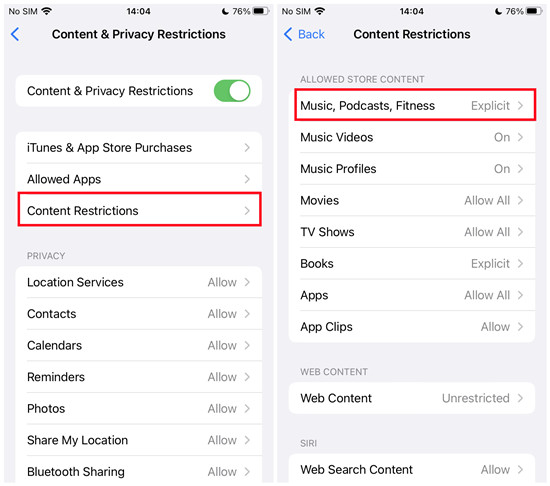
Your Apple Music content is now filtered according to the settings you've applied on your iPhone or iPad.
Part 5. Turn On/Off Apple Music Explicit on Mac
To control explicit content on a Mac, use the Screen Time settings:
- Click the Apple menu in the top-left and select System Settings (or System Preferences).
- Select Screen Time from the sidebar and ensure it's turned On.
- Click Content & Privacy and switch Content & Privacy Restrictions to On.
- Under Store Content, find Music, Podcasts & News and choose Clean to block explicit content or Explicit to allow it.
- For added security, set a Screen Time passcode to prevent changes.
- The changes are saved automatically, so you can close the settings window.
Now your Mac is set to either filter out or include explicit music based on your preferences.
Bonus Tip: How to Convert Apple Music to MP3
Maybe you'd like to keep a backup on Google Drive, OneDrive, or even a USB drive, or simply listen to your favorite songs on devices that don't support the Apple Music app. Since Apple Music tracks, including explicit songs, are typically in AAC format and tied to your subscription, converting them to MP3 can be a great solution. Here's where ViWizard Apple Music Converter comes in.
ViWizard Apple Music Converter is a user-friendly tool that lets you convert Apple Music songs into common audio formats like MP3, WAV, AAC, FLAC, M4A, and M4B. This means you can download your entire Apple Music library, including explicit tracks, and save them as standard audio files.
ViWizard works by downloading and converting songs directly from your Apple Music library in iTunes. The process is simple - just select the tracks you want to convert, choose your preferred output format, and let ViWizard do the rest. After conversion, you can save the songs to a USB drive, upload them to cloud storage, or transfer them to any device for unlimited listening. ViWizard isn't just limited to Apple Music songs. It can also convert iTunes purchases, audiobooks, and Audible books, give it a shot!
Key Features of ViWizard Apple Music Converter
Free Trial Free Trial* Security verified. 5, 481,347 people have downloaded it.
- Convert Apple Music songs, albums, playlists, and artists into MP3 for easy access
- Preserve lossless audio, high-resolution lossless, and Dolby Atmos quality
- Strip DRM from Apple Music for unrestricted offline listening
- Save converted audio files while retaining full ID3 tag details


Leave a Comment (0)