With Apple Music taking the lead, many users are wondering: what happens to all the music in their iTunes library? Don't worry — Apple isn't taking your music away. Instead, Apple Music is now handling most of what iTunes used to do. If you've spent years syncing devices, making playlists, and buying music through iTunes, this change might feel a bit overwhelming. But Apple Music is here to bring everything together in one place.
This shift might feel strange for long-time iTunes users, but it's all part of Apple's plan to improve its services. iTunes was a big success, keeping users loyal to Apple. Now, Apple Music is set to take over and offer a simpler, all-in-one music experience. If you're ready to move your iTunes library to Apple Music, we'll show you how to make the transition easy.
In reverse if you wish to transfer your Apple Music library to the iTunes software, read the post below:
This passage will present you 3 solutions to sync Apple Music to iTunes. With or without subscription can refer to this.
Part 1. Understanding the Difference Between iTunes and Apple Music
What's the difference between iTunes and Apple Music?
iTunes is a media management tool for organizing and playing music, movies, TV shows, podcasts, and audiobooks. It lets you buy and store content, including music, from the iTunes Store. Apple Music, on the other hand, is a music streaming service that focuses solely on music. It offers millions of songs for streaming, curated playlists, and radio stations.
Can I access my iTunes library in Apple Music?
Yes, you can. When you transition to Apple Music, your iTunes library is still accessible. You can sync your music across devices using iCloud Music Library, so all your songs, albums, and playlists will be available in Apple Music.
What happens to movies, TV shows, and podcasts?
Apple Music only handles music. Movies and TV shows have moved to the Apple TV app, while podcasts are now managed in the Podcasts app. These types of content aren't part of Apple Music, so you'll need other apps for them.
Will my iTunes music collection be lost?
No, your iTunes music will remain intact. All your previously purchased, imported, or ripped music will transfer to Apple Music and sync across your devices. There's no need to worry about losing your collection.
What if there are duplicates or mismatched songs in Apple Music?
Apple Music uses a matching system to sync your tracks with its catalog, which can sometimes cause duplicates or mismatches. If this happens, you can adjust your iCloud Music Library settings or use tools like ViWizard Apple Music Converter to resolve any issues.
Part 2. Why Transfer Your iTunes Library to Apple Music?
Here are a few reasons why I decided to transfer my iTunes library to Apple Music – and why you might want to, too:
-
Access Your Music Everywhere
"I used to store all my music on an old computer, and it was a bit of a hassle. I couldn't listen to my favorite tracks on my phone or iPad. But once I moved everything to Apple Music, I could stream my entire library from any device."
-
Keep Your Playlists
"I spent hours creating playlists in iTunes, and I didn't want to lose all that effort. When I transferred my library to Apple Music, all my playlists and albums came along with me. It felt like I upgraded my entire music collection without losing any of the music I loved."
-
Get the Best of Both Worlds
"Apple Music allows me to keep my old iTunes music while also giving me access to millions of new songs. It's like combining my personal library with all the incredible options Apple Music offers. It was the perfect music upgrade, as I didn't have to sacrifice anything."
-
Future-Proof Your Music
"iTunes was starting to feel a bit outdated. With the release of macOS Catalina, Apple Music replaced iTunes on Catalina and later versions, which made it essential to transfer my iTunes music library to Apple Music. Now, my music is stored in the cloud and always up to date. I don't have to worry about transferring files or losing songs when I upgrade my devices. It's just easier, more reliable, and future-proof."
Part 3. How to Transfer Your iTunes Library to Apple Music
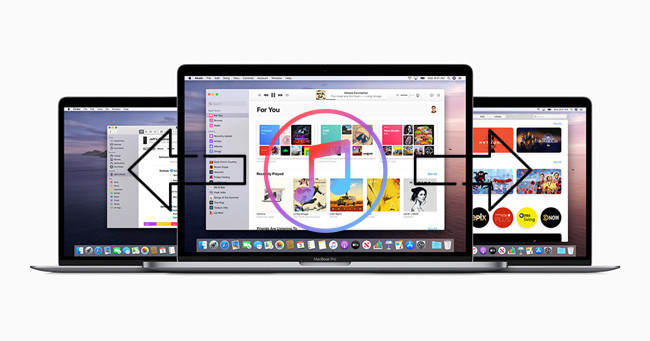
There're several ways you can try to transfer your iTunes library to Apple Music, and one of the easiest ones is by using iCloud Music Library. It lets you sync and access your entire music collection across all your devices.
Option 1: Using iCloud Music Library
iCloud Music Library works by uploading your iTunes library to the cloud and syncing it with Apple Music. Once enabled, your music will be accessible on all devices linked to your Apple ID. Although it's a smooth process, sometimes there can be potential issues, like duplicate songs and mismatches due to Apple Music's matching systems.
- Ensure you're using the latest version of iTunes (Windows) or Music (Mac). Check for updates in Help (Windows) or System Preferences (Mac).
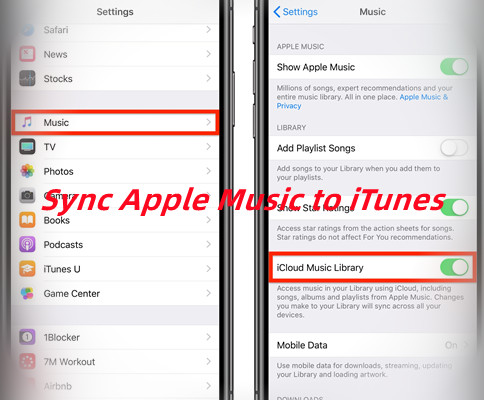
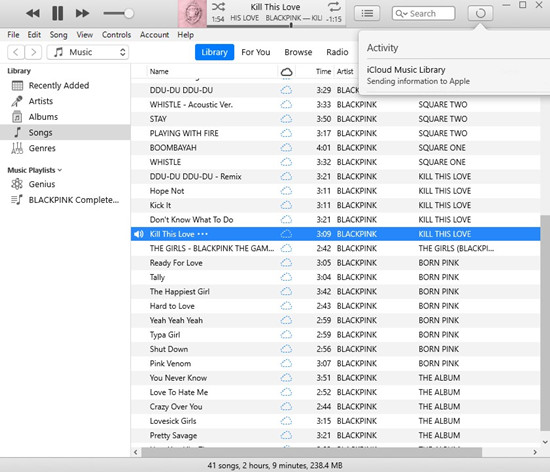
- Open iTunes or Music and log in using the Apple ID tied to your Apple Music subscription. Go to Account > Sign In and then enable iCloud Music Library:
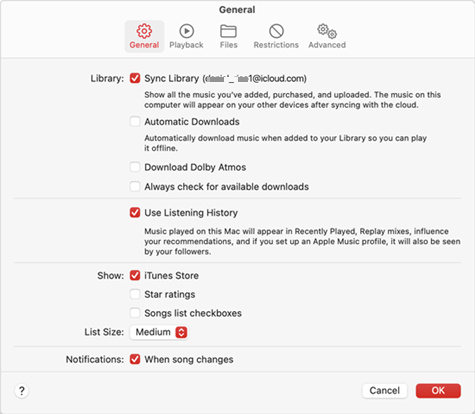
- On Mac: Go to Music > Preferences > General and check Sync Library.
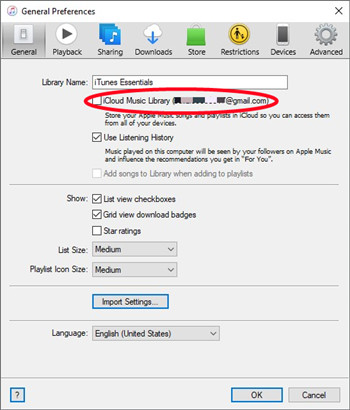
- On Windows: In iTunes, go to Edit > Preferences > General and check iCloud Music Library.
- Your iTunes library will upload to iCloud. Depending on your library size and internet speed, this can take some time.
- Once uploaded, your iTunes library will be available in Apple Music on all your devices linked to your Apple ID.
If you see duplicates or mismatches, you can manually fix them in your library. To avoid these issues, you can also use third-party tools like ViWizard Apple Music Converter.
Option 2: Using Soundiiz
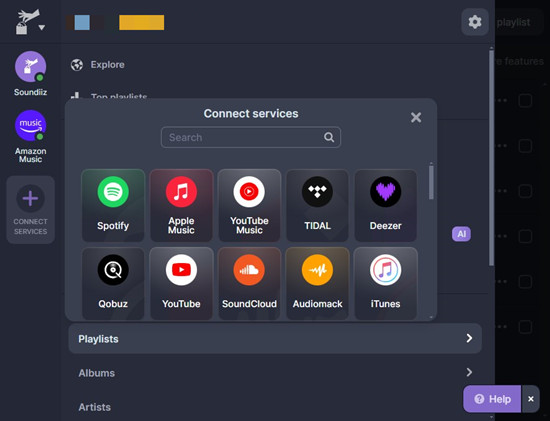
Soundiiz is a useful online tool for transferring playlists between music services like iTunes and Apple Music. Here's a simplified guide to using Soundiiz for this transition:
- Go to the Soundiiz website and log in with your preferred method (email, Google, or Facebook).
- On Soundiiz, select iTunes and choose Export my playlists.
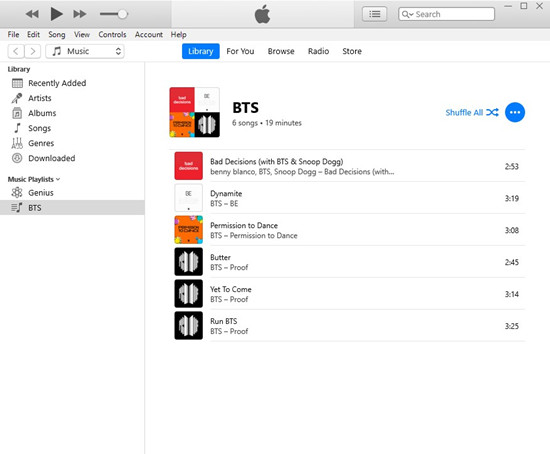
- In iTunes, find your playlist:
- For Apple Music playlists: Click the More button next to the playlist, then Share Playlist, and select Copy Link.
- For iTunes files playlists: Go to File > Library > Export Playlist and save as a .txt file.
- Return to Soundiiz and paste the playlist link or upload the .txt file.
- Review the imported playlist on Soundiiz. Adjust any details if needed and click Save configuration.
- Select Apple Music as your destination and sign in with your Apple ID.
- Open the Apple Music app and verify that the playlists have been added correctly.
Note: Soundiiz may not always transfer playlists perfectly, especially for local iTunes files. Some manual adjustments might be needed, and tools like ViWizard Apple Music Converter could be helpful for a more complete transfer.
Option 3: Using Apple Music Web Player
If you prefer a manual approach, you can use the Apple Music Web Player to recreate and organize your playlists.
- On your computer, launch the iTunes software to access your existing playlists.
- Open a compatible web browser and go to the Apple Music Web Player. Log in with the Apple ID and password associated with your Apple Music subscription.
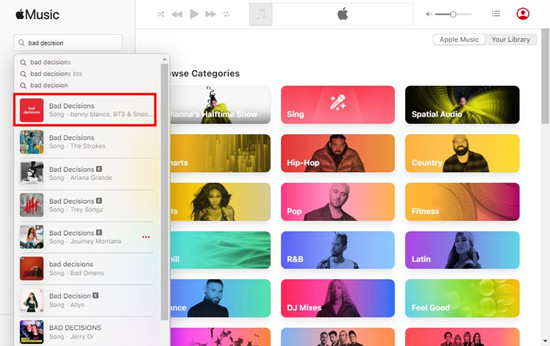
- In the Apple Music web app, click the Search field at the top of the sidebar. Enter the names of songs or albums from your iTunes playlists.
- Once you find the songs or albums, add them to a playlist in the Apple Music web app by selecting the Playlists section in the sidebar.
Part 4. How to Back Up Your Apple Music Library After The Transfer (Recommended)
While Apple Music offers a built-in way to back up your library through transferrable files like the iTunes Library.itl or iTunes Music Library.xml, there's a key limitation: using iCloud Music Library for transfer or backing up those files doesn't remove DRM protection from most content, such as music that comes with an Apple Music subscription, rather than iTunes Match or purchases. Additionally, you must keep subscribing to Apple Music to access the iCloud Music Library.
To back up your Apple Music library and transfer it anywhere, the best solution is using ViWizard Apple Music Converter. The biggest advantage of this method is that ViWizard removes any DRM protection from your Apple Music tracks. It also allows you to download and convert your music into formats that are compatible with nearly any device, such as MP3. With ViWizard, you can easily transfer your music to other platforms or devices and play it without restrictions.
Key Features of ViWizard Apple Music Converter
Free Trial Free Trial* Security verified. 5, 481,347 people have downloaded it.
- Convert Apple Music songs, albums, playlists, and artists into MP3 for easy access
- Preserve lossless audio, high-resolution lossless, and Dolby Atmos quality
- Strip DRM from Apple Music for unrestricted offline listening
- Save converted audio files while retaining full ID3 tag details
Getting started couldn't be easier. Download ViWizard, install it, and let its intuitive interface guide you through the process.
Step 1Download and Install ViWizard Apple Music Converter
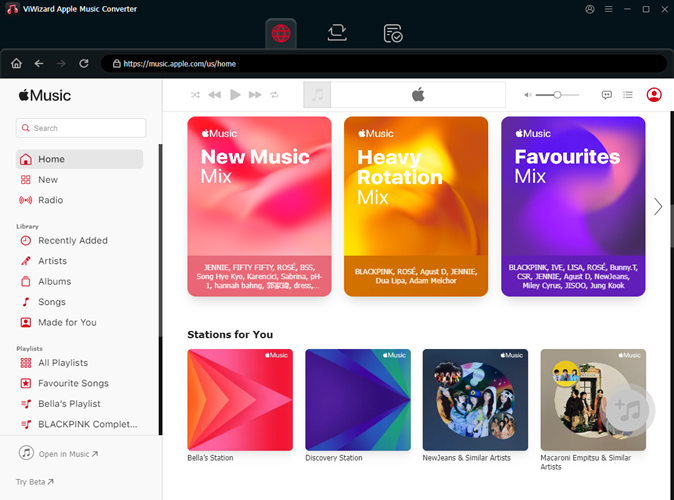
To get started, head over to the ViWizard website and download the Apple Music Converter for your computer. Once the software is installed, launch the app and sign in with your Apple Music account. This will give you access to your entire music library, including all of your playlists and albums. To begin transferring your songs, click on the "+" button and select the tracks you want to back up.
Step 2Choose Your Output Format
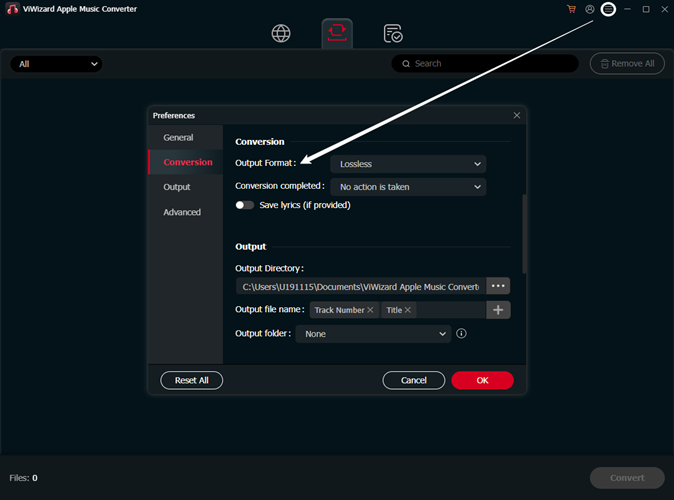
Now, it's time to choose the format for your backup files. ViWizard allows you to select from a variety of output formats, but for universal compatibility, M4A is a great choice. To adjust the settings, click on the gear icon at the top-right of the interface. Here, you can modify the sample rate, bit rate, and audio channels to match your preferences. Once you're happy with the settings, click "OK" to confirm.
Step 3Add Songs and Start the Conversion
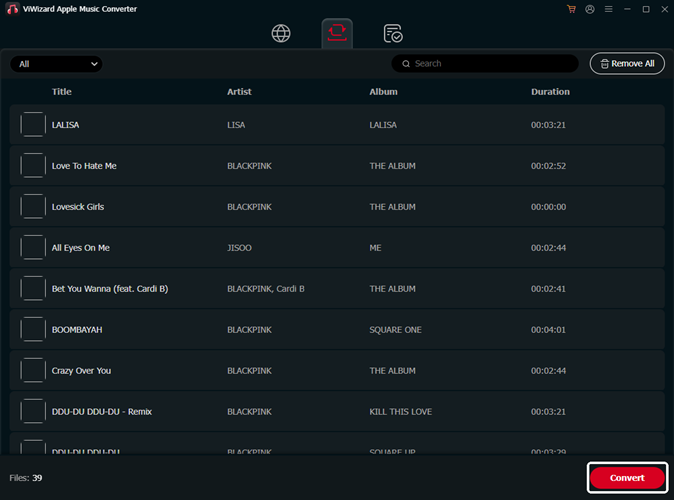
Next, browse through your Apple Music library and select the songs, albums, or playlists you want to back up. Once you've chosen your tracks, click "Add to Conversion List." After everything is added to the queue, hit the "Convert" button to start the conversion process. ViWizard will quickly convert your music into the chosen format, and the process should only take a few minutes.
Step 4Access and Use Your Converted Music
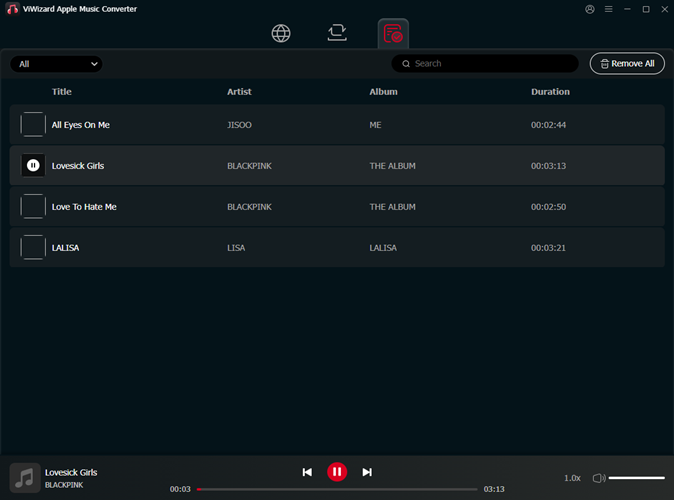
Once the conversion is complete, click on the "History" button to view your converted files. You can click the folder icon to open the directory where your files are saved. From there, you can transfer the converted music to any device, back it up, or simply enjoy it offline without any limitations tied to your Apple Music subscription.
Part 5. How to Fix Issues with Your Apple Music Library After The Transfer
Sometimes this transition can lead to a few hiccups, like duplicates or mismatches in your playlists. It's not uncommon to encounter these issues, but don't worry; they're usually easy to fix.
Fixing Duplicates
If you find multiple copies of the same song or album in your Apple Music library, it's often because of the matching system. When you upload music to Apple Music, it tries to match your tracks with its catalog, which can sometimes result in duplicates if the same song appears more than once. To resolve this, you can manually delete the extra copies from your library:
- Open the Apple Music app on your computer or mobile device.
- Go to your library and find the duplicates.
- Right-click (or Control-click) on the duplicate song or album.
- Select Delete from Library or Remove Download (depending on where the duplicate is located).
- Confirm the deletion when prompted.
Read More: Detailed Gudie to Delete Duplicates from Apple Music
Fixing Mismatched Music
Mismatched music can occur if the versions of songs in your iTunes library don't exactly match those in Apple Music's catalog. You might end up with different versions of songs or tracks that don't quite fit with what's available in Apple Music. To resolve mismatched tracks, you can manually adjust the track details or replace the mismatched songs with the correct versions:
- Open the Apple Music app on your computer or mobile device.
- Locate the mismatched songs or albums in your library.
- Check the details of each track to see if it matches the correct version.
- If a track is incorrect or has issues, you can either:
- Update the track details manually by right-clicking (or Control-clicking) on the song and selecting Edit Info.
- Replace the mismatched song by searching for the correct version in the Apple Music catalog and adding it to your library.
Read More: Detailed Gudie to Start or Stop Appple Music Matching Songs & Fix Mismatches
These fixes are fairly straightforward, but if you need more detailed guidance, check out our other posts for in-depth solutions.
You May Be Interested


Adam Gorden, the digital media specialist at ViWizard, is dedicated to providing the best solutions for digital media management, including audio and video conversion, file optimization, and media workflow enhancements.
Leave a Comment (0)