Ever set up a new iPhone and noticed your favorite playlists didn't transfer over? Or downloaded new songs on your computer, eager to enjoy them on the go? These moments highlight just how important it is to keep your Apple Music library in sync.
Syncing makes it easy to have your music ready across all your devices without the hassle of manually adding tracks. Whether you're upgrading your device, organizing your library, or enjoying new downloads, syncing ensures your music is always up to date and accessible.
If you're ready to simplify managing your music and keep everything seamlessly connected, this guide will walk you through everything you need to know about syncing Apple Music.
Can't find a way to transfer music from iTunes to Android? We've listed some of the best ways to help you sync iTunes music to Android phone.
Part 1. What Does Syncing Apple Music Mean?
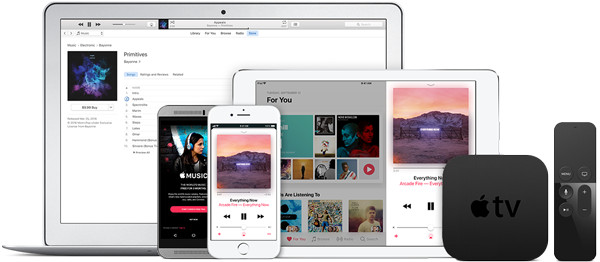
Apple Music syncing is a built-in feature that helps you keep your music library up to date across all your devices - whether it's an iPhone, iPad, Mac, or even a Windows PC. It's an essential and convenient tool, especially for those new to the Apple ecosystem. While it might sound technical at first, syncing is easy to set up and makes managing your music library much simpler.
For Non-Apple Music Subscribers

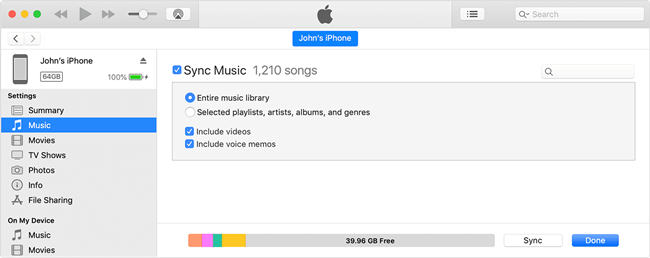
For personal music files, you don't need a subscription. You can sync your music manually using iTunes on Windows or Finder on Mac via a USB connection. This method works well for transferring your own music, and for Windows users, the files need to be uploaded to iTunes first. This manual process is separate from Apple's streaming catalog.
For Apple Music Subscribers:
For Apple Music subscribers, syncing works a bit differently. With a subscription at $10.99 per month, Apple Music content, like songs and playlists, is tied to iCloud Music Library. When iCloud Music Library is enabled, your saved songs, albums, and playlists are automatically synced across all devices signed in with the same Apple ID. This happens through the Sync Library setting.
Although you can manually transfer Apple Music files, they're encrypted and only work within Apple's ecosystem. Enabling syncing ensures a seamless experience, with your music always ready to go without manual transfers.
If this sounds like something you'd like to try, enabling iCloud Music Library is all it takes. Once activated, Apple does the rest, syncing your music library across every device.
Part 2. How to Sync Apple Music Library Across Devices
To sync your Apple Music library across all your devices, make sure the following prerequisites are in place:
Prerequisites:
- Apple ID: Ensure you're logged into the same Apple ID on all devices you wish to sync.
- Active Subscription: You need an active Apple Music subscription, iTunes Match, or iCloud+ for additional storage.
- Device Limit: You can sync your Apple Music library across up to 10 devices connected to your Apple ID, with no more than 5 of these being computers.
- Device Authorization: Any computer you want to sync with must be authorized to access the music library synced from other devices.
On iPhone or iPad:
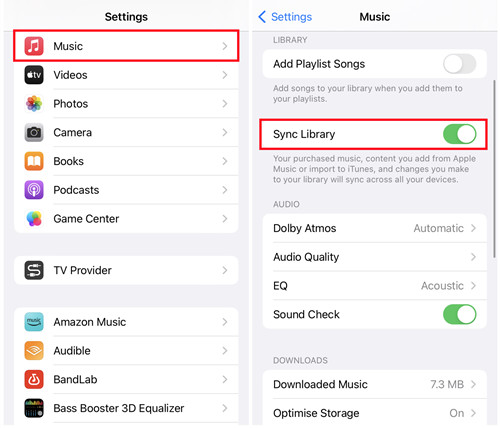
To get started, ensure your device is running the latest version of iOS. Go to Settings, select General, then tap Software Update. If there's an update available, tap Download and Install. Once updated, head to Settings, scroll down, and select Music. Toggle on Sync Library to ensure your music library is synced across all devices signed in with the same Apple ID.
On Mac:
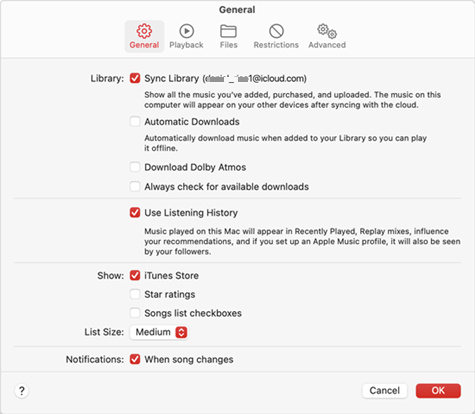
To sync your Apple Music library on a Mac, ensure you're using macOS Catalina or later. If you're on an older version of macOS, update iTunes. Open the Music app (or iTunes on older versions). In the top menu bar, click Music (or iTunes) and select Preferences. In the General tab, check the box next to Sync Library. Click OK to confirm. Your music will sync automatically across all devices with the same Apple ID.
On Windows PC:
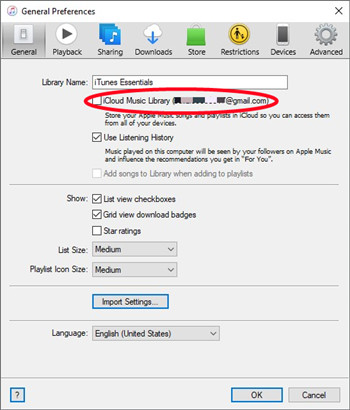
To sync Apple Music on Windows, open iTunes (ensure it's the latest version). From the iTunes menu, click Edit, then choose Preferences. Under the General tab, check the box next to iCloud Music Library and click OK. Your music library will now sync across all devices signed in to the same Apple ID.
As mentioned earlier, syncing your Apple Music library typically happens automatically. However, issues can sometimes arise. For example, certain items like specific playlists may not sync properly, or you may want to sync only certain items, like playlists, albums, songs, or even ringtones. If you encounter such issues, or if you prefer to have more control over what gets synced, you can manually force sync your Apple Music library.
Related Guides:
Read More: How to Fix Apple Music Not Syncing
Read More: Fixed: 'This Song is Not Synced Across Your Devices' on Apple Music/iTunes
Part 3. How to Sync Apple Music from Windows to iPhone
Most people are familiar with using iTunes to manage their devices and sync content, but did you know there's another option for managing your Apple devices on a Windows computer? It's called the Apple Devices app, and it's a free program designed to make syncing easier.
- Syncing via both iTunes and the Apple Devices app on the same device may overwrite content.Be sure to back up important music before starting a new sync.
- If you're using iCloud Music Library with an Apple Music subscription, syncing through iTunes or the Apple Devices app is optional. Your library is available on all devices signed in with the same Apple ID.
- Pay attention to your iPhone's storage space when syncing large libraries. You may need to manage your storage to avoid sync errors.
Option 1: Syncing Apple Music Using iTunes
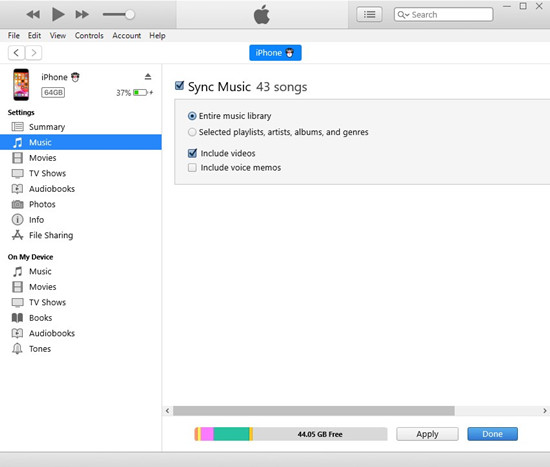
iTunes is still the go-to for syncing Apple Music from Windows to your iPhone. Here's how to do it:
- Open iTunes on your Windows PC.
- Click the drop-down menu in the top-left corner (under the iTunes logo) and select Check for Updates.
- If an update is available, follow the prompts to install it.
- Use a USB cable to connect your iPhone to your PC. Ensure you're using a certified Apple cable.
- Unlock your iPhone and tap Trust This Computer if prompted.
- Your iPhone will appear as an icon in the top-left corner of iTunes. Click it to open the device summary page.
- In the left sidebar, click the Music tab under your device settings.
- Check Sync Music and choose whether to sync your entire library or select specific playlists, albums, artists, or songs.
- Optionally, check Include videos to sync music videos.
- Click Apply to begin syncing. The progress will be shown at the top of iTunes.
- Wait for the sync to complete, then disconnect your iPhone. Your music will be available in the Music app on your iPhone.
Option 2: Syncing Apple Music Using the Apple Devices App
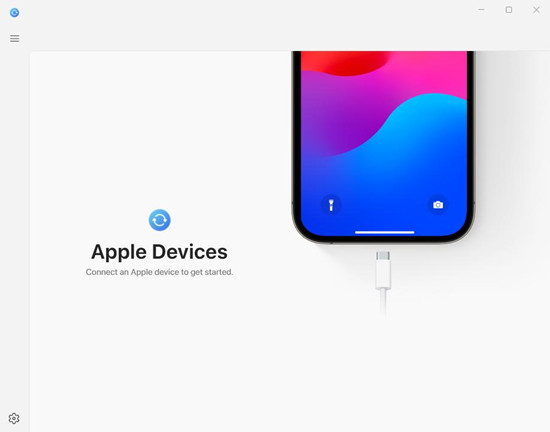
The Apple Devices app is a newer option that offers a simplified interface for syncing music. Here's how to use it:
- Open the Microsoft Store on your PC and search for Apple Devices.
- Click Get to download and install the app.
- Use a USB cable to connect your iPhone to your PC.
- Unlock your iPhone and tap Trust This Computer.
- In the Apple Devices app, click your iPhone to view available options.
- Go to the Music section to see your playlists, albums, and songs.
- Choose the playlists, albums, or songs you want to sync to your iPhone. You can also sync by genre, artist, or album.
- Click Sync to start the process.
- Monitor the progress in the app. Once completed, your music will be available on your iPhone.
Part 4. How to Sync Apple Music from Mac to iPhone
Starting with macOS Catalina, Finder has replaced iTunes for syncing content between your Mac and iPhone. Here's how to sync your Apple Music library:
If you're using macOS Mojave or earlier, you'll need to use iTunes to sync content. The syncing steps are similar to those outlined in Part 3, Option 1, for iTunes.
- Make sure your Mac is running macOS Catalina or later. If you're on an older version, you'll need iTunes to sync your music (refer to the instructions in Part 3, Option 1).
- Use a USB cable to connect your iPhone to your Mac. Unlock your iPhone and tap Trust This Computer when prompted.
- Open Finder on your Mac, and in the left sidebar, click on your iPhone under Locations.
- In the Music tab, check Sync music onto [your iPhone's name].
- Choose whether you want to sync your entire library or specific playlists, albums, artists, or songs.
- Click Apply to start the syncing process. Wait for it to complete before safely disconnecting your iPhone.
Bonus Tip: Get Started with ViWizard's Apple Music Backup and Music Syncing
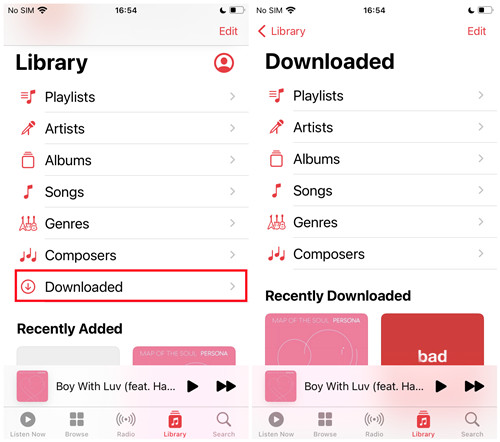
When you use iCloud Music Library to sync your iTunes library to iTunes, the music will not appear as downloaded music under the Downloaded section in the Music app on your iPhone. You'll have to redownloaded them within the Music app for offline use.
Even you don't have subscription to Apple Music, you can still transfer your iTunes library to your iPhone and have your music appear as downloaded music in the Music app. For this, you'll want to download your entire music library into transferrable music files, such as MP3. You're highly recommended to use our ViWizard Audio Converter to do this trick.
ViWizard Audio Converter is the best iTunes Music downloader that's designed for users to download all types of iTunes contents for offline use. You can add your entire iTunes library to download, including Apple Music, iTunes music, files, audiobooks, podcasts, and even Audible audiobooks. If you want to transfer your music library to iPhone, you'll need to adjust the output format as MP3, AAC, or M4A. Then you can consider replacing the digital music with your music, and do the syncing of your music library to your iPhone as downloaded music.
Key Features of ViWizard Apple Music Converter
Free Trial Free Trial* Security verified. 5, 481,347 people have downloaded it.
- Convert Apple Music songs, albums, playlists, and artists into MP3 for easy access
- Preserve lossless audio, high-resolution lossless, and Dolby Atmos quality
- Strip DRM from Apple Music for unrestricted offline listening
- Save converted audio files while retaining full ID3 tag details
Step 1Select iTunes music
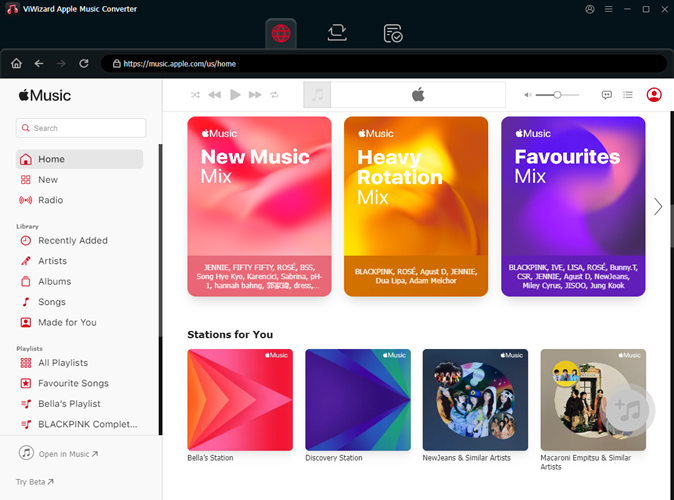
Download and install either the Mac or Windows version of the ViWizard app to your computer, and launch it and grant to open the iTunes app. This allows you access your iTunes music library directly from the iTunes app. To add music to download, you can drag and drop the items to ViWizard from the iTunes app. Alternatively, you can click the Add Music icon at the top of the screen to load your entire music library there.
Step 2Adjust output format
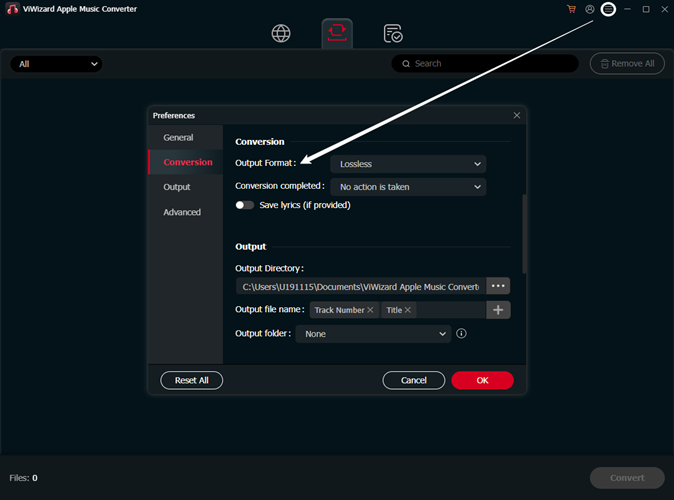
After adding, you should adjust the output format. Click the Format tab at the bottom left of the screen, and select either MP3, AAC, or M4A as the output format. After that, click OK to save this setting.
Step 3Download iTunes music library
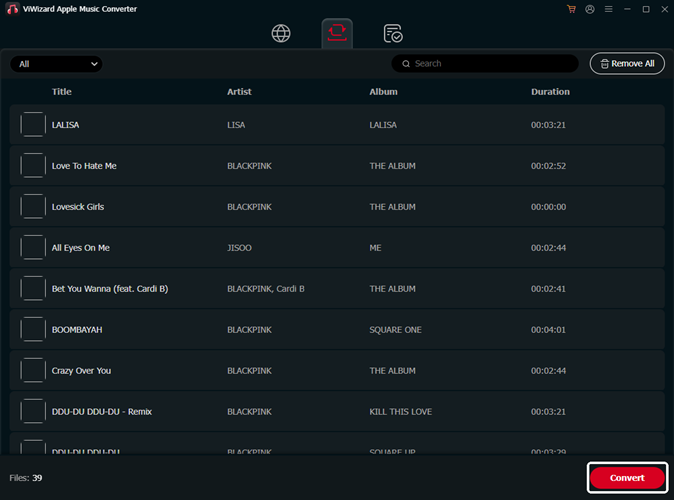
Back to the main interface of ViWizard Audio Converter, and click on the Convert button to start the conversion. Wait the conversion to complete, and click the Open button next to the output location tab to check to see the downloaded music.
Step 4Sync iTunes music to iPhone
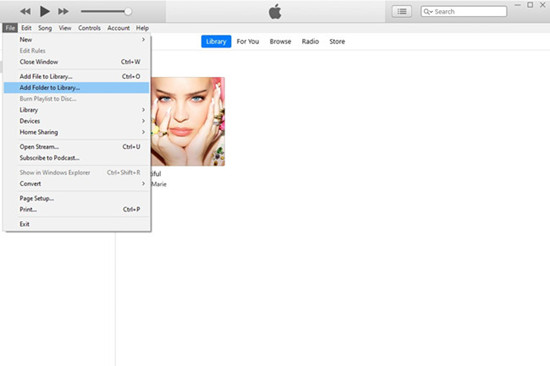
Once done, you should upload your music to iTunes by using File > Add File/Folder to Library. Later you can sync your music library to your iPhone by using the steps mentioned earlier in Part 2. To find your downloaded music specifically, open the Music app on your iPhone and tap on the Downloaded option under the Library tab. This will displayed the synced music that has been downloaded to your device.

Leave a Comment (0)