For most iOS users, screen record is a perfect feature to capture what is happening on the device's screen for future use. However, when it comes to screen record music apps on the devices - like Apple Music, the task is hard to finish due to the DRM.
In most cases, it's until Apple Music tells how a few clicks can screen record Apple Music on the device that we’ll find this out. No worries. We'd like to share some possible methods to manage to do that.
Quick answer: Why can't you screen record Apple Music, even for your personal use? Apple's protection mechanisms prevent the recording of audio within the Apple Music app.
Part 1. Why Can't I Screen Record Apple Music?
While iPhone users have the convenience of built-in screen recording, a frustrating limitation arises when attempting to capture Apple Music moments. Apple has implemented a security measure that automatically mutes the audio when screen recording is initiated within the Apple Music app. This means that users trying to document their favorite music tracks or create engaging content are left with silent recordings, lacking the vibrant sound of their selected tunes.
To overcome this obstacle and still capture the essence of your Apple Music experience, alternatives are necessary. Fortunately, there're effective Apple Music recording software for screen recording Apple Music, both on iPhone and on desktop platforms.
Part 2. How to Record Apple Music Audio on PC/Mac
While Apple Music offers a direct download option, these downloads are often temporary and tied to the subscription, limiting users in preserving their favorite tracks for the long term. For those seeking a more permanent solution, screen recording becomes an invaluable tool, allowing users to capture and save content for personal use without concerns about expiration. However, when the built-in screen recording features prove insufficient, particularly on desktop platforms, an effective alternative comes in the form of ViWizard Apple Music Recorder.
Why ViWizard Audio Converter?
When standard screen recording falls short, ViWizard Apple Music Recorder steps in to tackle the challenge. It is specially crafted to remove DRM protection from Apple Music, providing a seamless solution for users who wish to download and permanently save their cherished songs.
ViWizard Apple Music Recorder supports an array of audio formats, including MP3, AAC, WAV, FLAC, and M4B. This versatility ensures compatibility with various devices and applications, giving users the freedom to choose the format that best suits their preferences.
Recording Apple Music Audio and Exporting It to MP3:
Key Features of ViWizard Apple Music Converter
Free Trial Free Trial* Security verified. 5, 481,347 people have downloaded it.
- Convert Apple Music songs, albums, playlists, and artists into MP3 for easy access
- Preserve lossless audio, high-resolution lossless, and Dolby Atmos quality
- Strip DRM from Apple Music for unrestricted offline listening
- Save converted audio files while retaining full ID3 tag details
Step 1Add Apple Music to ViWizard
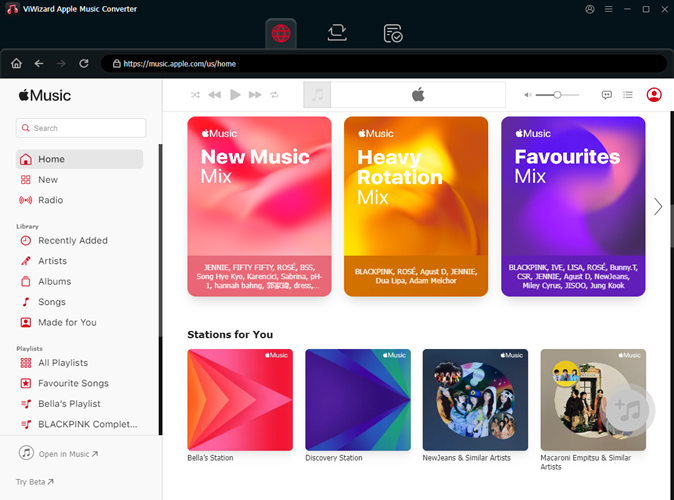
Once the ViWizard software is open, it will launches the iTunes app to build a safe connection. In ViWizard, click on the Load iTunes Library button (Add Music icon) at the top menu to let it load all the music contentes in iTunes to convert.
Step 2Remove DRM from Apple Music
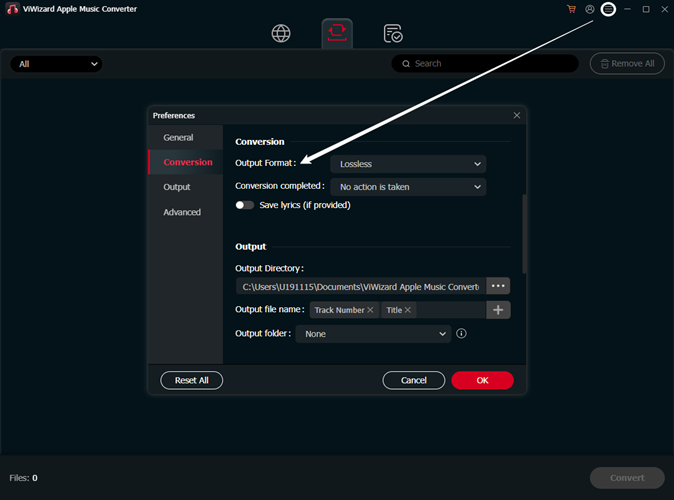
To remove the DRM, several output settings should be adjusted in ViWizard. At the bottom, click on Format option to go to Format setting. For the output format, set it as MP3. You can also customize codec, channel, sample rate and bit rate here, then OK to save these changes.
Step 3Record Apple Music in ViWizard
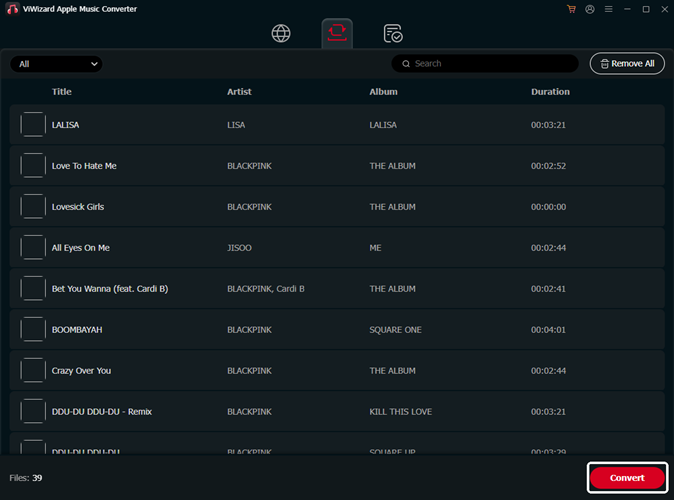
Back to the ViWizard software, click Convert to start to record Apple Music in it. Once the conversion is complete, the DRM is removed from the music contents and the files are in designated designation folder.
Syncing Recorded Apple Music Audio to iPhone:
Now that you've successfully recorded Apple Music audio on your PC or Mac using ViWizard Audio Converter, the next step is to seamlessly integrate it into your iPhone and enhance your screen recordings with video editing software. You can use iTunes or iCloud for this purpose.
- Use a USB cable to connect your iPhone to your computer. Open iTunes if it doesn't open automatically.
- If prompted, authorize your computer to access your iPhone.
- Click on the iPhone icon in the upper-left corner of iTunes to access your device.
- In the left sidebar, click on "Music" under your iPhone's name.
- Drag and drop the recorded Apple Music files into the iTunes window or use "File" > "Add File to Library."
- Confirm that the sync settings include the recorded files. Go to "Music" tab and ensure relevant playlists or folders are selected.
- Click "Apply" or "Sync" in the lower-right corner to start transferring the recorded music to your iPhone.
- Allow iTunes to complete the sync process. You'll see a notification when it's done.
- Safely eject your iPhone from iTunes by clicking the "Eject" icon next to your device's name.
Now, your recorded Apple Music files should be on your iPhone, accessible through the Music app.
Part 3. How to Screen Record Apple Music on PC/Mac
When it comes to screen recording Apple Music on PC and Mac, Joyoshare VidiKit Screen Recorder emerges as a powerful tool, offering a seamless solution to capture both audio and video.
Joyoshare VidiKit Screen Recorder is a versatile and user-friendly screen recording tool for PC and Mac. It allows you to capture any area of your screen along with system audio, making it an ideal choice for recording Apple Music content.
Screen Recording Apple Music and Saving It as MP3:
- Launch Joyoshare VidiKit on your desktop.
- In the main interface, locate and click on the "Recorder" section.
- Choose "Screen Recorder." Alternatively, if you only want to capture Apple Music audio, you can use "Audio Recorder."
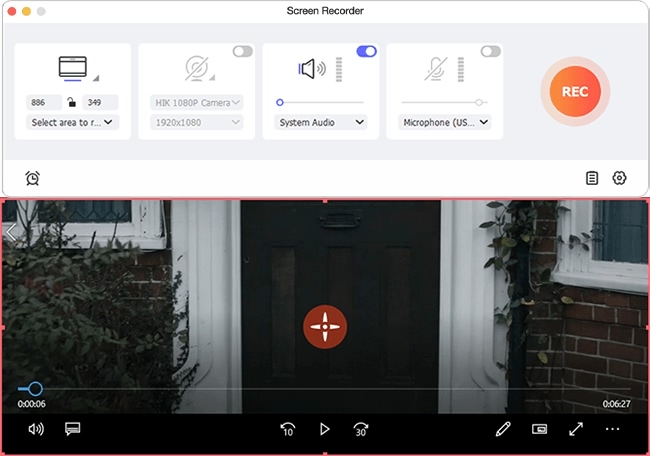
- In the screen recorder settings, adjust the capture area to match your Apple Music screen.
- Enable "System Audio" and disable the microphone to focus on capturing audio from Apple Music.
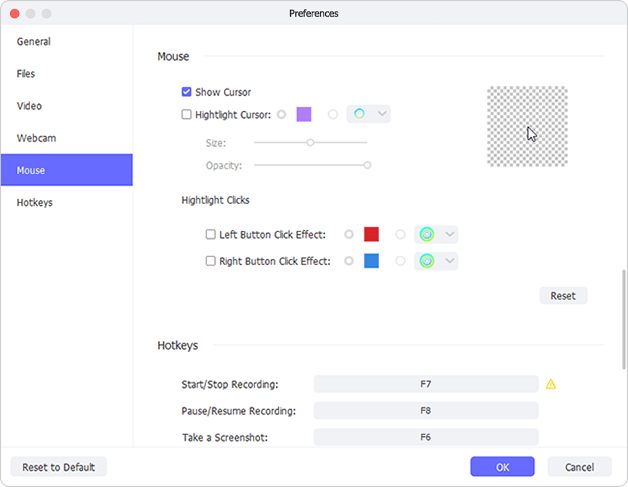
- Customize screen recording features by clicking the gear-shaped Preferences icon at the bottom right.
- Set preferences such as storage location, video format, quality, and hotkeys.
- Play a song using either the Apple Music app or Apple Music web player.
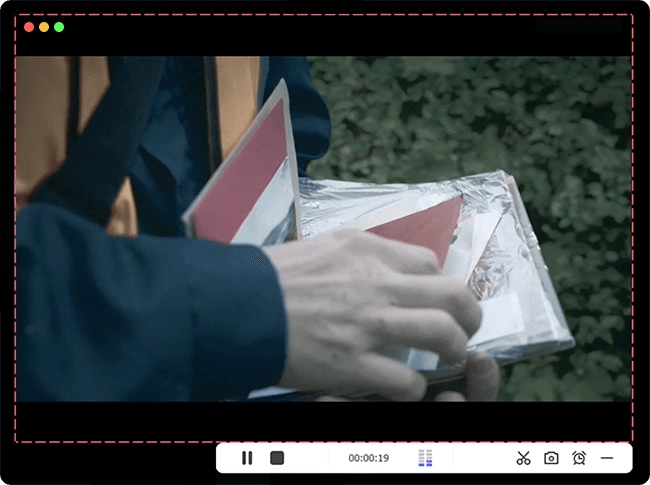
- Click the "REC" button to start screen recording. The software will capture both the video and audio simultaneously.
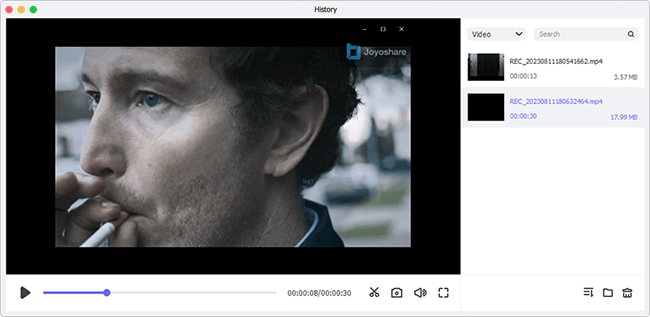
- After recording, go to the "History" interface within Joyoshare VidiKit.
- Locate the recent recording in the list and confirm that it includes the video with Apple Music audio.
- Optionally, trim the desired section and rename the file according to your preference.
Part 4. How to Screen Record Music on iPhone
Screen recording on an iPhone is a straightforward process, allowing users to capture audio, including Apple Music. Additionally, users can choose to screen record music from other apps, such as Spotify, which is compatible with iPhone screen recording. Follow these steps to screen record audio on your iPhone:
Adding Screen Recording to Control Center:
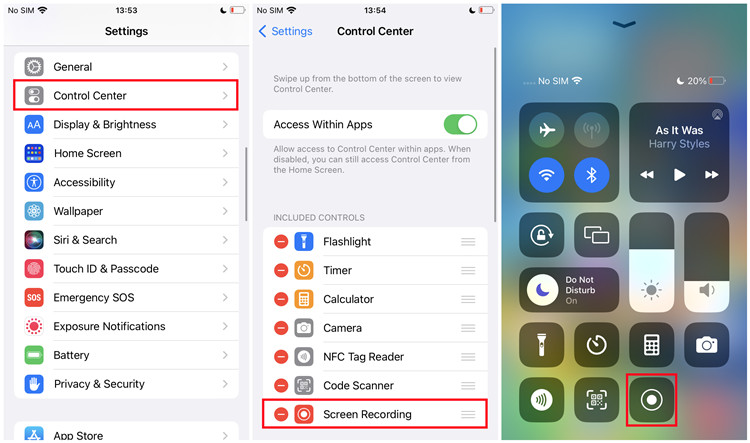
- From the Home Screen, launch the Settings app on your iPhone.
- Scroll down in Settings and select "Control Center."
- Within Control Center settings, find and tap on "Screen Recording."
- Tap the green "+" button next to "Screen Recording" to add it to your Control Center.
- Tips: Move "Screen Recording" to the top in the "INCLUDED CONTROLS" section for easy access.
- Navigate back to the Home Screen on your iPhone.
Screen Recording Music on iPhone:
- Swipe down from the top-right corner of your iPhone to open the Control Center.
- Look for the Screen Recording button in the Control Center. Press and hold it.
- The screen will display apps that can access Screen Recording. Ensure the desired music app (e.g., Apple Music or Spotify) is listed.
- Tap the Screen Recording button to begin recording. A countdown will initiate.
- Once the countdown finishes, your iPhone will start recording the screen. Perform actions within the chosen music app, be it Apple Music or Spotify.
- Return to the Control Center and tap the blinking red recording indicator to stop the screen recording.
- The recorded session is saved in the Photos app under "Videos" or "Screen Recordings."


Leave a Comment (0)