We all have that special music collection—albums that bring back memories or songs we just can't stop playing. It's great to have your music ready on your phone or computer, whether it's for a long drive or a workout. But what if you find an old CD you haven't listened to in years? You can't just add it to your Apple Music playlist.
That's where iTunes comes in. It makes it easy to turn your old CDs into digital files that you can store and sync across all your devices. Once everything's set up, your music collection will be organized and ready to go with just a few clicks.
In this guide, we'll show you how to rip a CD with iTunes, the key things to consider before starting, and some alternatives if you'd rather not use iTunes. We'll also explain how to burn a CD from your digital Apple Music library. We'll break it all down into simple steps to make the process as easy as possible.
Wondering whether it's possible to burn Apple Music to CD? Here we go. This tutorial will show you how to burn Apple Music to CD in a few clicks only.
Part 1. Key Considerations When Ripping a CD to iTunes
Ripping a CD with iTunes is a great way to digitize your music collection, allowing you to import songs directly into your iTunes library and listen to them without needing the CD. However, there are a few things to consider to get the best results. Based on the experiences of many users, here are some key points to keep in mind:
Key Points for Ripping a CD to iTunes
Choose the Right Format: iTunes offers different formats, each affecting sound quality and metadata handling. For the best audio and metadata preservation, use Apple Lossless (ALAC). AAC is a good balance between quality and file size and is the default format for ripping CDs in iTunes, but it may not be supported by non-Apple devices. WAV lacks metadata support, which can be inconvenient for organizing your library.
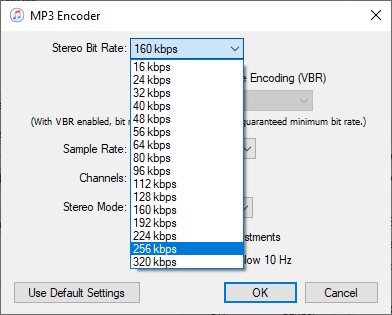
- For large collections, consider ripping to a lossless format like FLAC for archival purposes, then converting to MP3 for portable use. To adjust the format settings in iTunes, go to Edit > Preferences > General > Import Settings. From there, you can select the MP3 Encoder and adjust the bitrate and other options.
Consider Using External Software: For more control over the ripping process, consider using tools like XLD (X Lossless Decoder). This software improves metadata retrieval and supports additional formats like FLAC, offering better organization than iTunes alone.
Ripping Speed: The speed of ripping depends on your CD drive. Users have reported up to three times faster speeds with better external drives compared to built-in ones, reducing the time spent on the process.
Metadata and Album Art: iTunes automatically grabs metadata and album art, but it's not always accurate. If you encounter missing or incorrect information, Mp3tag can help you fix or enrich metadata.
Digitizing Audiobooks: For audiobooks, merging tracks into a single file is recommended for smoother playback, eliminating interruptions between chapters. This can be done directly in iTunes or with external software.
Creating CDs and DVDs: iTunes also supports creating audio CDs, MP3 CDs, and data CDs/DVDs.
Part 2. How to Rip a CD using iTunes (or Apple Music)
If you're already comfortable with iTunes, it's easy to digitize your music collection by ripping your CDs. But before you start, there's one important step: set up iTunes to rip your CDs in the format you prefer. By default, iTunes rips CDs into AAC format, which works well for Apple devices, but if you need more flexibility or better quality, you'll want to change the settings.
- Large Collections: When dealing with a large number of CDs, break the process into batches for easier organization.
- Error Correction: Enable error correction in the Import Settings for better accuracy, especially with damaged or old CDs.
- Automatic Eject: Enable the "Eject CD after importing" option in Preferences > General for convenience.
Step 1 Set Up iTunes to Insert the CD
- Download and install the latest version of iTunes from the Apple website or Microsoft Store (for Windows).
- Follow the on-screen prompts to complete the installation and restart your computer if needed.
- Launch iTunes from your desktop (Windows) or Applications folder (Mac).
- Insert the CD into your computer's CD/DVD drive. If your computer doesn't have a built-in drive, use an external USB drive.
- iTunes should automatically detect the CD. If it doesn't, click the CD icon in iTunes to start the process.
Step 2 Configure Import Settings
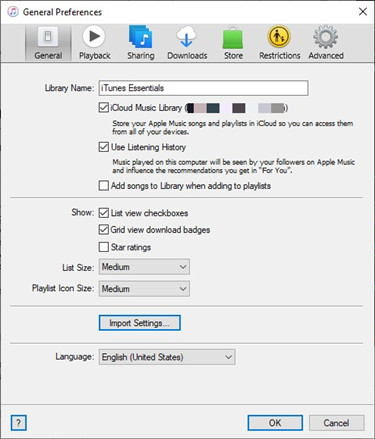
- Open iTunes, go to Edit > Preferences (Windows) or iTunes > Preferences (Mac).
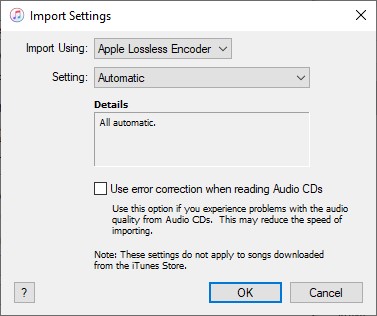
- Under the General tab, click Import Settings to choose your format. For higher-quality audio, select Apple Lossless Encoder (ALAC). If you prefer smaller files, select AAC Encoder or MP3 Encoder and set the bitrate to your desired value. For example, MP3 at 256 kbps is a great balance between quality and file size.
- Ensure Use error correction when reading Audio CDs is enabled to improve ripping accuracy, especially with scratched or damaged CDs.
Step 3 Import the CD
- Once the CD is detected, iTunes will display a list of tracks. You can choose to import the entire CD or select specific tracks.
- Click Import CD to start the ripping process. The time taken will depend on your CD drive speed and the number of tracks.
- After ripping, the tracks will be added to your Library > Recently Added section.
Part 3. Tips for Organizing Your Apple Music Library After Ripping
After ripping your CDs into iTunes (or Apple Music), organizing your music library is the next important step. Though iTunes offers some basic sorting features, customizing them for your needs is key to a more efficient music collection. A well-organized library makes it easier to find and enjoy your music, saving you time when searching for specific tracks or albums.
Tip 1: Check Metadata and Album Art

iTunes automatically retrieves metadata and album art, but it's not always flawless. You might find discrepancies or missing information. If something's incorrect, right-click (Windows) or Control-click (Mac) on the track, and select Get Info (Mac) or Song Info (Windows) to edit the metadata and update the album art.
Tip 2: Organize and Customize Your Library
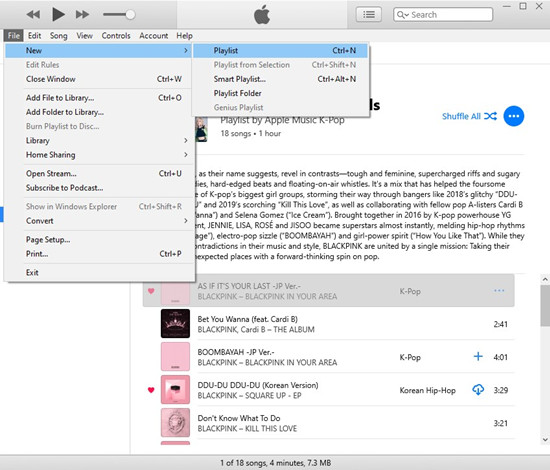
- Create Playlists for Easy Access: Keep your library organized by creating playlists. Drag and drop tracks into the playlist section for access to your favorite music or specific genres. You can also create smart playlists in iTunes that automatically update based on rules you set, like genre or rating. This is great for dynamically curating your music collection.
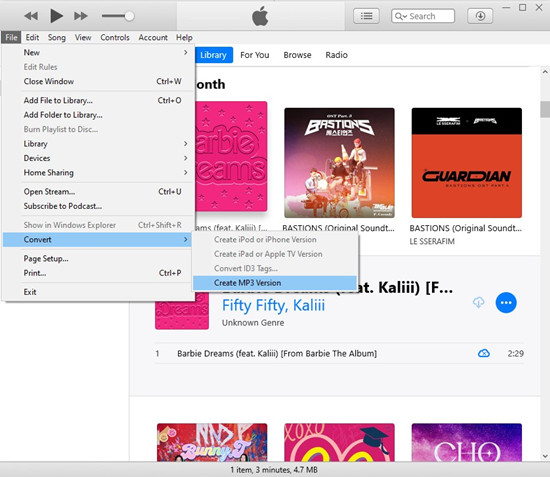
- Convert Tracks for Portability: If you want to convert your tracks to MP3 for easier portability, go to File > Convert > Create MP3 Version. You can also adjust the bitrate in the Import Settings for a smaller file size, ideal for mobile devices.
- Consider Lossless Formats for Long-Term Storage: Consider ripping your CDs to a lossless format like Apple Lossless (ALAC) first. Later, you can convert these tracks to MP3 for portable use without sacrificing too much sound quality.
Part 4. Best Alternatives to iTunes for Ripping a CD
While iTunes is a popular choice for ripping CDs, there are other great alternatives that offer unique features or cater to different user preferences. Whether you're using Windows, macOS, or Linux, here are some of the best tools for ripping CDs:
Alternative 1: Windows Media Player (Windows)
Windows Media Player is a built-in application on Windows that offers an easy way to rip CDs into digital files.
How to Rip a CD with Windows Media Player:
- Insert the CD into your computer's CD drive.
- Open Windows Media Player and select the "Rip CD" button when the CD is detected.
- Go to Rip Settings > Format to select the audio format (MP3, WMA, etc.).
- Adjust the bitrate for better audio quality.
- Click Rip CD to start the process.
- The files will be saved to your default music folder.
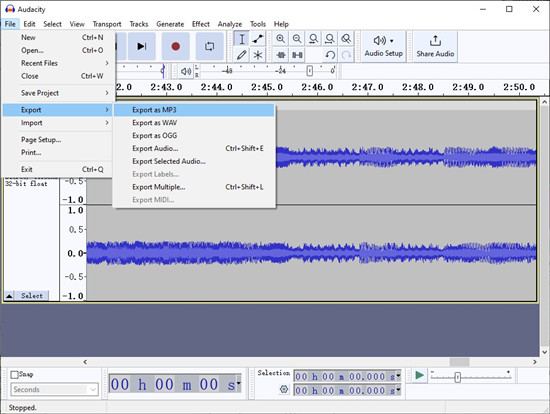
Alternative 2: Audacity (Windows, macOS, Linux)
Audacity is a free, open-source audio editor. It allows you to rip CDs and edit and adjust the audio before exporting, perfect for users who want more control over the sound.
How to Rip a CD with Audacity:
- Install Audacity from the official website.
- Insert the CD into your computer's CD drive.
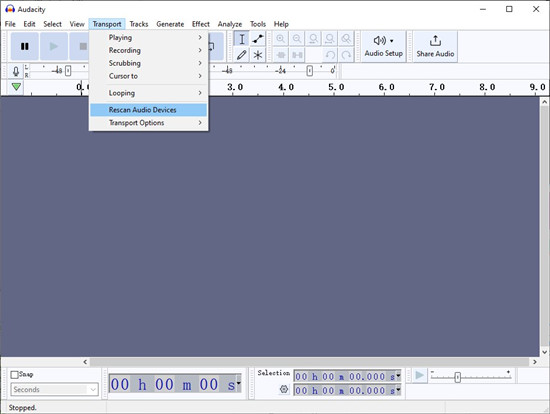
- Open Audacity, go to Transport > Rescan Audio Devices to detect your CD drive.
- Select the CD drive as the input device, then press Record and play the CD.
- Audacity will record the audio in real-time.
- Once done, select File > Export to save the tracks in MP3, WAV, or FLAC formats.
Part 5. How to Rip MP3s from Apple Music and Burn a New CD
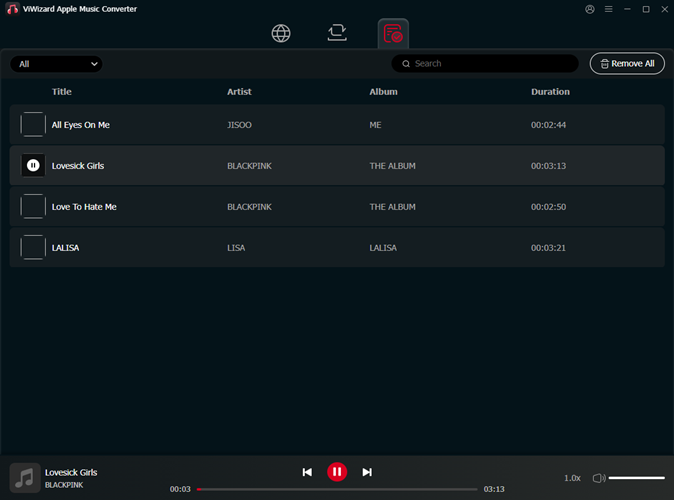
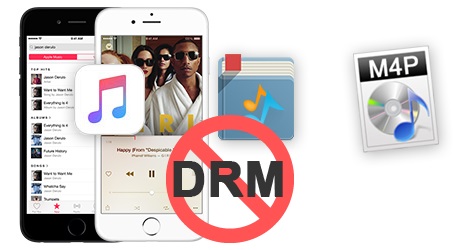
If you want to burn a CD from your Apple Music tracks, MP3 is a great format to use. It works with almost all CD burners and devices, from car stereos to portable players. The challenge with Apple Music is that its tracks are protected by Digital Rights Management (DRM), which means you can't just burn them directly onto a CD. That's where ViWizard Apple Music Converter comes in.
ViWizard Apple Music Converter lets you remove the DRM protection from Apple Music and convert tracks into MP3, AAC, or WAV formats. Once converted, you can easily burn the music onto a CD without any issues. The process is simple. After converting your Apple Music tracks with ViWizard, just import them into your CD-burning software. From there, you can burn your custom CD, and you won't have to worry about DRM anymore. ViWizard also keeps the original sound quality, so your music will sound just as good on the CD as it did on Apple Music.
Key Features of ViWizard Audio Converter
Free Trial Free Trial* Security verified. 5, 481,347 people have downloaded it.
- Convert Apple Music songs, albums, playlists, and artists into MP3 for easy access
- Preserve lossless audio, high-resolution lossless, and Dolby Atmos quality
- Strip DRM from Apple Music for unrestricted offline listening
- Save converted audio files while retaining full ID3 tag details
Step 1Download and Install ViWizard Apple Music Converter
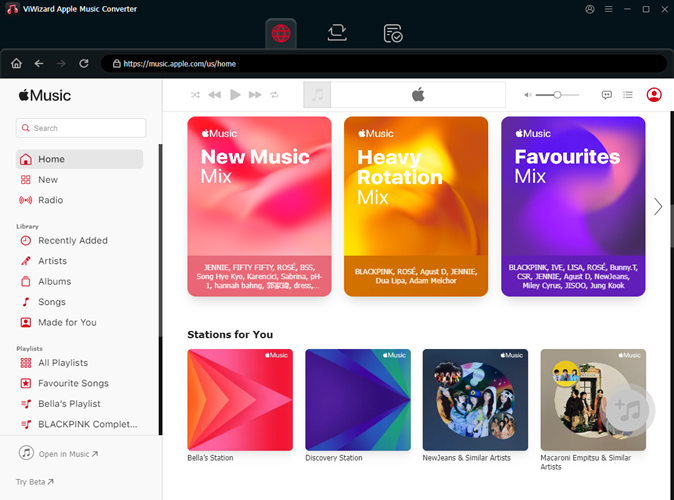
First, download and install the ViWizard Apple Music Converter on your computer. This software is designed to convert your Apple Music library into formats like MP3, WAV, or AAC, which are perfect for creating CDs. Once installed, open the program and sign in using your Apple Music account credentials. After logging in, you can access all of your playlists, albums, and tracks. To start, click the "+" button to select the songs, albums, or playlists you want to convert.
Step 2Choose Your Output Format
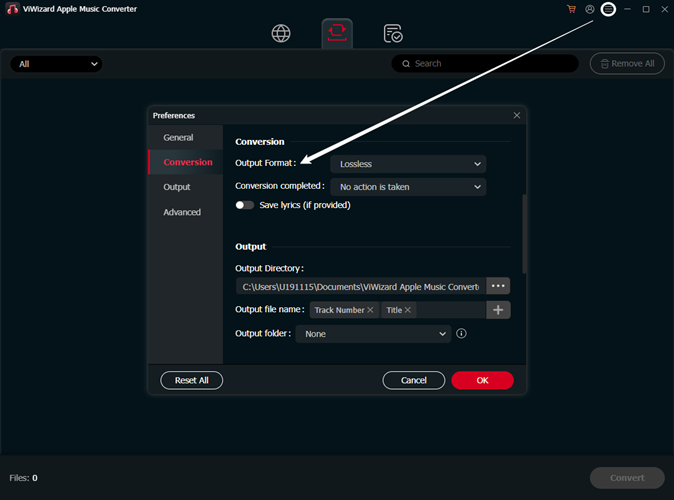
Once you've added your music to the list, you'll need to select the output format. MP3 is often the best choice, as it works with most CD burners and devices. You can also choose other formats like WAV or AAC depending on your preferences. To adjust additional settings like sample rate or bit rate for your output files, click the settings icon in the top-right corner. Once you're happy with your settings, click "OK" to save them.
Step 3Add Your Music and Start the Conversion
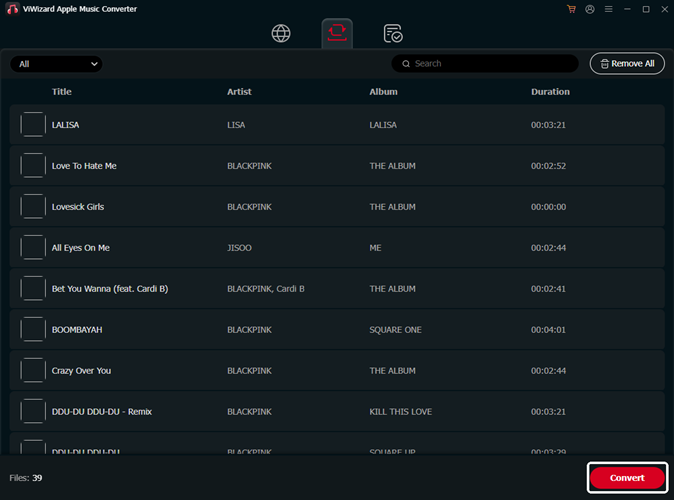
Browse your library and select the tracks or albums you want to convert. If you want to convert specific songs, you can paste the URL directly into the ViWizard interface. After selecting your desired files, click "Add to Conversion List" to queue them up. When you're ready, hit the "Convert" button to start the conversion process. ViWizard will download and convert the files into your chosen format.
Step 4Access and Use Your Converted Files
Once the conversion is complete, click on the "History" button to locate your converted files. You can then click the folder icon to directly access the location where your tracks are saved. From here, you can transfer the files to your devices, use them in applications, or burn them onto a CD for offline listening without the need for an Apple Music subscription.
Conclusion:
With ViWizard, you can take your Apple Music collection offline in a physical format. Whether you're making a playlist for yourself or creating a gift, this tool makes it easy to get your music ready for burning to a CD. It's a great solution for anyone who wants to listen to Apple Music anytime, anywhere.
You May Be Interested

Rick Lee, an IT solutions expert with 25 years of experience, specializes in system optimization, troubleshooting, and security. He's the author of over a dozen books and helps businesses and individuals solve tech challenges.
Leave a Comment (0)