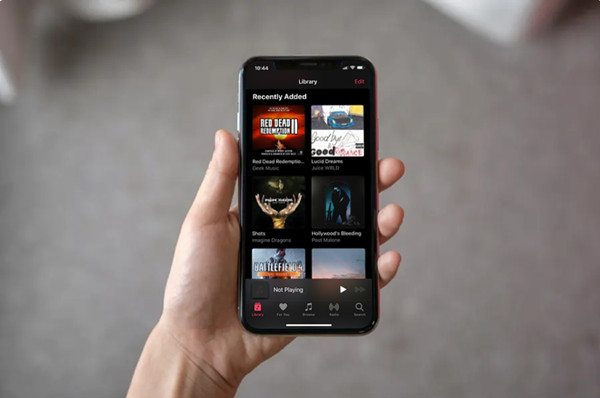
It's a bummer when you open your Apple Music app and find that all your music is suddenly missing! This usually happens if you missed a payment or let your subscription lapse for a while.
Before 2022, missing a payment just meant your account would be temporarily suspended. Apple would keep trying to charge you for a while, and once the payment went through, everything - your songs, playlists, albums - would be right where you left them. But now, it's a bit more complicated. If your payment lapses, not only do you lose access to all the Apple Music exclusives, but your entire music library, including playlists, can disappear.
Part 1. Can I Get My Apple Music Back After Renewal?
The truth is, when your Apple Music subscription ends, Apple doesn't guarantee that your library will still be there when you come back. While iCloud Music Library stores your music in the cloud, it's tied to your active subscription. If your subscription is inactive for too long, there's a chance that your playlists and songs could be permanently deleted from Apple's servers. That's why it's always a good idea to re-subscribe as soon as possible. But even then, some users have found that their music is gone for good after reactivating their account.
If you're lucky, your Apple Music playlists will still be intact after renewal. But don't count on it. So, what can you do? If you manage to get your music back after renewing, back it up right away. Export your playlists and save them locally to your device or computer, because once they're gone, there's little you can do to recover them. Don't wait for the worst - be proactive and protect your collection.
If you haven't re-subscribed yet, do it as soon as possible to increase the chances of getting your music back. And once you do, make it a habit to back up your library, so you never have to worry about losing your playlists again.
Part 2. How to Get Music Back on Apple Music
Whether you've simply missed your music after letting your Apple Music subscription lapse or discovered your playlists are gone entirely, this guide is here to help you recover what you can. The steps below will walk you through restoring your Apple Music library, but if these don't work, you might need to try other methods. If you're still unable to get your music back, check out our other post for additional tricks on how to restore your Apple Music library.
Here you can find the step-by-step process to restore your Apple Music seamlessly after subscription ends.
Renew Apple Music Subscription
First things first, if your subscription has expired, you'll need to renew it. Without an active Apple Music subscription, your access to your music library, including any saved playlists and songs, is cut off. To renew:
On iPhone or iPad:
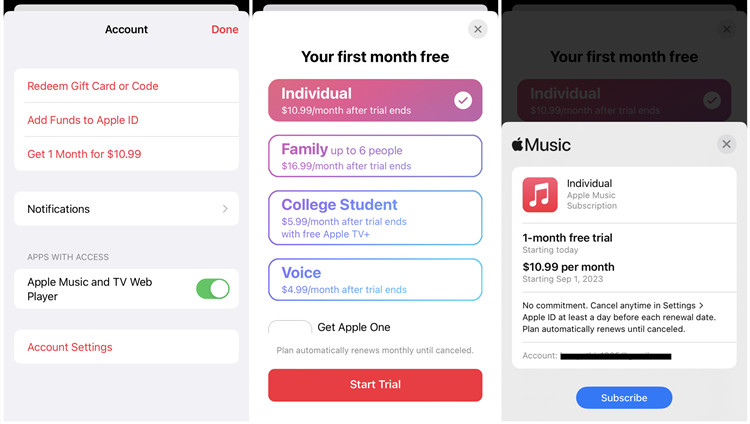
- Open Settings.
- Tap [your name] at the top of the screen.
- Go to Subscriptions.
- Find Apple Music and tap Renew or Resubscribe.
On PC (via iTunes):
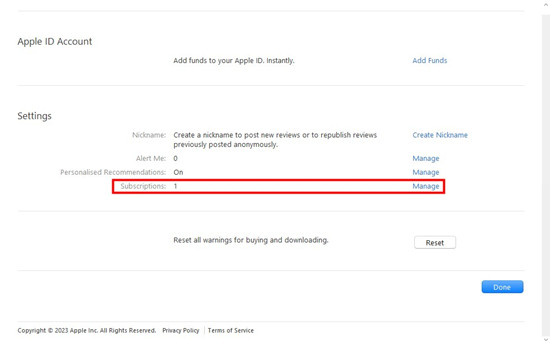
- Open iTunes.
- Go to Account at the top of the menu bar.
- Select View My Account.
- Scroll to Manage Subscriptions.
- Find Apple Music and follow the prompts to renew your subscription.
Once your subscription is renewed, your Apple Music features should be restored, but your playlists may still be missing. That's where the next steps come in.
Step 2: Re-enable iCloud Music Library
Your iCloud Music Library is the key to syncing your music across all your devices. If it's been disabled (either automatically when your subscription lapsed or manually), re-enabling it could restore your playlists and saved songs. Here's how:
On iPhone or iPad:
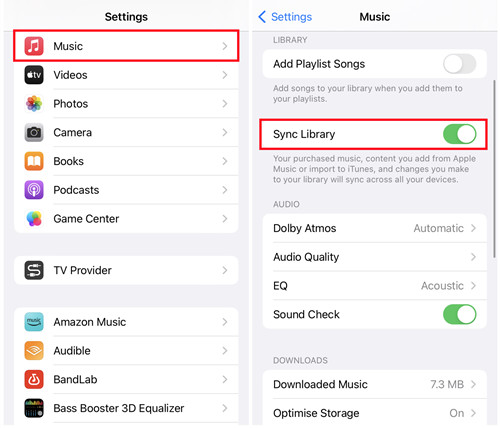
- Open Settings.
- Scroll down and tap Music.
- Find the iCloud Music Library option and toggle it on (or enable Sync Library for newer iOS versions).
- Wait for your library to sync.
On PC (via iTunes):
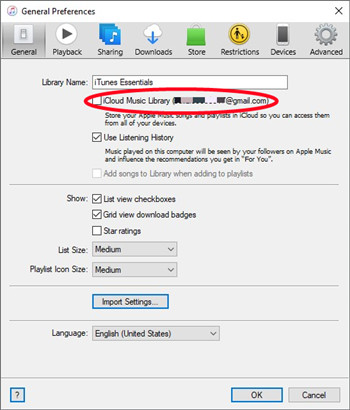
- Open iTunes.
- Click Edit at the top, then choose Preferences.
- In the General tab, check the box next to iCloud Music Library (or Sync Library).
- Click OK and allow time for your library to sync.
After re-enabling, give it a few moments for the library to sync. If you're lucky, your playlists will reappear!
Step 3: Redownload Purchased Music
If you've purchased music through iTunes, you can easily redownload those tracks even if your Apple Music subscription has expired. Follow these steps:
On iPhone or iPad:
- Open the iTunes Store app.
- Tap More (three dots at the bottom).
- Go to Purchased, then select Music.
- Scroll through your purchased tracks and albums.
- Tap the Download icon next to any items you want to redownload.
On PC (via iTunes):
- Open iTunes.
- Click Account in the top menu.
- Select Purchased.
- Click Music and view your previous purchases.
- Click the Download button next to the songs or albums you want to recover.
Step 4: Restore Deleted Playlists
If your playlists were accidentally deleted or disappeared when your subscription lapsed, you might still be able to recover them. Unfortunately, Apple doesn't provide a specific "restore playlist" feature, but you can try the following:
On iPhone or iPad:
- Open the Music app and check the Recently Added section. If you've just re-enabled iCloud Music Library, your playlists may reappear here.
- Scroll through to see if your old playlists show up after the sync completes.
On PC (via iTunes):
- Open iTunes and check your playlists under the Library section.
- If you still don't see your playlists, try restarting iTunes or re-syncing with iCloud.
Step 5: Recover Music from Backup
If you've been regularly backing up your iPhone or PC, you can try restoring your Apple Music library from a backup. For iOS users, restoring a full iCloud or iTunes backup might bring back your music, although it will also restore your entire device to a previous state.
On iPhone (iCloud Backup):
- Open Settings and go to General.
- Scroll to the bottom and tap Reset > Erase All Content and Settings.
- After your phone restarts, choose to Restore from iCloud Backup during setup.
- Select the backup that includes your Apple Music library.
On iPhone (iTunes Backup):
- Connect your iPhone to your PC with a USB cable.
- Open iTunes and select your device.
- Choose Restore Backup and select the relevant backup file.
On PC (Local iTunes Library Backup):
- Locate your backup folder on your PC.
- Replace the current iTunes library file with the backed-up version.
- Open iTunes and see if your playlists and songs are restored.
Part 3. How to Export Apple Music Library
In case anything ever happens to your account or subscription, it's best to export your Apple Music library. Even though Apple Music stores your music in the cloud, it's always a smart move to create a local backup.
One easy way to do this is by using iTunes on your PC or Mac. You can export your playlists or the entire library as an XML file, which stores:
- Launch the iTunes app on your PC or Mac.
- Click on File in the top menu, then select Library.
- Choose Export Library to save your entire library or Export Playlist to save a specific playlist.
- In the pop-up window, select XML from the "Format" dropdown.
- Name your file and choose where to save it. If exporting the entire library, it will be automatically named "Library.xml." Click Save to complete the export.
- Navigate to the saved location to find your XML file, which now contains all your music metadata.
- To restore your library, open iTunes and select File > Library > Import Playlist. Locate your XML file, select it, and your playlists will reappear in iTunes.
Part 4. How to Back Up Apple Music Library Safely
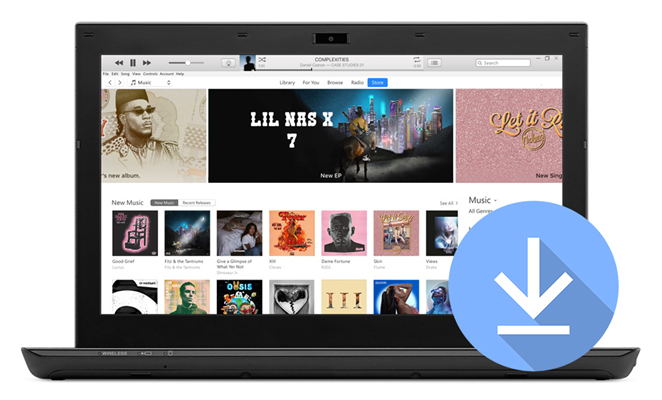
Creating a backup of your Apple Music library as music files on your devices makes senses for reasons. For starters you can listen to the actual music files on any media player on your devices, such as the iTunes software, Music app and more. Even after you missed your Apple Music payment, your access to your library won't disappear, and it's easier for you to import your music files to your Apple Music library at no extra cost. And it's easy for you to do the syncing of your music library to your Apple devices and listen to them as downloaded music in the Music app. Additionally, you can transfer your music library to a storage device or cloud service such as the most common USB.
It's worth noting that Apple Music downloads have DRM-protection, and the iTunes software require certain file formats, so you may need to convert your entire music library to a compatible file format by using an Apple Music downloader called ViWizard Audio Converter.
Best Apple Music Downloader for Apple Music Backup - ViWizard
Added with the DRM-removal function, ViWizard Apple Music Converter is designed for Apple Music users who want to create a backup of their own music libraries as music files. You can download and convert music tracks in iTunes to MP3, M4A, M4B, WAV, AAC, and FLAC. Lossless audio and all the metadata data will be kept with the downloaded music files.
In addition to Apple Music songs, iTunes contents such as iTunes files, songs, podcasts, audiobooks and Audible audiobooks can be converted and downloaded by ViWizard.
Key Features of ViWizard Apple Music Converter
Free Trial Free Trial* Security verified. 5, 481,347 people have downloaded it.
- Convert Apple Music songs, albums, playlists, and artists into MP3 for easy access
- Preserve lossless audio, high-resolution lossless, and Dolby Atmos quality
- Strip DRM from Apple Music for unrestricted offline listening
- Save converted audio files while retaining full ID3 tag details
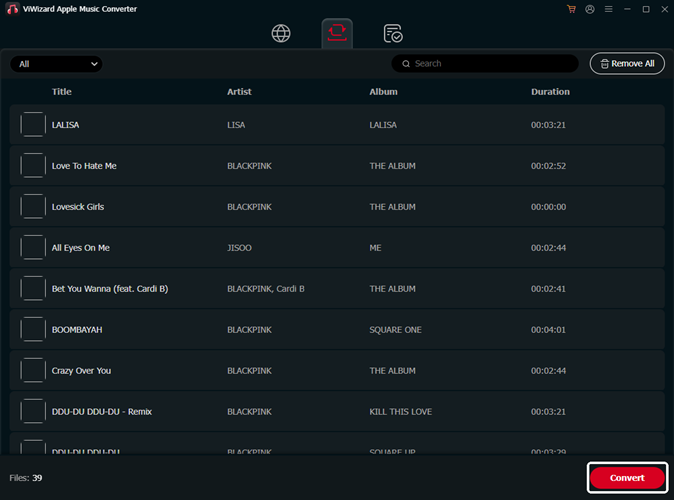
Step 1Add Entire Music Library
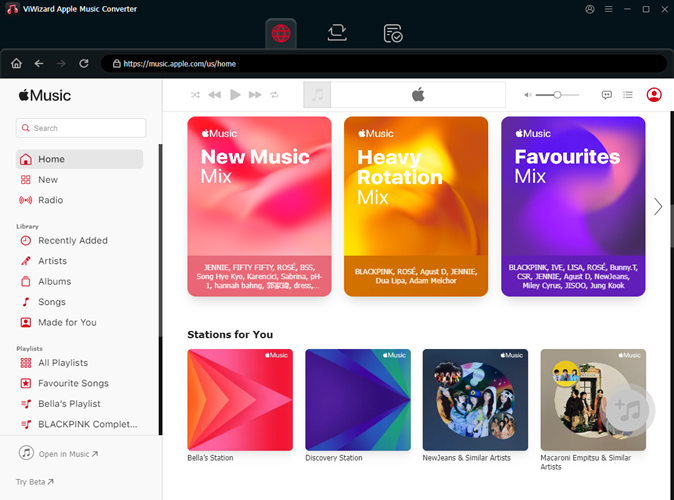
On your PC or Mac, launch ViWizard Audio Converter and choose to launch the iTunes software. Now add what you want to download and convert from iTunes by using drag/drop. Or you can load your entire music library by clicking on the Add music library button at the top. Just select any music tracks you want to download.
Step 2Adjust Output Format
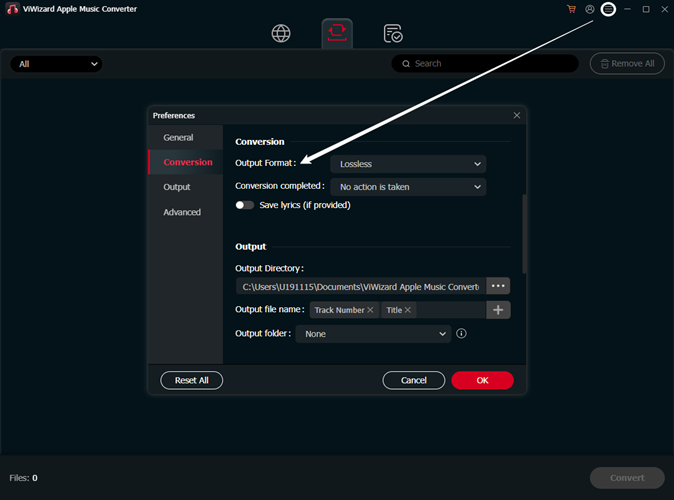
Then, click the Format tab at the bottom of the screen. You can choose MP3, M4A, M4B, WAV, AAV, or FLAC as the output format for your Apple Music downloads. Just click OK to save your changes.
Step 3Download Entire Music Library
Back to the main interface of ViWizard, and click the Convert button to start the conversion. Then conversion of your music library will be completed at a 30x super faster speed. And you will get a music folder that contains all the music files.

Leave a Comment (0)