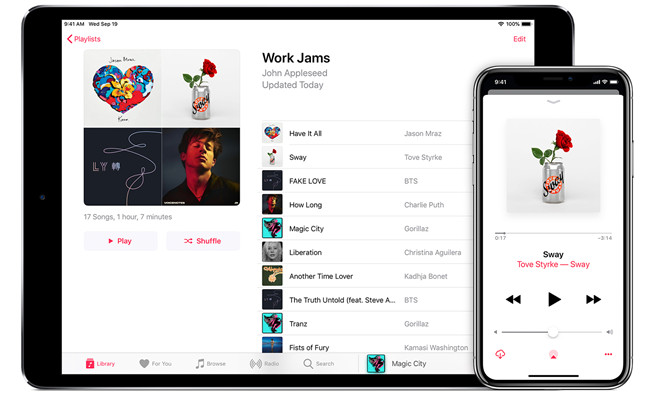
Apple Music makes it easy to build your music library with a variety of playlist options.
You can create your own playlists by picking your favorite songs, or let Apple Music recommend playlists based on your listening habits. If you enjoy discovering new music, personalized playlists are perfect for you, offering fresh suggestions that match your taste. If you've already built a great collection of songs, both Genius playlists and Smart playlists can help with music discovery or give you a nostalgic vibe. And if you love mixing things up, Apple Music offers collaborative playlists, where you and your friends can create a playlist together.
But it doesn't stop there. If you have your own collection of music, like songs from CDs or purchases from the iTunes Store, you can easily add them to your playlists, too. Apple Music makes it simple to combine your personal library with the playlists it suggests, giving you complete control over your music experience.
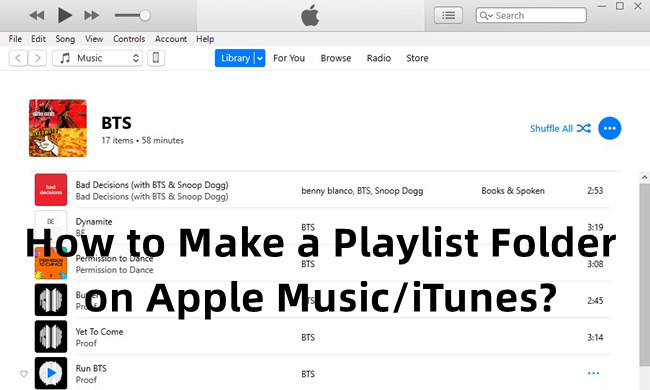
You'll learn how you can make a playlist folder to include your standard or smart playlists in iTunes or Music app. In addition to adding items to the folder, you can even change the items order in the folder and sync it to your iOS device.
Step 1: Choose Your Apple Music Playlist Type
When getting started with Apple Music playlists, the first step is deciding which type best suits your needs. Apple Music offers several options to help you curate and enjoy your music, each with its own unique features. Here's a breakdown of the different types:
Curated Playlists: Let you handpick your favorite tracks to match a specific mood or occasion.
Personalized Playlists: Are tailored to your listening habits, offering fresh song suggestions you might enjoy. You'll find these playlists ready to explore in the Home section, without having to create them yourself. You can also use these suggestions as inspiration for your own curated playlists.
Smart Playlists: Are dynamic and change over time, automatically updating based on your music preferences. However, they require a solid song collection in your library and preset criteria, so it's important to know exactly what you want from them.
Genius Playlists: Are generated by Apple Music based on a song you choose. These playlists bring together tracks that complement the song, often focusing on fresh releases and helping you discover music similar to what you already love.
Collaborative Playlists: Let you and your friends add songs together. You'll need to follow your friends and share the playlist with them. While it's a fun way to share music, it also runs the risk of being accidentally altered.
Activity-based Playlists: Are created with a specific purpose or activity in mind. You can combine your favorite songs, local files, and iTunes purchases into one playlist, keeping your music organized while blending personal and streaming tracks.
When deciding which playlist to create, think about how you want to use it. Are you curating a collection of your top songs, or would you prefer a playlist that evolves with your music taste over time? Do you want to share it with friends or keep it more personal? Apple Music gives you the flexibility to choose the playlist type that best fits your unique music style.
Step 2: Create a Playlist on Apple Music
Apple Music lets you create playlists across different devices, including your iPhone, iPad, Android phone, and computer. While the basic steps are similar on all platforms, there are a few small differences to note depending on what device you're using.
Once you've created a playlist, you can always come back to it, add new songs, or make changes. Just follow the steps for your device and remember, you can always tweak your playlist as your music preferences evolve.
For iPhone/iPad/Android phone:
- Open the Apple Music app on your smartphone or tablet.
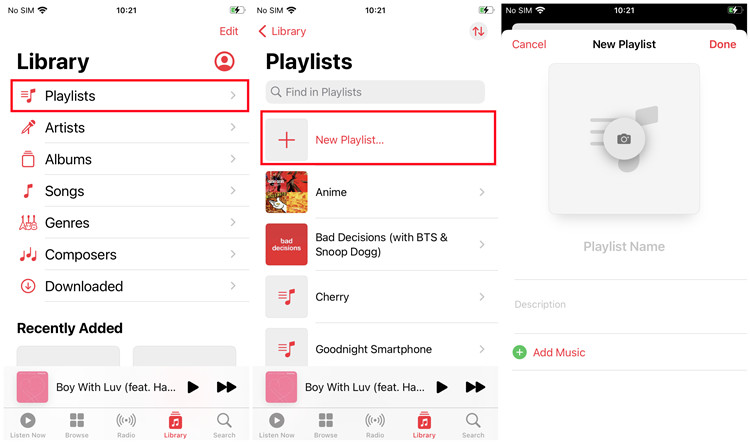
- Tap the Library tab at the bottom of the screen, then select Playlists from the contents menu.
- Tap New Playlist at the top of the Playlists section on iPhone and Android. On iPad, scroll to the bottom to find this option.
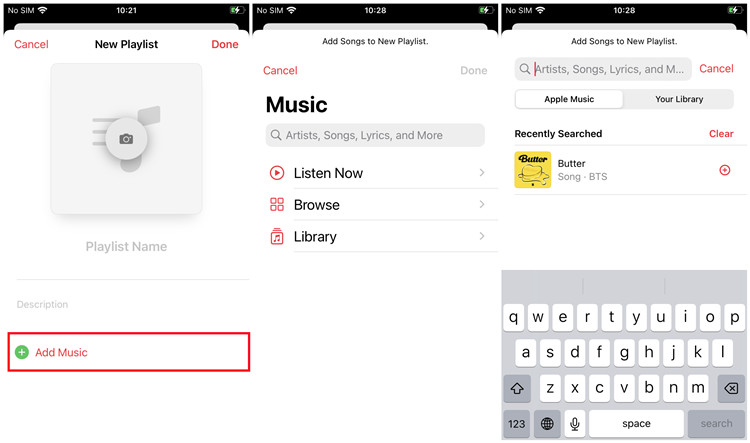
- Edit the playlist name, and feel free to add a description. To add music, tap Add Music, search for the songs you want, and tap the Add button next to the title to add them to your playlist.
- Tap Done (or the checkmark √) to save.
- Go back to the Playlists section, where you'll find and view your new playlist along with any existing ones.
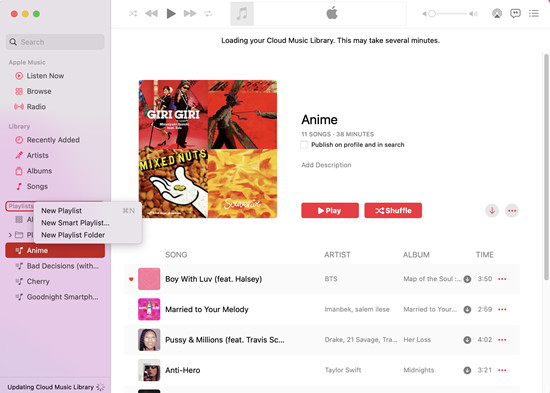
For Mac/Windows:
- Open the Music app on Mac or iTunes on Windows.
- Find the Playlists section in the sidebar, then right-click on the blank area below it.
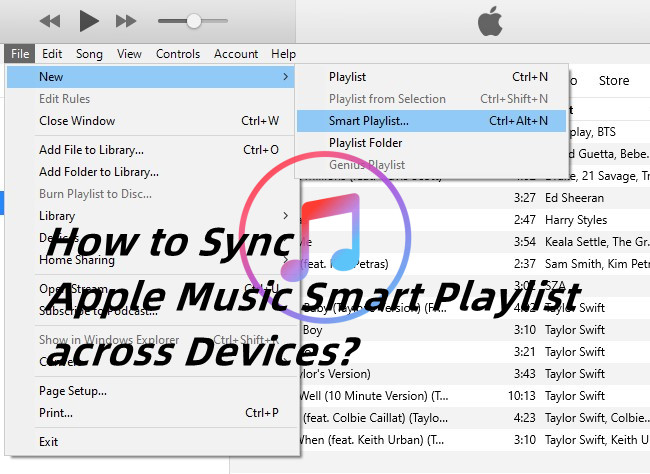
- You can then choose to create a new playlist, smart playlist, or playlist folder in your music library. For a standard playlist, select New Playlist.
- Name your playlist. If you're using Music on Mac, you can also add a description.

Other Playlist Creation Guides:
- Smart Playlist: How to Create Apple Music Smart Playlists
- Collaborative Playlist: How to Make a Collaborative Playlist on Apple Music
- Genius Playlist: What Is Genius Playlist on Apple Music?
- Personalized Playlist: What Does Apple Music Recommend?
Step 3: Add Music to Your Apple Music Playlist (or Skip It)
Now that you've created your playlist, it's time to add some music to it so you can start enjoying it right away. If you're creating a playlist that's automatically updated by Apple Music, like a Smart Playlist or Genius Playlist, you can skip this step. These playlists automatically update with new music based on your preferences, so you don't need to manually add anything.
However, if you want to curate your playlist manually, here's how to add music to your new playlist:
Option 1: Adding Music from an Existing Playlist
For iPhone/iPad/Android phone:
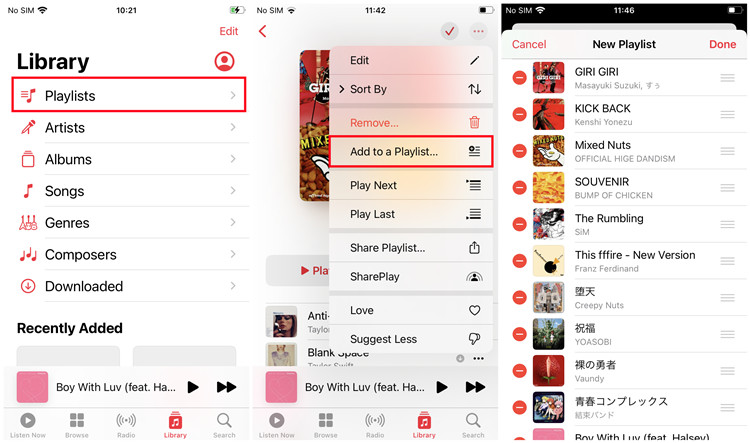
- Open the Apple Music app and go to Library > Playlists.
- Select the playlist you want to add songs from.
- Tap the three vertical dots icon in the upper-right corner.
- Tap Add to a Playlist from the menu that appears.
- Choose the playlist where you want to add the songs. If you select New Playlist, a new playlist will be created with the songs from the original playlist.
- All songs from the original playlist will be added to your new playlist.
For Windows/Mac:
- Open the Apple Music or iTunes app on your computer.
- Under the Playlists section, select an existing playlist.
- Drag and drop songs to the new playlist. To select multiple tracks, hold Ctrl (Windows) or Cmd (Mac) while clicking on them, then drag them into your playlist.
Option 2: Adding Music from Your Library or Apple Music
For iPhone/iPad/Android phone:
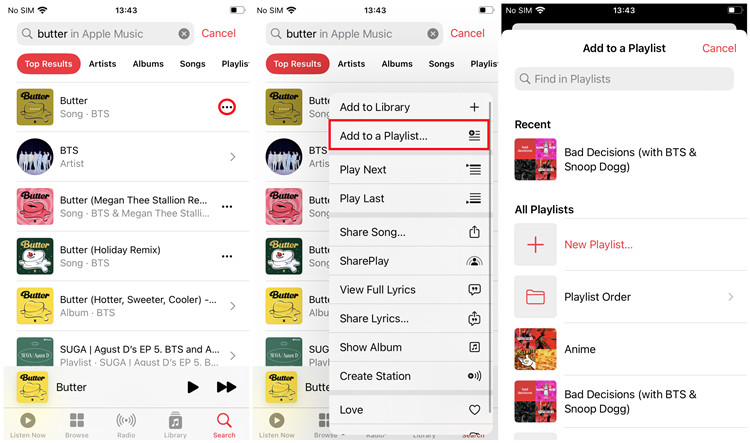
- Open the Apple Music app.
- Tap Search at the bottom of the screen.
- Type in the song or artist you want to add to your playlist.
- Once you find the music, tap the Add to Playlist button.
- Select the playlist where you want to add the track.
For Windows/Mac:

- Open the Apple Music or iTunes app.
- Click on Search in the sidebar (Apple Music) or the upper-right corner (iTunes).
- Type in what you want to add - whether it's a song, album, or artist - and choose your source (your library or Apple Music).
- Once you find the track, click the Add button next to it.
- Choose the playlist to which you'd like to add the music.
You can start listening to it right away, shuffle the tracks, or even make edits as you go. If you prefer to leave your playlist empty for now, feel free to skip adding music and revisit it later when you're ready to add more songs.
Step 4: Customize and Edit Your Apple Music Playlist
Once you've added music to your playlist, you might want to personalize it further - whether it's by changing the playlist's name, adding a description, or even selecting a profile photo. Apple Music makes it easy to customize and tailor your playlists to suit your style.
For iPhone/iPad/Android phone:
- Open the Apple Music app.
- Go to Library > Playlists.
- Select the playlist you want to edit.
- Tap the three vertical dots icon in the upper-right corner of the screen.
- Choose Edit Playlist from the menu that appears.
- Here, you can change the name of your playlist, add or modify the description, and even select a new profile photo if you want to make it more personal.
- Once you're done, tap Done to save your changes.
For Windows/Mac:
- Open the Apple Music or iTunes app.
- In the Library section, click on Playlists.
- Right-click on the playlist you want to edit and select Edit.
- A window will pop up where you can change the name and description of your playlist.
- After making your changes, click OK to save.
More Playlist Customization Tips:
- Change Playlist Order: How to Change the Order of Playlists in Apple Music
- Remove Duplicates: Fastest Way to Check and Delete Duplicates on Apple Music
Step 5: Manage Your Apple Music Playlist Settings
After creating and customizing your playlist, you may want to ensure it stays synced across all your devices. Apple Music makes this easy by providing options to sync your entire library or select specific playlists, ensuring everything is up-to-date and accessible wherever you are.
Option 1: Syncing Apple Music Playlists Automatically
For iPhone/iPad:
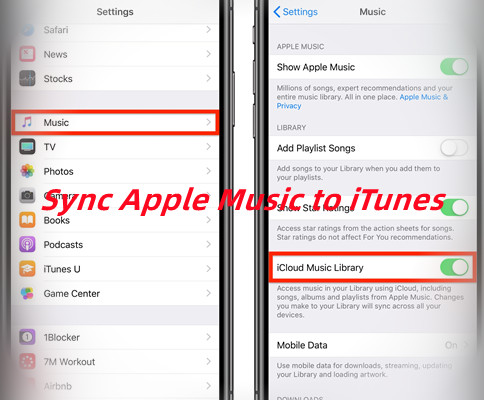
- Open the Settings app on your device.
- Scroll down and tap Music.
- Toggle Sync Library on if it's not already enabled.
- In the Sync Music section, select Selected Playlists, Artists, Albums, and Genres.
- Under Playlists, choose the specific playlists you want to sync to this device.
- Your selected playlists will now sync automatically, staying updated and accessible on all your devices.
For Windows/Mac:
- Open the Apple Music or iTunes app.
- Go to Account > Sign In and ensure you're logged in with the same Apple ID on all devices.
- Navigate to Music > Preferences (Mac) or Edit > Preferences (Windows).
- In the General tab, check the box next to Sync Library.
- Under Library > Playlists, select the playlists you want to sync across devices.
- Once enabled, your selected playlists will sync automatically.
Option 2: Syncing Apple Music Playlists Manually
If you prefer manual syncing, you can follow these steps:
- Connect your device to your PC or Mac using a USB cable.
- Open the Apple Music or iTunes app.
- Select your device from the sidebar in Apple Music or the top-left corner in iTunes.
- Navigate to the Music section under your device settings.
- Toggle Sync Music on if it's not already enabled.
- Choose Selected Playlists, Artists, Albums, and Genres, then select the specific playlists you want to sync.
- Click Apply or Sync to start the process.
Read More: How to Sync Library on Apple Music
Step 6: Download Your Apple Music Playlist to MP3
You may know that any curated Apple Music playlist is protected by Apple's digital rights management. That means even you choose to download your playlists on Apple Music, you won't be able to transfer them to other platforms or devices for playing. To download your playlists off Apple Music, you have to use a tool called ViWizard Audio Converter.
ViWizard Audio Converter is designed for iTunes users to download all types of Apple Music contents into transferrable music files, including MP3, M4A, M4B, WAV, AAC, and FLAC. Besides playlists, you can also download songs, albums, artists, genres, podcasts and even audiobooks off iTunes directly to your computer. By downloading your favorite playlists to your devices, you get the ability to play them anytime, anywhere.
Key Features of ViWizard Apple Music Converter
Free Trial Free Trial* Security verified. 5, 481,347 people have downloaded it.
- Convert Apple Music songs, albums, playlists, and artists into MP3 for easy access
- Preserve lossless audio, high-resolution lossless, and Dolby Atmos quality
- Strip DRM from Apple Music for unrestricted offline listening
- Save converted audio files while retaining full ID3 tag details
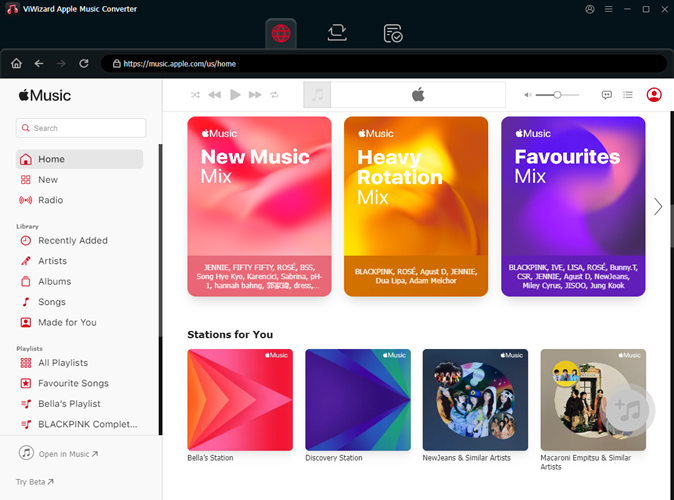
Step 1 Select iTunes playlists
Download and install the correct version of the ViWizard app to your computer and launch it. When prompted, grant to open the iTunes app. Now you can drag your playlists from iTunes and drop them to ViWizard. Or you can load your entire music library by clicking on the Add Music icon at the top of the window, and select and add your music there.
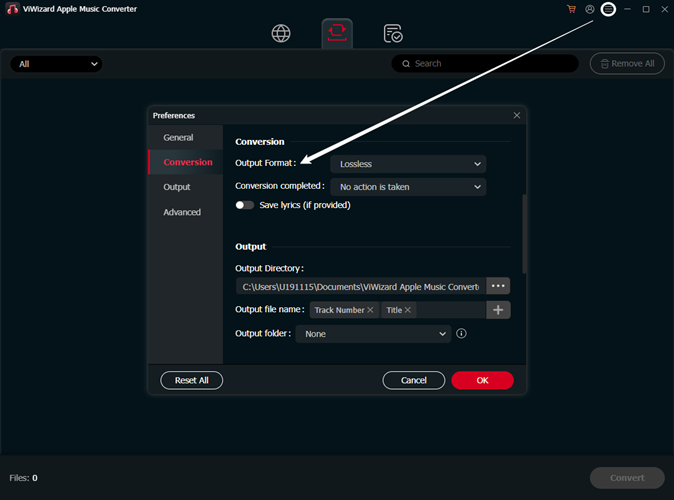
Step 2 Adjust output format
After the playlists are added, click on the Format tab at the bottom left. Select the desired format, such as MP3. And click on the OK to save this change.
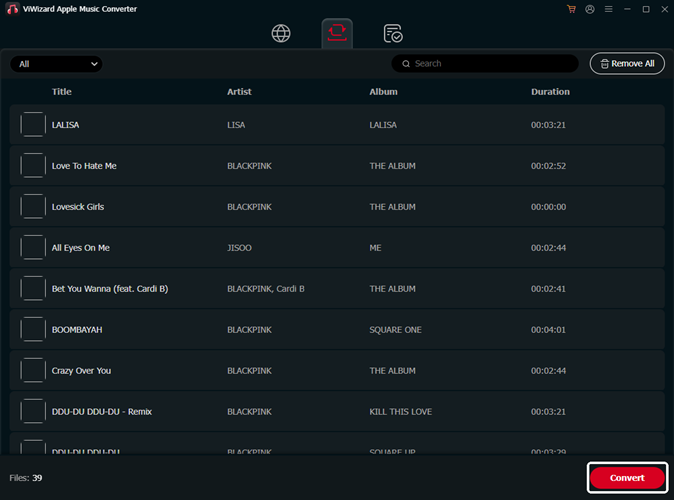
Step 3 Download iTunes playlists
Back to the main interface of the ViWizard app, and click on the Convert button in the lower-right corner to start converting and downloading the music tracks in batch. Wait until the conversion to complete, and click on the Open button next to it. This will open the music folder that contains all the downloaded music.
Conclusion
With the ability to create a playlist on Apple Music, you can always create a music library that reflects your individual taste and style. With ViWizard Audio Converter, you can download your entire music library with all your playlists offline.
You May Be Interested


Adam Gorden, the digital media specialist at ViWizard, is dedicated to providing the best solutions for digital media management, including audio and video conversion, file optimization, and media workflow enhancements.
Leave a Comment (0)