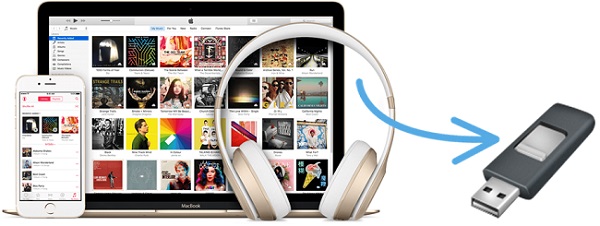
Once upon a time, there was this frustrating notion that you could only play your favorite Apple Music songs on devices connected to your account. Unfortunately, this still holds true today. The so-called "streaming lock" (officially known as Digital Rights Management, or DRM) used by Apple Music means that even though you can download your favorite tracks for offline listening, you're essentially locked into Apple's ecosystem. Once you cancel your subscription, those songs disappear, and your downloaded music becomes useless. The worst part? You can't save those Apple Music songs to a USB drive, play them on other devices like your car stereo, or use them as a backup for your Apple Music library.
But here's the good news: it doesn't have to be this way. One solution is to convert your Apple Music songs to a format like MP3, making them portable and usable with a USB drive. In this guide, we'll show you how to easily transfer your Apple Music songs to a USB drive. No more worrying about restrictions or losing access to your favorite tracks. Let's get your music onto your USB stick and ready to play wherever you want.
Part 1. Can You Save Apple Music to a USB Drive?
Apple Music's DRM protection has long been a barrier for those wanting to freely transfer their music across devices. While Apple Music is a streaming service, meaning you're essentially paying for access to the music rather than owning the files, it does present a limitation. You can prove you have the right to listen to a song simply by logging into your account on any supported device or platform. But when it comes to transferring your Apple Music tracks to a USB drive, you'll need a workaround.
Though the idea seems simple enough, it's nearly impossible to transfer your entire Apple Music library with the actual files for personal use. The files are saved in special formats like M4P, which is DRM-protected. If you've bought music, you'll get DRM-free AAC files. However, these formats are primarily designed to work on Apple devices, not on others. Even if you find these files on your device, playing them freely elsewhere through a USB drive isn't feasible.
Tool You'll Need: ViWizard Apple Music Converter
To avoid this issue, you'll need ViWizard Apple Music Converter to remove the DRM protection and convert the music into a transferable file format. Why is this important? It's all about flexibility. ViWizard Apple Music Converter is a powerful DRM-removal tool designed specifically for Apple's music catalog. It allows you to save your music however and wherever you want. With just a few clicks, you'll have your favorite Apple Music tracks ready to play on any device, including via USB.
A full-featured Apple Music converter that easily converts Apple Music songs, albums, playlists—including iCloud Music Library content, personalized recommendations, and curated playlists—into MP3, M4A, M4B, WAV, AIFF, and FLAC so you can keep your Apple Music forever or transfer it to any device without restrictions.
If you're still unsure about where to find your downloaded files, you can check the storage locations on your device. But for seamless conversion, we recommend using ViWizard Apple Music Converter for the best results.
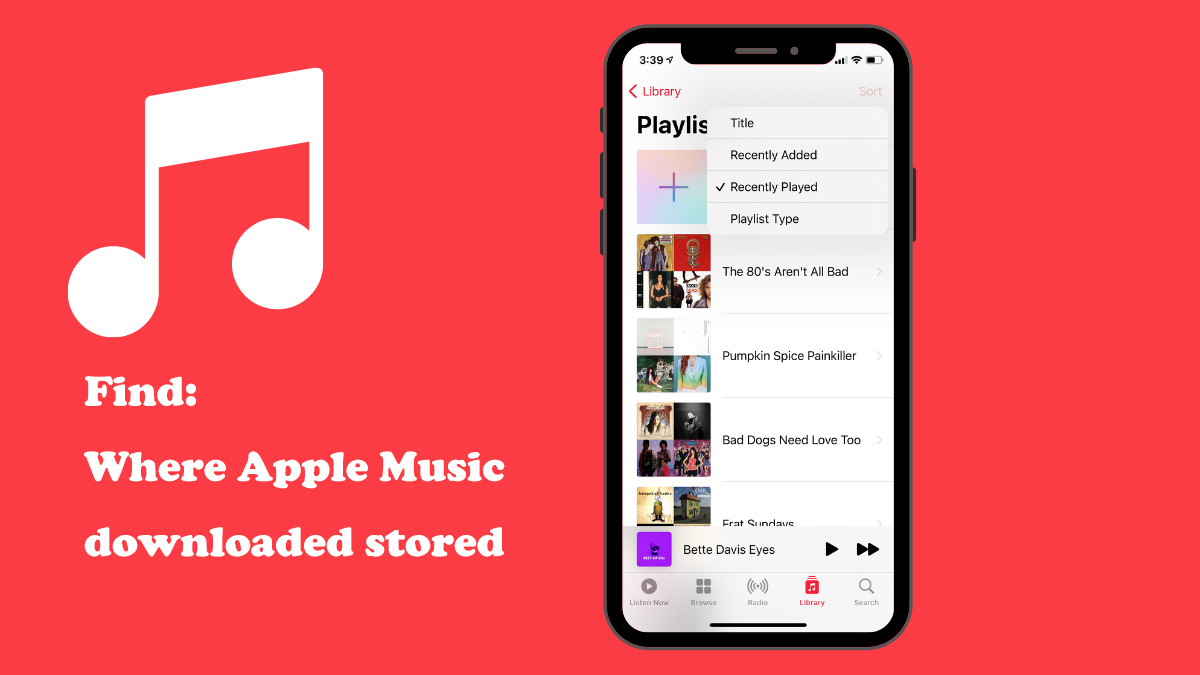
Apple Music allow premium users to download music for offline playing. Do you know where the downloads Apple Music stored on your device? Let's have a look.
Part 2. How to Convert and Download Apple Music to a USB Drive (Recommended)
What You Need:
- Apple Music Account: You'll need an active Apple Music subscription to access and download your favorite tracks.
- ViWizard Apple Music Converter: A tool to convert and remove DRM protection from Apple Music files, allowing you to save them in universally playable formats like MP3.
- USB Drive: A USB drive with enough space to store your converted Apple Music files.
- Computer: A computer with sufficient storage to download and convert the music before transferring it to the USB drive.
- Internet Connection: A stable internet connection to download your Apple Music tracks and use ViWizard for conversion.
This is probably the easiest way to get your Apple Music onto a USB drive. ViWizard Apple Music Converter is a tool designed specifically to convert Apple Music songs, playlists, and albums into formats that you can use on any device. It's incredibly easy to use: Download and open ViWizard Apple Music Converter, which lets you access your Apple Music library directly through a web browser for a familiar experience. From there, select any track you'd like to convert and add it to the conversion task list. Adjust the settings, choosing MP3 or another popular format, and start converting. Once the files are converted, you can easily locate them and transfer them onto your USB drive. It's that simple.
By using ViWizard Apple Music Converter, you've found an easy, fast, and secure way to save your Apple Music to a USB for a permanent backup. No more worrying about DRM restrictions or whether your Apple Music will work on non-Apple devices. Plus, there's no download limit. Just remember, the converted music is for personal use only.
Lossless audio, Dolby Atmos with Spatial Audio, and 256Kbps AAC qualities will be preserved based on your account settings, so you don't have to compromise on sound quality. Even the ID3 tags and essential info are kept intact, saving you time and effort when organizing your music for USB transfer.
Key Features of ViWizard Apple Music Converter
Free Trial Free Trial* Security verified. 5, 481,347 people have downloaded it.
- Convert Apple Music songs, albums, playlists, and artists into MP3 for easy access
- Preserve lossless audio, high-resolution lossless, and Dolby Atmos quality
- Strip DRM from Apple Music for unrestricted offline listening
- Save converted audio files while retaining full ID3 tag details
Step 1Download and Install ViWizard Apple Music Converter
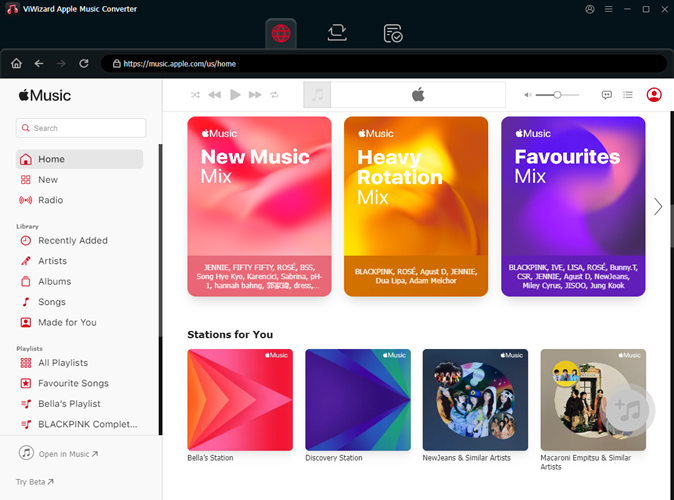
To begin, download and install the ViWizard Apple Music Converter on your computer. This tool allows you to convert Apple Music tracks to DRM-free formats, such as MP3 or AAC, so you can transfer them to a USB drive. After installation, open the app and sign in with your Apple Music account using your Apple ID. This will give you access to your entire Apple Music library, making it easy to select the tracks or playlists you want to convert and transfer.
Step 2Choose the Output Format for Conversion
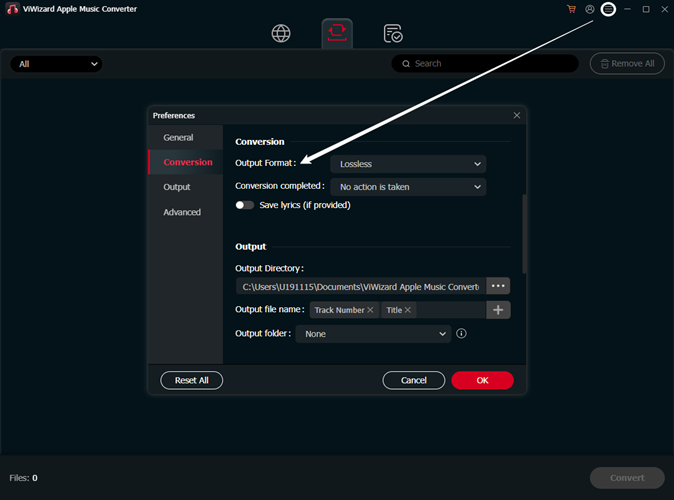
Next, select a file format compatible with your USB drive. MP3 or AAC are the most common and widely supported formats. To adjust this setting, click on the menu icon (usually in the top-right corner). You can customize the output format and adjust options such as sample rate, bit rate, and audio channels. Once you've set the desired options, click OK to save your preferences.
Step 3Add Your Apple Music Tracks to Convert
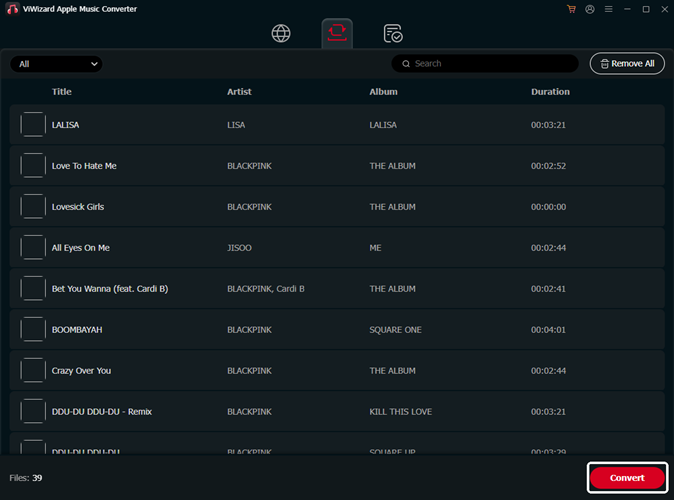
Now, browse through your Apple Music library or search for specific songs, albums, or playlists you want to convert. Once you've found the music you wish to transfer, click Add to Conversion List to queue the selected tracks. Afterward, hit the Convert button, and ViWizard will begin converting your Apple Music files into the selected format.
Step 4Save Your Converted Files
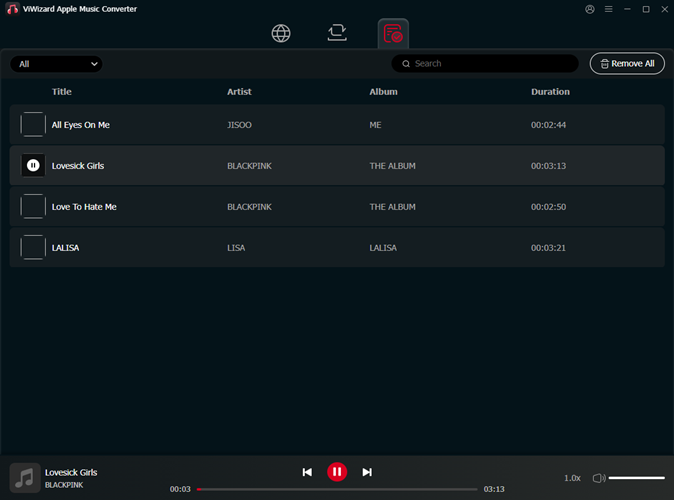
After the conversion process finishes, the converted music files will be ready for transfer. To locate them, click on the History button, then select the folder icon to open the folder where your converted files are saved. From here, you can transfer the files to your USB drive, ready for use on any compatible device without the need for a subscription.
Part 3. How to Transfer Converted Apple Music Files to a USB
Based on the format setting, you can choose to back up your iTunes Library with the converted files in MP3, or transfer them to a USB drive from local storage for other devices and platforms. Right-click the converted Apple Music file or the whole "Music" folder, then Copy. Go to the USB drive, then right-click > Paste to transfer the converted Apple Music to it.
Step 1Organize Your Apple Music by Artist, Playlist, or Album
Before transferring your music, it's a good idea to organize your files so they're easier to find and play later. Here are a few ways to do this:
Sort by Artist: Create folders for each artist and place their songs inside.
Sort by Playlist: If you prefer, you can create folders based on playlists you've curated.
Sort by Album: Keeping albums together ensures you can play them in order, especially useful for concept albums or live recordings.
Most music players, including those in cars and smart TVs, recognize folders, so organizing your music now will make browsing much easier later.
Step 2Format Your USB Drive (If Needed)
Before transferring your files, you might need to format your USB drive, especially if it's brand new or if you're using it with a specific device like a car stereo.
- Check the Format: Plug your USB drive into your computer and check its format.
- On Windows: Open File Explorer, right-click the USB drive, and select Properties.
- On Mac: Open Disk Utility, select your USB drive, and check its format.
- Choose the Right Format:
- For car stereos and most devices: Use FAT32 (widely compatible but has a 4GB file limit).
- For newer systems: Use exFAT (supports larger files and works on Windows and macOS).
- Format the USB Drive (If Necessary):
- On Windows: Right-click the USB drive → Format → Choose FAT32 or exFAT → Click Start.
- On Mac: Open Disk Utility → Select USB drive → Click Erase → Choose exFAT or MS-DOS (FAT) → Click Erase.
⚠️Warning: Formatting will erase all existing data on the USB drive, so back up anything important before proceeding!
Step 3Start Transferring Your Apple Music to USB
Now that your files are organized and your USB drive is ready, follow these steps to transfer your music:
- Insert your USB drive into your computer and open it in File Explorer (Windows) or Finder (Mac).
- Locate your converted Apple Music files in the folder where they were saved. If you used ViWizard Apple Music Converter, they should be in your designated output folder.
- Drag and drop your music files or folders (organized by artist, playlist, or album) into the USB drive.
- Wait for the transfer to complete—this may take a few seconds to several minutes depending on the number of files.
- Eject your USB drive safely to prevent data corruption:
- On Windows: Click the USB icon in the system tray and select Eject.
- On Mac: Drag the USB drive to the Trash (which changes to an eject symbol).
Once the transfer is complete, your Apple Music songs are now free to play from your USB drive! Plug it into your car stereo, smart speaker, or any other compatible device, and enjoy your music without restrictions.
Part 4. How to Locate Apple Music Files for Transfer to a USB Drive
Depending on how you've added music to your Apple Music or iTunes library, there are different ways to transfer your songs to a USB drive. Below are three methods:
- Option 1: Transfer iTunes Local Files to USB
- Option 2: Transfer Your Entire iTunes Library to USB
Option 1: Transfer iTunes Local Files to USB
If you have songs that you manually added to iTunes or downloaded/purchased from the iTunes Store (without DRM), you can transfer them to a USB drive.
Important Note: This method only works for music files you've personally added to iTunes or purchased outright. Apple Music streaming tracks (without conversion) won't transfer.
- Open Apple Music (on macOS Catalina and later) or iTunes (on Windows/macOS Mojave and earlier).
- Find the songs you want to copy. These must be files you've personally added to iTunes or purchased from the iTunes Store.
- Locate the actual files:
- On Mac, right-click the song and select Show in Finder.
- On Windows, right-click the song and select Show in Windows Explorer.
- This opens the folder where the music files are stored.
- Connect your USB drive to your computer.
- Transfer the files: Drag and drop them into the USB drive folder, or use Copy and Paste.
Now, your iTunes local files are saved on a USB and can be played on any device that supports the file format.
Option 2: Transfer Your Entire iTunes Library to USB
If you want to back up your full iTunes library—including playlists, metadata, and media files—follow these steps:
Before transferring, make sure all your media files are stored in one location:
- Open iTunes (on Windows or macOS Mojave and earlier).
- Click File > Library > Organize Library.
- Check the box next to "Consolidate files", then click OK.
- iTunes will copy all media files into the iTunes Media folder, ensuring nothing gets left behind.
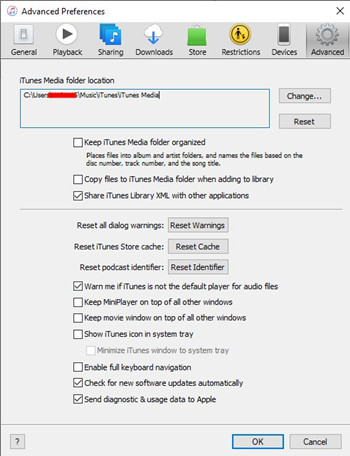
- Tip: You can check the file location by going to the Music or iTunes app > Edit > Preferences > Advanced > iTunes Media folder location.
- Find your iTunes Media folder based on your system:
- For Mac (Mojave and earlier):
/Users/[Your Username]/Music/iTunes/iTunes Media/ - For Windows:
C:\Users\[Your Username]\Music\iTunes\iTunes Media\
- For Mac (Mojave and earlier):
- Connect your USB drive to your computer.
- Copy the entire "iTunes Media" folder to your USB drive.
- (Optional) Copy additional library files for backup:
- iTunes Library.itl (to preserve library data)
- iTunes Music Library.xml (optional, useful for older iTunes versions)
- Eject the USB drive safely before unplugging.
Now, you have a portable backup of your iTunes library, including all music and playlists, ready to be transferred to another computer or media player.
Conclusion
In summary, you can copy your Apple Music library to a USB drive using three methods: directly copying downloaded files (simple but limited), converting songs with third-party software for compatibility, or consolidating your library (complete but needs more space). You're highly recommended to take advantage of ViWizard Apple Music Converter to have the full control of your Apple Music library.
You May Be Interested


Adam Gorden, the digital media specialist at ViWizard, is dedicated to providing the best solutions for digital media management, including audio and video conversion, file optimization, and media workflow enhancements.
Leave a Comment (0)