![]()
I've opened GarageBand more than a few times, thinking this will be the moment I finally make something cool. I drop in a few loops, maybe mess around with a synth, and then I think, what if I just add a track from Apple Music to mix things up? So I tap the "Music" option—only to find the Apple Music songs I want won't work.
Turns out, it's not just me. Apple Music tracks seem like they should work, but they don't.
So, what can you do? This guide walks you through exactly how to get Apple Music into GarageBand—from converting the songs to importing them on Mac or iOS. We'll also show you how to export your creations and even how to turn a track into a ringtone if that's your thing.
Let's dive in.
Part 1. Can You Use Apple Music with GarageBand?
What Is GarageBand?
In case you haven't used it much, GarageBand is Apple's beginner-friendly music creation app. It's been around since 2004 and is available for free on Mac, iPhone, and iPad. While it's designed for anyone, it's surprisingly powerful—you can record vocals, mix beats, add effects, and create something that sounds pretty professional. The best part? You don't need a music degree to get started.
Why Can't I Import Apple Music into GarageBand?
So, the obvious question is: if you already pay for Apple Music, can you just use those songs in your GarageBand projects? It would make sense, right? Unfortunately, the answer is no.
Apple Music is a great place for discovering new music, and with a premium subscription, you can easily download tracks for offline listening. But here's the problem—Apple Music songs are protected by DRM, which means you can't just drag them into a GarageBand session like you can with regular MP3s or tracks you've bought from iTunes. You're stuck within the Apple Music app.
Get Songs from Apple Music into GarageBand:
GarageBand doesn't support M4P files, the format Apple Music uses. It only works with formats like AIFF, CAF, WAV, AAC (except protected AAC), Apple Lossless, and MP3.
Of course, buying every track you want to remix isn't exactly budget-friendly. So, what's the workaround?
To get Apple Music songs into GarageBand, you'll need to convert them into one of the following formats that GarageBand supports:
GarageBand Supported Formats: AIFF, CAF, WAV, AAC (except protected AAC), Apple Lossless, MP3
iTunes Purchases: Unprotected AAC files
Apple Music Downloads: Protected M4P files
ViWizard Output: MP3, WAV, AIFF, FLAC, M4A, M4B
You can use an Apple Music converter like ViWizard Apple Music Converter. This tool allows you to convert Apple Music songs into formats that GarageBand supports, like MP3, AAC, WAV, and more. That way, you get the music you love in the format you need, without having to spend more money.
A full-featured Apple Music converter that easily converts Apple Music songs, albums, playlists—including iCloud Music Library content, personalized recommendations, and curated playlists—into MP3, M4A, M4B, WAV, AIFF, and FLAC so you can keep your Apple Music forever or transfer it to any device without restrictions.
Part 2. How to Convert Apple Music for Use in GarageBand
To get Apple Music into GarageBand, you'll need a tool that can convert those DRM-protected tracks into a format GarageBand supports. ViWizard Apple Music Converter is perfect for this. It can convert Apple Music songs into MP3 or WAV, and other compatible formats, all while ensuring no loss in fidelity.
ViWizard also lets you adjust settings like codec, channel, bit rate, and sample rate, so you can customize the audio to suit your project. And with its 30X faster conversion speed, you'll spend less time waiting.
Key Features of ViWizard Apple Music Converter
Free Trial Free Trial* Security verified. 5, 481,347 people have downloaded it.
- Convert Apple Music songs, albums, playlists, and artists into MP3 for easy access
- Preserve lossless audio, high-resolution lossless, and Dolby Atmos quality
- Strip DRM from Apple Music for unrestricted offline listening
- Save converted audio files while retaining full ID3 tag details
Step 1Install ViWizard on Your Computer
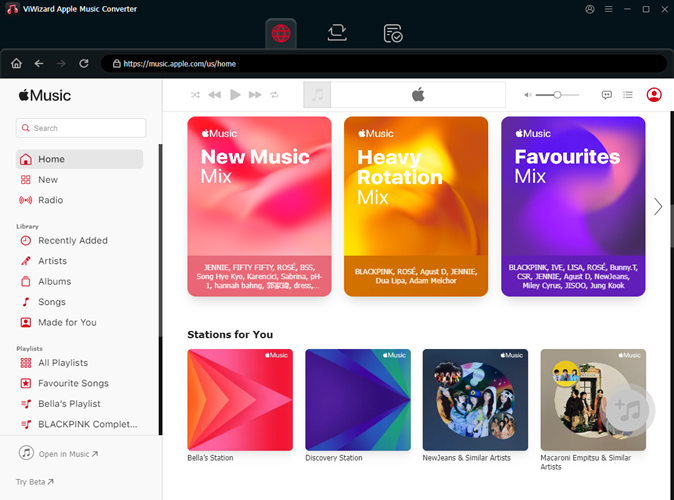
Start by downloading ViWizard Apple Music Converter for Mac or Windows from the official site. Open the program and sign in using your Apple Music account—this will load your entire music library, including saved albums and playlists.
Step 2Select Apple Music Songs to Convert
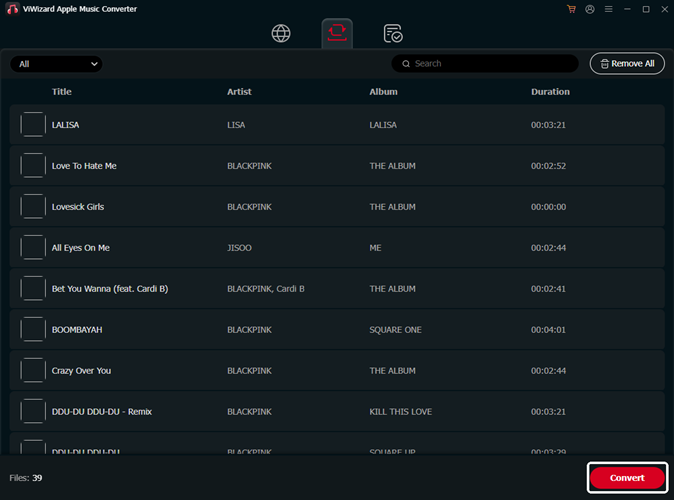
Once you're logged in, click the "+" (Add) button to open your Apple Music library. Pick the songs, albums, or playlists you want to use in GarageBand. When your selection is ready, click "Add to Conversion List" to prepare for conversion.
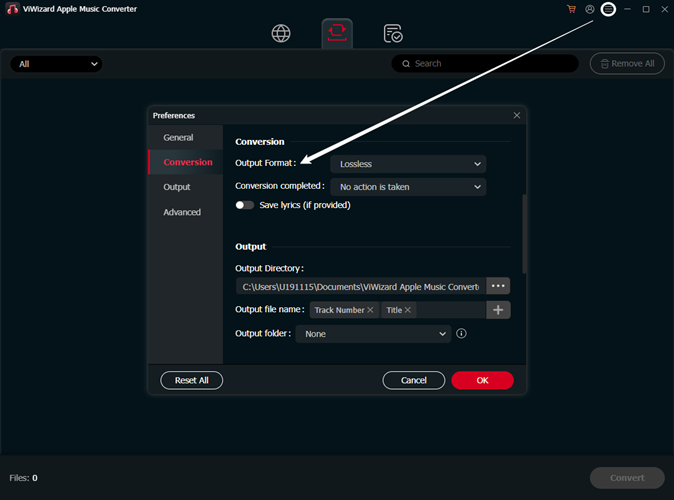
Step 3Set Output Format to MP3
Click the menu icon (☰ or gear icon) to open the output settings. Set the format to MP3, which is fully supported by GarageBand across all Apple devices. You can also adjust the bit rate, sample rate, and audio channels here if you want better audio quality or smaller file sizes. Click OK to apply your settings.
Step 4Convert and Locate the Files
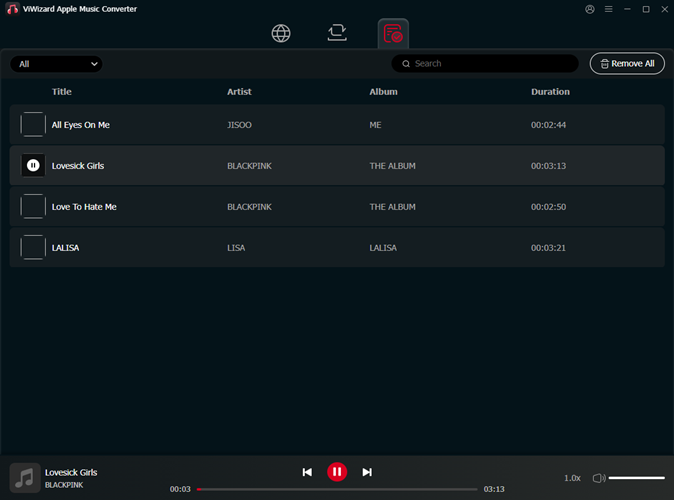
Now hit the Convert button. ViWizard will start processing your Apple Music tracks into MP3s. Once it's done, go to the History tab and click the folder icon to find your converted files on your computer.
Part 3. How to Add Converted Apple Music Songs to GarageBand
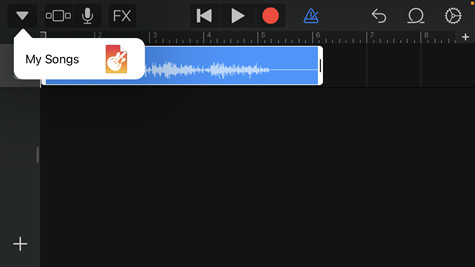
You can now drag and drop your converted MP3 files directly into GarageBand for Mac. If you're working on an iPhone or iPad, simply move the MP3s to your device. Then open GarageBand, go to the Loop Browser, and import them into your project.
On Mac:
- Open GarageBand: Launch GarageBand and open your project.
- Prepare Your MP3 File: Ensure your MP3 file is accessible in Finder or the Music app (if it's stored there).
- Drag and Drop: Resize the GarageBand window if necessary to view both GarageBand and Finder. Click and drag the MP3 file directly into your GarageBand project window.
- Position the Audio: Drop the audio file onto an empty track or below existing tracks in the Tracks area.
- Adjust Tempo (Optional): If your MP3 has a specific tempo, adjust the project tempo in GarageBand to match it for seamless integration.
On iPhone/iPad:
-
Option 1: Using the Files App
- Transfer MP3 to Device: Use iCloud Drive, Dropbox, or the Files app to transfer the MP3 file to your iPhone or iPad.
- Open GarageBand: Launch GarageBand and create a new project.
- Access the Loop Browser: Tap the Loop icon (the looped arrow) in the top-right corner.
- Browse Files: Tap "Browse items from the Files app" and navigate to where your MP3 file is saved.
- Import the Audio: Tap the MP3 file to add it to your project.
- Position the Audio: Drag the audio file into the Tracks view to position it where desired.
-
Option 2: Using iTunes (Music App on macOS Catalina and Later)
- Sync MP3 to Device: Add the MP3 file to iTunes (or the Music app on newer macOS versions), then sync it to your iPhone or iPad.
- Open GarageBand: Launch GarageBand and create a new project.
- Access the Loop Browser: Tap the Loop icon in the top-right corner.
- Select Music Tab: Tap the "Music" tab to view the synced tracks.
- Import the Audio: Select the MP3 file and drag it into the Tracks view.
Part 4. How to Export GarageBand Songs Back to Apple Music
On Mac:
- Open GarageBand: Launch GarageBand and open your project.
- Prepare Your Song for Export: Once your song is ready, go to the Share menu in GarageBand and select Song to Music.
- Edit Song Info (Optional): In the Share dialog, you can adjust details such as song name, artist name, composer, and album info.
- Choose the Quality: Select your preferred audio quality from the Quality pop-up menu.
- Export Song (Optional): If you want to export only a specific part of the song, check the "Export cycle area only" box. Otherwise, the whole song will be shared.
- Click Share: After confirming your settings, click Share to add the song to the Music app on your Mac.
Part 5. How to Turn Apple Music Songs into Ringtones Using GarageBand
On Mac:
- Open GarageBand: Launch GarageBand and open a new or existing project.
- Select the Song: Find the song you want to turn into a ringtone in Apple Loops, Files, or the Music app.
- Drag and Drop: Drag the song into the Tracks view within your project.
- Trim the Song: Adjust the track length by dragging the edges to trim it to your desired portion. The maximum length for a ringtone is 30 seconds.
- Save Your Project: Click File > Save to save your trimmed song.
- Export as Ringtone: Click Share > Export Song to Disk, and choose Ringtone as the export format.
- Name and Export: Name your ringtone and select Export to save it.
- Set as Ringtone: Once exported, go to System Preferences > Sound on your Mac to set the new ringtone.
On iPhone/iPad:
- Launch GarageBand: Open GarageBand on your iPhone or iPad and create a new project.
- Select the Song: Choose your desired song from Apple Loops, Files, or the Music app.
- Drag to Tracks View: Drag the selected song into the Tracks view within your project.
- Trim the Song: Tap the Plus icon to adjust the song's length and drag the track's edges to trim it.
- Save Your Song: Tap the down arrow icon and save the song to My Song.
- Share the Song: Tap and hold on the song, then select Share.
- Select Ringtone: Choose Ringtone as the export option.
- Name and Export: Name your ringtone and tap Share to save it.
- Set as Ringtone: After export, tap Use sound as and select Standard Ringtone to set it on your iPhone.
The Final Words
Since the Apple Music files are in protected format, so to edit Apple Music songs on GarageBand, you need to convert Apple Music to MP3 with ViWizard Audio Converter first. This professional tool can convert Apple Music from encrypted M4P format to MP3, WAV, AAC and others with lossless quality. When the conversion is finished, you can add Apple Music to GarageBand without limit.
You May Be Interested


Adam Gorden, the digital media specialist at ViWizard, is dedicated to providing the best solutions for digital media management, including audio and video conversion, file optimization, and media workflow enhancements.
Leave a Comment (0)