For streaming music, Apple Music completes its streaming with offline mode. Apple Music subscribers benefits from Apple Music's offline service across devices and platforms and have loads of downloaded Apple Music songs … well, until some issues come up like Apple Music songs not playing offline.
We're here to help save time and efforts with this article, which includes both basic and advanced fixes.
Part 1. How to Fix Apple Music Not Playing Offline
Step 1 Check Apple Music Subscription and Verify Downloaded Music
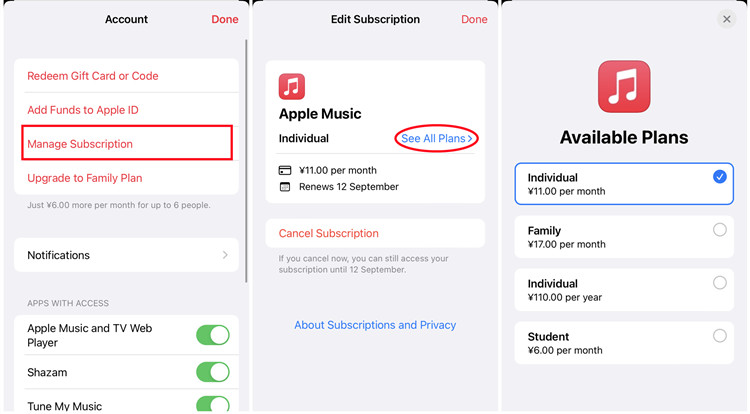
- Open the Settings app on your iPhone.
- Tap on your name at the top.
- Select Subscriptions and look for Apple Music. Make sure it's active.
- Open the Apple Music app.
- Go to the Library tab.
- Look for downloaded songs or albums; they should have a cloud icon with a downward arrow. If they don't, they are not downloaded.
Step 2 Restart the App and Device
- Swipe up from the bottom of the screen (or double-click the Home button on older devices) to access the app switcher.
- Swipe up on the Apple Music app to close it.
- Press and hold the side button and the volume button until the slider appears.
- Slide to power off, wait a few seconds, then turn your device back on.
Step 3 Update the App and Device OS
- Open the App Store on your iPhone.
- Tap on your profile icon at the top right.
- Scroll down to see pending updates. If Apple Music is listed, tap Update.
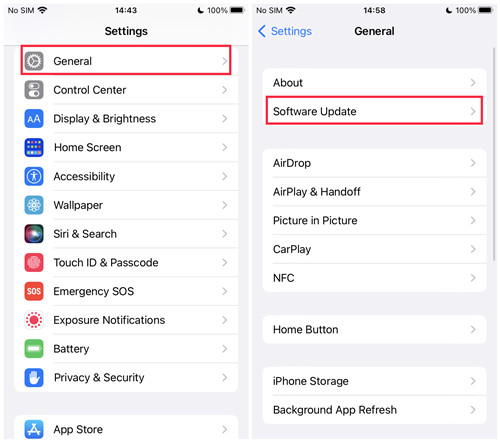
- Open the Settings app.
- Tap on General > Software Update.
- If an update is available, tap Download and Install.
Step 4 Re-Sync Music Library
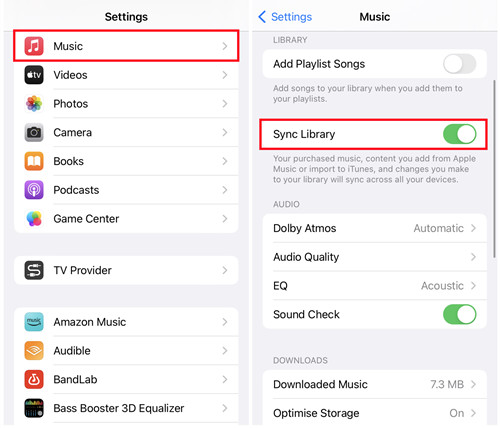
- Open the Settings app.
- Scroll down and select Music.
- Toggle on Sync Library (if not already enabled).
- Wait a moment for the library to sync.
Step 5 Re-Download Affected Music
- In the Apple Music app, go to the Library tab.
- Find the song or album that isn't playing.
- Tap the three dots next to the song/album and select Remove or Delete from Library.
- Then, find the song/album again and tap the cloud icon with a downward arrow to re-download it.
Step 6 Sign Out and Back into Apple ID
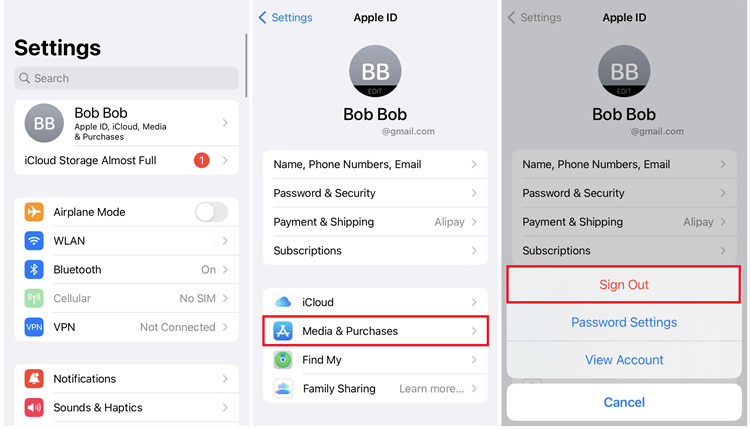
- Open the Settings app.
- Tap on your name at the top.
- Scroll down and tap Sign Out. You may need to enter your Apple ID password.
- Choose what data to keep on your device (such as Contacts) and tap Sign Out again.
- Still in the Settings app, tap Sign in to your iPhone.
- Enter your Apple ID and password.
Step 7 Disable Lossless or Dolby Atmos
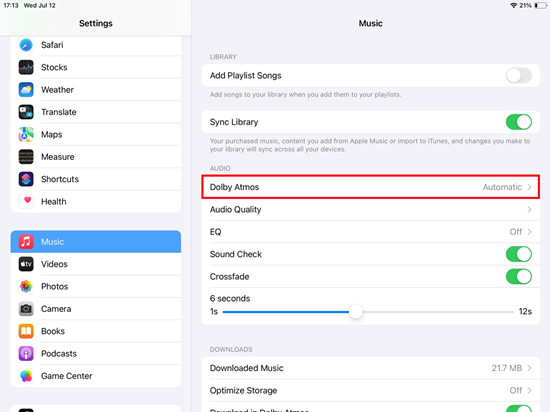
- Open the Settings app.
- Scroll down and tap Music.
- Under the Audio Quality section, find Lossless Audio and Dolby Atmos settings. Ensure they are both set to Off.
Step 8 Update Apple Music
- Open the App Store.
- Tap your profile icon and look for any updates related to Apple Music.
- If an update is available, tap Update.
Advanced Solutions:
Step 1 Restore Device OS through iTunes
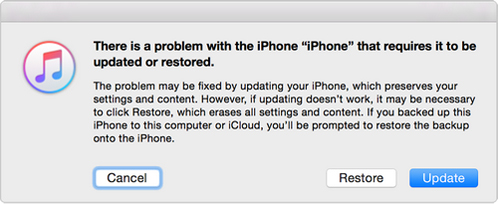
- Connect your iPhone to your computer and open iTunes (or Finder on macOS Catalina and later).
- Select your device when it appears.
- Click on Restore iPhone and follow the prompts. Make sure to back up your data first.
Step 2 Reset iCloud Settings
- Open the Settings app.
- Tap on your name at the top and select iCloud.
- Scroll down and tap Sign Out.
- Follow the prompts to sign out, then sign back in.
Step 3 Reset Network Settings
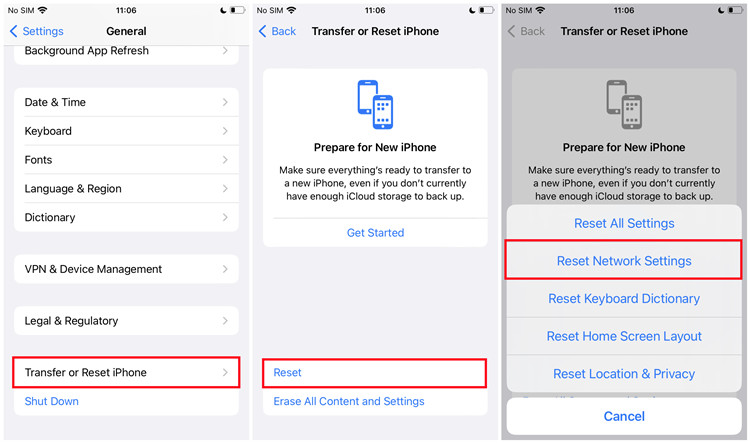
- Open the Settings app.
- Tap General > Transfer or Reset iPhone > Reset > Reset Network Settings.
- Enter your passcode if prompted and confirm. Note that this will erase saved Wi-Fi passwords.
Step 4 Offload Apple Music
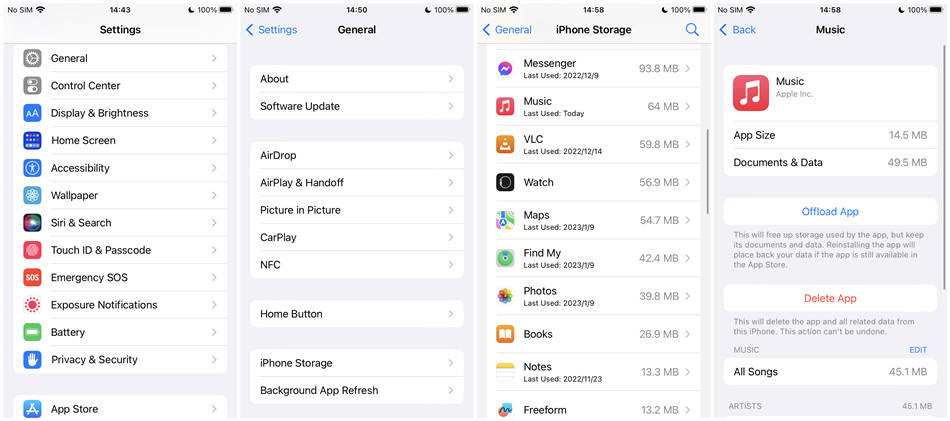
- Open the Settings app.
- Tap General > iPhone Storage.
- Scroll down to find Apple Music and tap on it.
- Tap Offload App, then confirm. This will free up storage without deleting your documents and data.
After offloading, go back to the App Store and reinstall Apple Music.
Part 2. Best Alternatives to Fix Apple Music Not Playing Offline
One issue that most Apple Music users ignore is that the DRM (Digital Right Management) is also a cause of all issues about Apple Music offline not working, including the Apple Music not playing downloaded songs offline at hand.
DRM is more than the protection from music streaming services like Apple Music but can be problematic when it requires an internet connection to phone, not to mention it encode all the downloaded songs to listen offline.
Don't despair. Whether for removing DRM from downloaded Apple Music tracks or downloading them from Apple Music, ViWizard Apple Music Converter is perfect for both.
ViWizard Apple Music Converter is a professional and powerful tool that helps users with Apple Music's subscription to download music tracks and converted them into iTunes compatible formats like MP3, AAC and WAV for keeping them, while the DRM is removed at the same time. DRM-free music songs in the formats above are for uploading to iTunes, streaming well offline on Apple Music app and keeping forever.
Key Features of ViWizard Apple Music Converter
Free Trial Free Trial* Security verified. 5, 481,347 people have downloaded it.
- Convert Apple Music songs, albums, playlists, and artists into MP3 for easy access
- Preserve lossless audio, high-resolution lossless, and Dolby Atmos quality
- Strip DRM from Apple Music for unrestricted offline listening
- Save converted audio files while retaining full ID3 tag details
Step 1Launch ViWizard Audio Converter
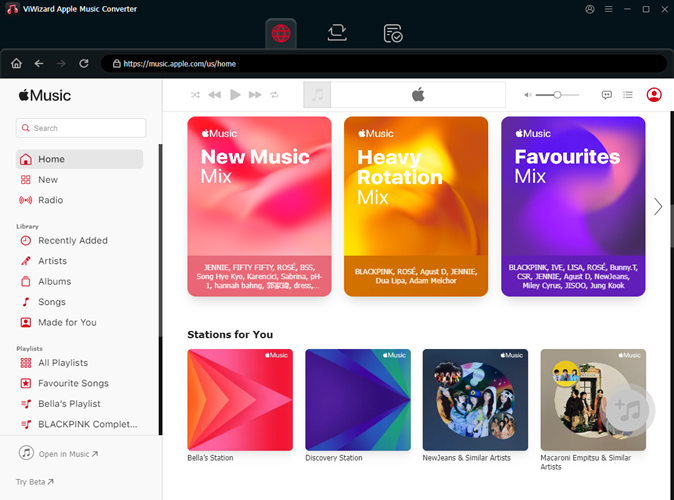
Launch ViWizard Audio Converter and wait until it detects and launches iTunes to continue the conversion. A simple click on the Load iTunes Library button (Add Music icon) at the top can load all the songs in the iTunes library. Choose the song to add to ViWizard drag and drop songs from iTunes to the program.
1) ![]() This music note icon is to add DRM audios to the converter.
This music note icon is to add DRM audios to the converter.
2) ![]() This icon is to import non-DRM audios to ViWizard.
This icon is to import non-DRM audios to ViWizard.
3) ![]() This is where you can find the converted audio files.
This is where you can find the converted audio files.
Step 2Set Output Formats
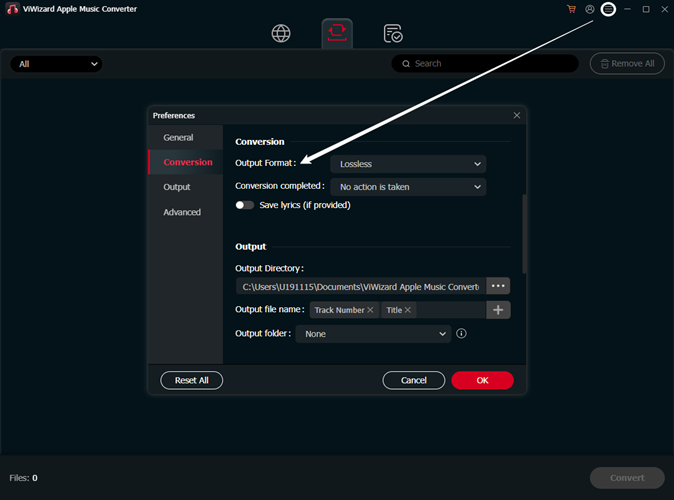
Now on ViWizard's main interface, see and click on Format option at the bottom. From here to open a Format Setting window and set output formats for added music tracks. You can also customize codec, channel, sample rate and bit rate here. Don't forget to click OK to save all the settings.
Step 3Make Apple Music Tracks Offline
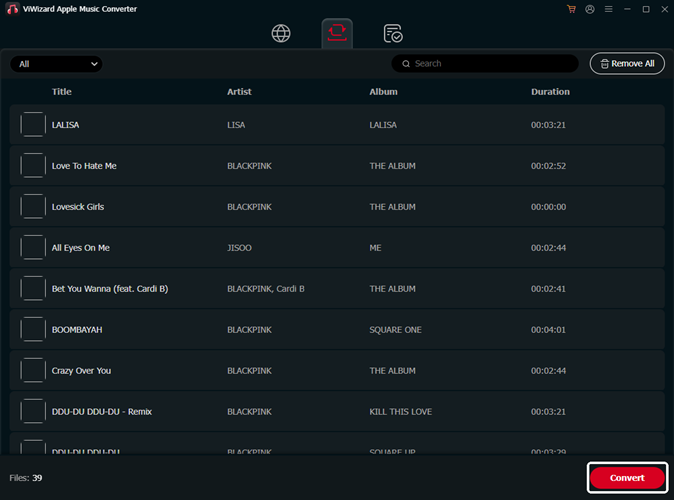
Note the output format of each song on the screen. Feel free to add more music tracks or click on the Convert button to start the conversion at 5x speed. As the conversion proceeds, the DRM of songs are removed.

Leave a Comment (0)