In the digital realm of music, order is key to an enjoyable listening experience. Apple Music brings a game-changing feature into play – song matching. This feature seamlessly aligns your personal music collection with Apple Music's extensive catalog, ensuring a well-organized and enhanced musical journey.
Join us as we unlock the potential of Apple Music's matching feature, simplifying the process of creating a harmonious and curated library that perfectly suits your musical taste. Let's dive in!
Part 1. How to Match Songs on Apple Music
When you enable iCloud Music Library on your Apple Music account, Apple Music takes your uploaded songs and compares them to its extensive catalog. The goal is to identify and match your songs with existing tracks in the Apple Music library.
Apple Music uses audio fingerprinting technology to analyze the characteristics of your songs and find the best match in its catalog. If a match is found, Apple Music replaces your uploaded song with its high-quality version, providing you with access to a superior listening experience.
The matching feature is most effective for users with an Apple Music subscription. Subscribers have access to the full Apple Music catalog, enhancing the chances of successful matches.
Matching Songs on Apple Music:
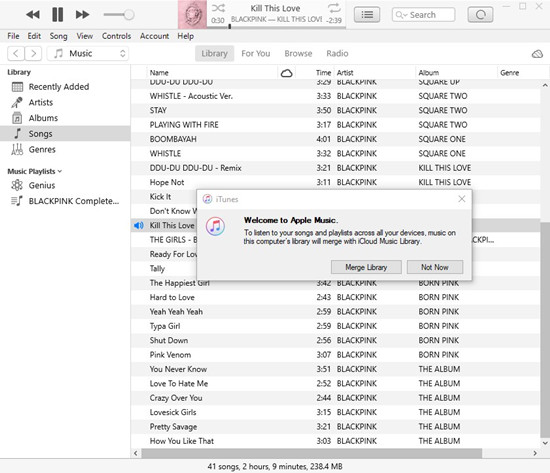
iCloud Music Library, linked to your Apple ID, serves as the repository for your matched songs. It stores information about your music library and ensures that your matched songs are accessible across all your Apple devices.
- Launch the Apple Music app on your iOS device or iTunes on your computer.
- Look for the "iCloud Music Library" option on your device:
- On iOS:
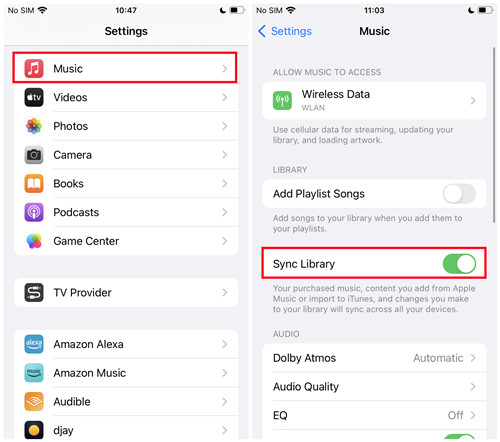
- Tap your profile picture in the top-left corner, then select "Settings."
- Tap "Music."
- Under the "LIBRARY" section, check the "Sync Library" setting.
- On iTunes or Music (on a computer):
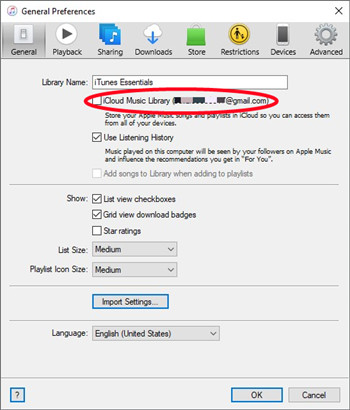
- Click on "Edit" in the top menu, then choose "Preferences."
- Go to the "General" tab and check the "iCloud Music Library" toggle.
- On iOS:
- Switch on the "iCloud Music Library" setting to enable the matching feature.
- Once enabled, Apple Music will initiate the matching process, comparing your songs with its catalog. Monitor the progress in the status bar or look for a cloud icon next to each song.
- A cloud icon next to a song indicates a successful match. This means you now have access to Apple Music's version of that song.
- Explore your library and savor the upgraded, high-quality versions (typically 256 kbps DRM-free AAC) of your matched songs from Apple Music or the iTunes Store.
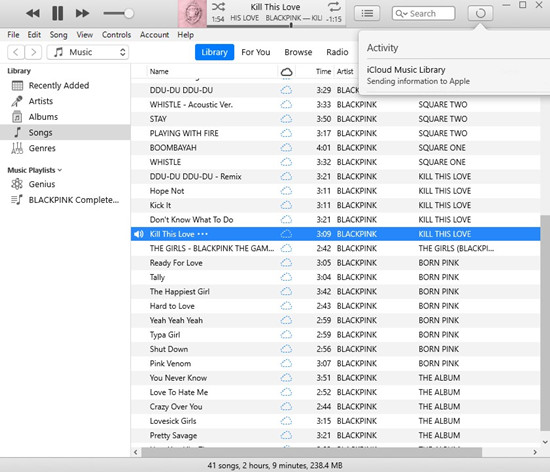
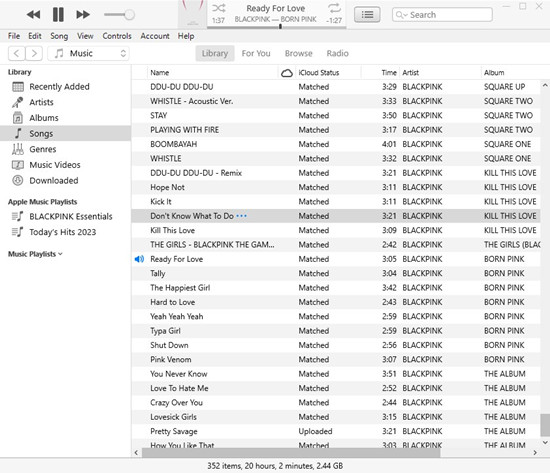
Checking Matched Songs on Apple Music:
-
For Entire Songs Collection:
- Navigate to the "Songs" section in the sidebar of your library.
- Look for the cloud icon next to each song; this indicates its iCloud status.
Note: If the "iCloud Status" column is not visible:
- Click on "View" in the top menu.
- Select "Show View Options."
- Check the "iCloud Status" option to enable this column in your Songs view.
-
For Specific Songs:
- In the "Songs" view, locate the song you want to check for its iCloud status.
- Right-click on the song.
- Choose "Song Info" (on PC) or "Get Info" (on Mac).
- Navigate to the "File" tab and check the "iCloud Status:"
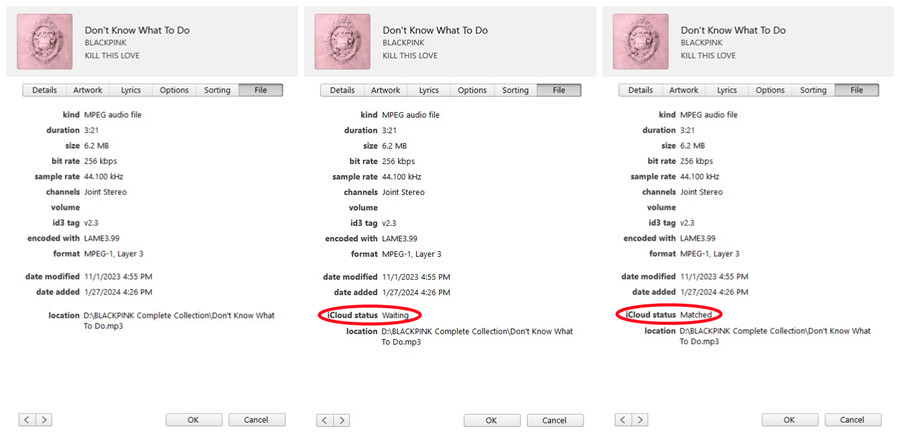
- If there's no "iCloud Status:" iCloud Music Library may be disabled or the song info isn't sent to it.
- If "iCloud Status" reads "Waiting:" The song info is awaiting synchronization with iCloud Music Library.
- If "iCloud Status" reads "Matched:" The song has been successfully matched with iCloud Music Library.
Part 2. How to Fix Apple Music Match Wrong Songs
Apple Music's matching process is remarkably accurate, but occasional mismatches may occur. If you discover a song that's greyed out or matched with the wrong version on your device, it's crucial to rectify the situation promptly. This can happen if Apple Music incorrectly identifies a song or if you unintentionally added the Apple Music version instead of your original file. Follow these steps to address mismatched songs and ensure you have the correct versions in your library:
Fixing Mismatched Songs on Apple Music:
- Confirm that you initially had the correct file, and it's still available in your original iTunes library.
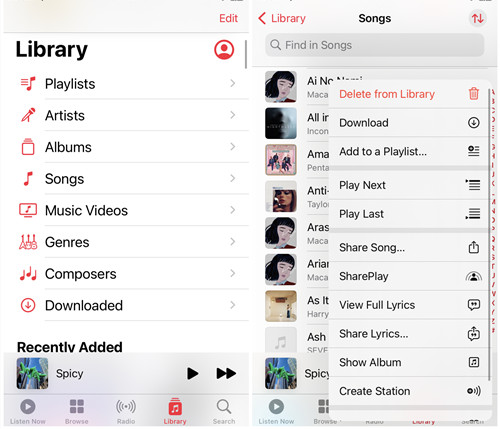
- On your iPhone, locate the mismatched song.
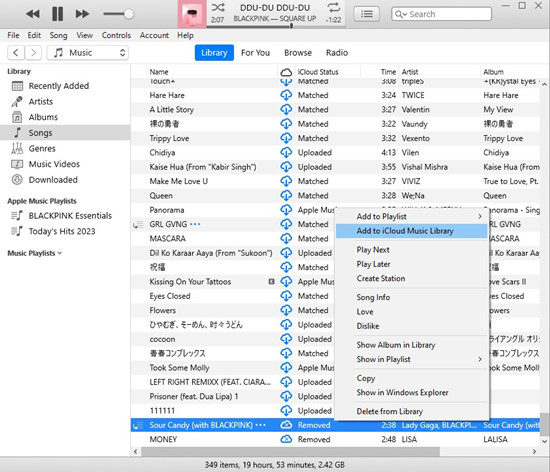
- Tap on 3-dot icon next to the song, and select "Delete from Library." This means the song will be removed from all your iCloud devices. Note that the prompt may say, "This would also remove it from any playlists." However, if you still have the file in your original iTunes library, it won't be deleted from there.
- After deletion, you'll notice a crossed-out cloud icon, which reads "Removed" next to the file in iTunes. This indicates that the file is still present on your computer, as it was originally your file.
- Right-click on the song in iTunes.
- Select "Add to iCloud Music Library." This action will reupload the song, ensuring that you no longer have the mismatched version.
- Patience is key. It may take some time for the corrected song to reappear on your iPhone, but it should be there within 24 hours.
Part 3. How to Stop Apple Music from Matching Songs
If you prefer more control over your music library and want to prevent Apple Music from automatically matching songs, you can follow these steps to turn off "iCloud Music Library" and "Automatic Downloads" on your iCloud devices:
1. Turn Off iCloud Music Library
Disabling iCloud Music Library will prevent automatic matching, but keep in mind that it may affect features like syncing playlists and music across your devices.
-
For iPhone/iPad:
- Open the Settings app on your iPhone or iPad.
- Tap "Music".
- Toggle off the "Sync Library."
-
For Mac/PC:
- Open the Music app or iTunes.
- Click on "Edit," then choose "Preferences."
- Go to the "General" tab and ensure not to select the "iCloud Music Library" checkbox.
- Click OK to save this setting.
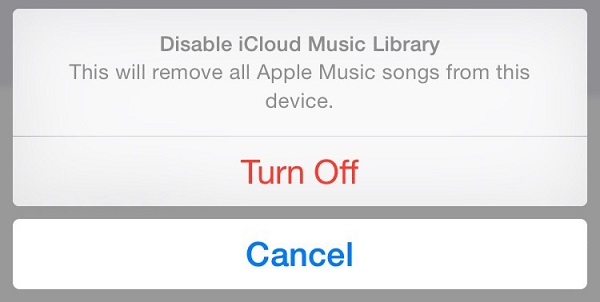
You may encounter some errors when using iCloud Music Library. To solve your annoyance, here we'll guide you to turn off iCloud Music Library on iPhone, Mac, or PC step by step.
2. Disable Automatic Downloads on iPhone or iPad
Turning off automatic downloads prevent Apple Music from automatically adding songs to your library.
-
For iPhone/iPad:
- Go to Settings on your device.
- Scroll down and tap "Music."
- Turn off "Automatic Downloads."
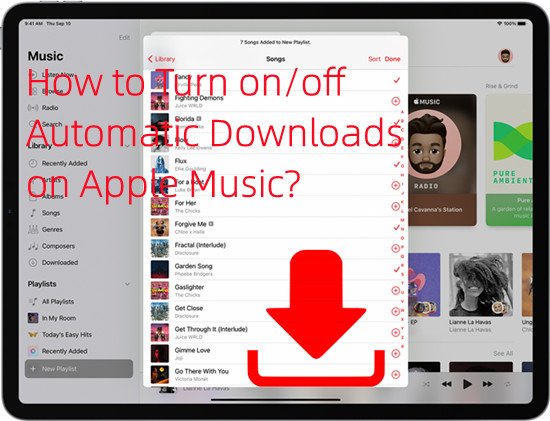
Here you can learn how to turn on or off automatic download to use for Apple Music.
3. Access Apple Music Library without Subscription
For users seeking a reliable and efficient solution to safeguard their music library without dependence on Apple Music's subscription and iCloud Music Library, ViWizard Apple Music Converter proves to be an excellent choice. This versatile tool is designed to back up your original Apple Music library seamlessly, as well as any audio files you upload to there. Here's why ViWizard Apple Music Converter stands out:
ViWizard Apple Music Converter supports multiple output formats including MP3, WAV, AAC, FLAC, and more that suit your preferences and device compatibility. With a remarkable 30x faster conversion speed, ViWizard ensures swift and efficient conversion of your Apple Music library, so you create backups without extended waiting times.
Worry about the audio quality? ViWizard takes pride in maintaining the original, lossless quality of your music during the conversion process. Your backed-up files will retain the same audio fidelity as your original iTunes library.
Key Features of ViWizard Apple Music Converter
Free Trial Free Trial* Security verified. 5, 481,347 people have downloaded it.
- Convert Apple Music songs, albums, playlists, and artists into MP3 for easy access
- Preserve lossless audio, high-resolution lossless, and Dolby Atmos quality
- Strip DRM from Apple Music for unrestricted offline listening
- Save converted audio files while retaining full ID3 tag details
Step 1Launch ViWizard and Import Apple Music Files
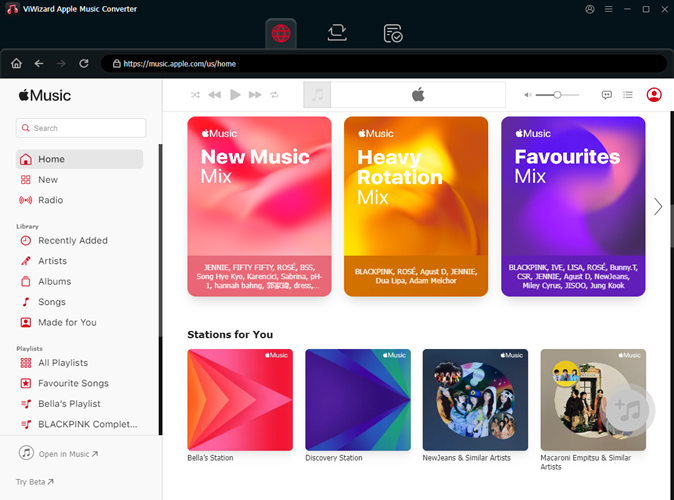
Open ViWizard Audio Converter on your computer. Click the Music Note button to initiate the process of loading the Apple Music songs you've downloaded from your iTunes library. In the popup window, select the specific music files you want to back up, and click OK to confirm. Alternatively, you can locate the folder where your downloaded Apple Music files are stored and directly drag them into the ViWizard interface.
Step 2Select Output Audio Format and Adjust Settings
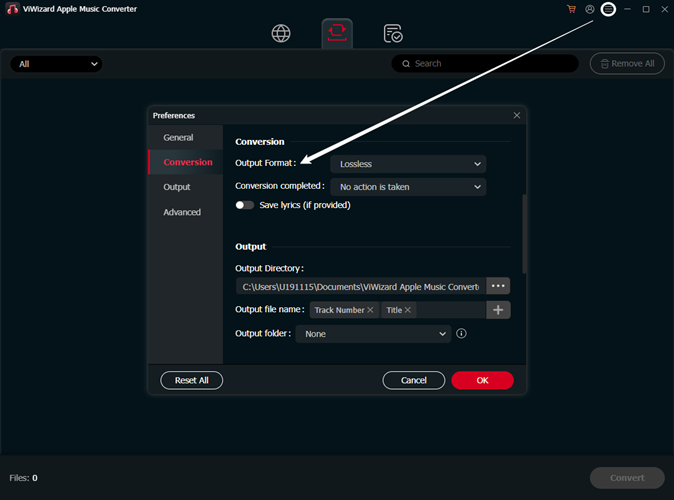
Navigate to the Format section located at the bottom left of the ViWizard interface. Click the format button (e.g., MP3) to choose your desired output format. Customize additional settings such as codec, channel, sample rate, and bit rate according to your preferences. Ensure to tap the OK button to save all your selected settings.
Step 3Start the Backup Process
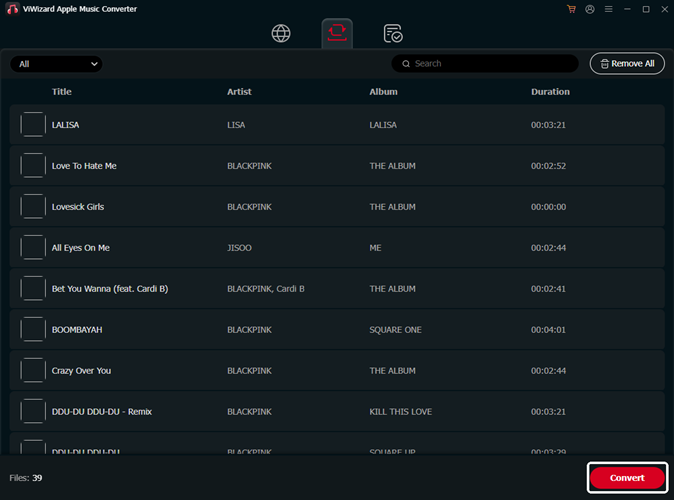
With your preferred settings in place, click the Convert button located at the bottom right of the ViWizard interface. ViWizard will commence the conversion process, transforming your Apple Music songs into the chosen format (e.g., MP3). Once the conversion is complete, click the Converted icon to easily locate the well-converted Apple Music songs on your computer.
Congratulations! Your original iTunes library is now safely backed up with DRM-free versions of your Apple Music songs, ready for secure storage and easy accessibility.
Conclusion
For those who value ownership and control over their music, safeguarding your collection is paramount. Consider trying out ViWizard Apple Music Converter – a reliable companion to back up your original iTunes library. With ViWizard, you not only protect your music but also gain the freedom to enjoy it without limitations. Try ViWizard Apple Music Converter for a secure and DRM-free backup today – your music, your way.

Leave a Comment (0)