There's this idea that keeps popping among some video creators—that you have to be a "pro" to add music to your videos. It's almost like there's a secret formula that only the experts know. They make it seem like unless you're using expensive software or licensing music from some high-end service, you're doing it all wrong.
That's nonsense. It's not just possible to use the music you already listen to, it's actually a great idea. Here's why.
Think about it. You've got an Apple Music subscription, and you're constantly discovering songs you love—songs that get stuck in your head, songs that set the mood for your day. So why not use those same tracks in your videos? You don't have to go hunting for obscure royalty-free music or spend a ton of money on a track that might not even fit. Instead, you've already got the music that speaks to you. The question is, how do you get it into your video? Well, that's exactly what we're going to explore.
Part 1. Can I Use Apple Music in Videos?
Music is the heartbeat of our stories. So, when you find that perfect song on Apple Music—the one that fits seamlessly into your video—you want to use it, right? But then the question arises—can you actually use it? Apple Music tracks are protected by DRM (Digital Rights Management), meaning they're locked within Apple's ecosystem and can't be directly used in video editing software or shared on social media. Unlike royalty-free music libraries, Apple Music isn't designed for video projects.
It's frustrating, but there's a way around it. You don't have to settle for generic music. By converting Apple Music tracks into accessible formats like MP3 or WAV, you can integrate them into your video. Tools like ViWizard Apple Music Converter remove the DRM protection and convert tracks into formats that video editing software can use. Once converted, you're free to add the music to your project, giving it the depth and emotion you've been searching for—just like when you outline your projects with the desired soundtrack on Apple Music.
A full-featured Apple Music converter that easily converts Apple Music songs, albums, playlists—including iCloud Music Library content, personalized recommendations, and curated playlists—into MP3, M4A, M4B, WAV, AIFF, and FLAC so you can keep your Apple Music forever or transfer it to any device without restrictions.
Understanding Apple Music's Licensing for Videos
Converted Apple Music tracks are for personal use only. You can use them in private, non-commercial projects like family videos or Instagram stories. However, once you upload them to public platforms like YouTube or TikTok, you're entering risky territory. Apple Music tracks aren't licensed for public or commercial use, and posting a video with these tracks could lead to it being taken down or muted.
Now with ViWizard Apple Music Converter, you can bring your video projects to life with the tracks you love—while keeping licensing restrictions in mind. Explore it now, or follow the steps in the next part to get started!
Part 2. How to Convert Apple Music for Video Projects (Tutorial)
You've found the perfect background music on Apple Music—now you just need a way to bring it into your videos. The solution is simple: ViWizard Apple Music Converter. Apple's DRM protection locks those tracks within its ecosystem, making them difficult to use in video projects. But ViWizard removes that barrier, converting Apple Music tracks into MP3 or other widely supported formats that seamlessly integrate into video editing software. It's like finally being able to turn the music you love into the soundtrack of your own story.
Why ViWizard Is Perfect for Apple Music as Background Music
What makes ViWizard truly remarkable is its lossless conversion process—ensuring the sound you love in Apple Music remains just as rich and immersive in your video projects. Just make sure your Apple Music settings match the highest quality available, whether it's Lossless Audio (up to 24-bit/48kHz), Hi-Res Lossless (up to 24-bit/192kHz), Dolby Atmos with Spatial Audio, or 256Kbps AAC. ViWizard captures every detail, weaving the essence of the music seamlessly into your work.
If you're working on multiple videos, ViWizard's batch conversion feature saves you time by converting multiple tracks at once. No more tedious, one-by-one conversions—just let ViWizard handle it while you focus on bringing your creative vision to life.
Key Features of ViWizard Apple Music Converter
Free Trial Free Trial* Security verified. 5, 481,347 people have downloaded it.
- Convert Apple Music songs, albums, playlists, and artists into MP3 for easy access
- Preserve lossless audio, high-resolution lossless, and Dolby Atmos quality
- Strip DRM from Apple Music for unrestricted offline listening
- Save converted audio files while retaining full ID3 tag details
Getting started couldn't be easier. Download ViWizard, install it, and let its intuitive interface guide you through the process.
Step 1Download and Install ViWizard Apple Music Converter
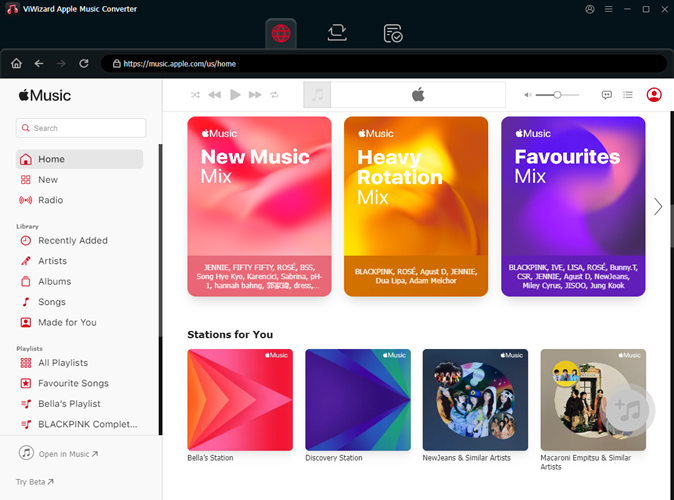
Start by downloading and installing ViWizard Apple Music Converter on your computer. The tool is designed to help you easily convert Apple Music tracks into widely compatible audio formats like MP3, WAV, or AAC. After installation, launch the software and sign in with your Apple Music account credentials. Once logged in, you'll have access to your entire music library. To begin the conversion process, simply click the "+" button to import the songs or albums you want to use in your video project.
Step 2Choose the Output Format (MP3 or Others)
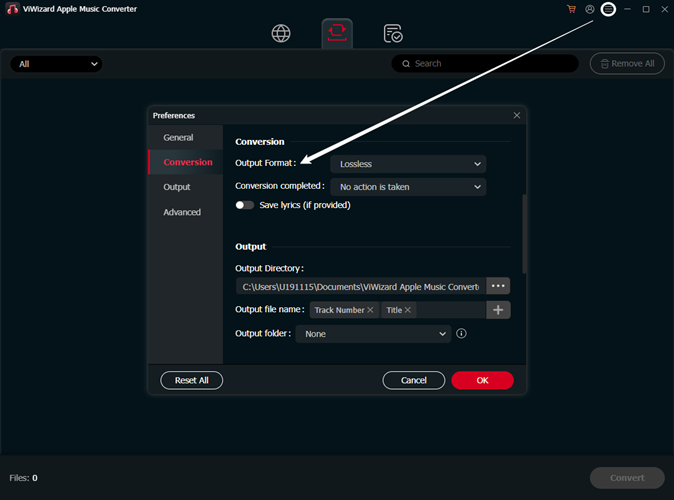
Once your music is imported, you'll need to select the format for your converted files. MP3 is a great choice because it's universally compatible with most video editing software. To do this, click the settings icon in the top-right corner of the interface. Here, you can customize the sample rate, bit rate, and audio channels to suit your needs. After adjusting the settings, click "OK" to confirm.
Step 3Add Music to Conversion Task and Start the Process
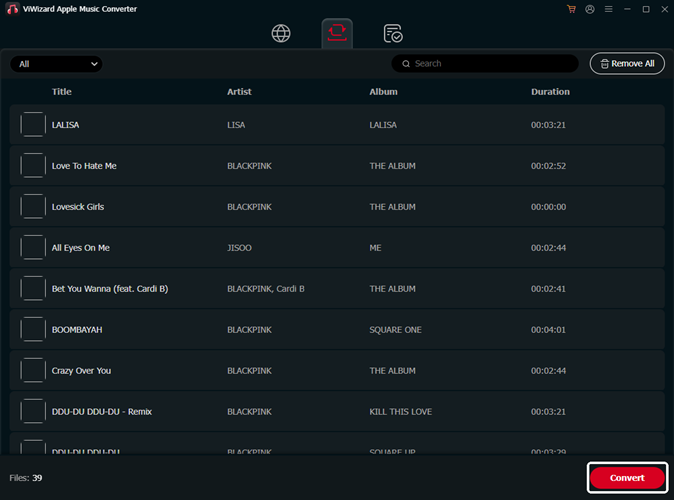
Now, navigate through your Apple Music library to choose the songs, albums, or playlists you want to convert. You can also paste the URL of a specific track into ViWizard. Once you've selected all the music you need, click "Add to Conversion List." After everything is queued, hit the "Convert" button to begin the process. ViWizard will convert the selected music files into MP3 format (or another format you selected) in just a few moments.
Step 4Access and Use Your Converted Files
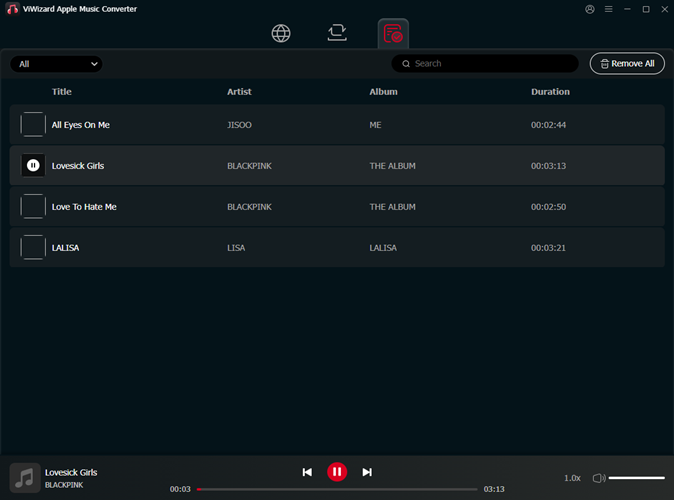
When the conversion is complete, click the "History" button to view your converted files. From here, click the folder icon to locate the files on your computer. You can now transfer them to any device, use them in your video editing software, or enjoy them offline without any Apple Music restrictions.
Part 3. How to Add Converted Apple Music to Video Projects
Integrating Apple Music tracks into video projects using Apple's editing software—iMovie, Clips, and Final Cut Pro—requires a few additional steps due to digital rights management (DRM) protections on Apple Music content. Here's how you can do it:
How to Import Apple Music to iMovie [Mac/iOS]
iMovie is what I'd call a solid beginner-friendly editor. It keeps things simple with an intuitive interface and just the right number of tools. You can trim clips, tweak colors, and even edit in 4K, all without feeling overwhelmed. One of the best parts? You can start a project on your iPhone and pick it up seamlessly on your Mac, making it great for quick edits on the go. If you're looking for something that's easy to use but still has enough features to make your videos pop, iMovie is a great choice.

- Open iMovie on your Mac. If it's not installed, download it from the Mac App Store.
- Click "Create New" and select either "Movie" or "Trailer" as your project type.
- Drag and drop your video clips into the timeline.
- Locate your converted Apple Music files in Finder.
- Drag and drop the music files into the iMovie timeline, placing them below your video clips.
- Trim the music track, adjust its volume, and position it to fit your video.
- Add fade-ins, fade-outs, or other audio effects as needed.
- Once satisfied, click "File" > "Share" > "File" to export your video with the added music track.
Read More: How to Add Apple Music to iMovie Projects
How to Import Apple Music to Clips [iOS]
Clips is Apple's take on a casual, social-media-friendly video editor. It's built entirely for iOS and designed for speed—think short, fun videos with built-in filters, animated text, and music. It's not a full-scale editor, but if you just want to throw together a quick video for Instagram or TikTok, it's perfect. No learning curve, no complicated settings—just record, edit, and share.
- Launch Clips on your iPhone or iPad. If needed, download it from the App Store.
- Tap the "+" icon to start a new project.
- Tap on the video clips you want to include.
- Tap the "Music" icon at the top of the screen.
- Choose "My Music" to access your saved, converted Apple Music files.
- Select your desired track and tap "Done" to add it to your project.
- Trim the track, adjust the volume, and position it within the timeline.
- Add filters, text, and stickers as desired.
- When finished, tap "Done," then choose to save the video or share it directly on social media.
Read More: How to Add Apple Music to Clips
How to Import Apple Music to Final Cut Pro [iOS]
Final Cut Pro is where you go when you want pro-level editing without jumping into the world of Adobe. It's packed with high-end features like multi-cam editing, 360-degree video support, and deep color grading tools. The latest update even brings AI-powered tools like Magnetic Mask for easy subject isolation and auto-generated captions to speed up workflow. If you're looking for something serious but still optimized for Apple's ecosystem, Final Cut Pro is a powerhouse.
- Open Final Cut Pro on your Mac.
- Use the "Import" button or navigate to "File" > "Import" > "Media" to add your video files to the project timeline.
- Locate your converted Apple Music files in Finder.
- Drag them directly into the Final Cut Pro timeline.
- Trim the music, adjust the volume, and sync it with your video clips.
- Utilize Final Cut Pro's audio effects to refine the sound, such as adjusting EQ or adding fades.
- Once you're happy with the edit, export your video with the integrated music track.
Read More: How to Add Apple Music to Final Cut Pro
Part 4. Recommended Video Editing Software for Apple Music
Once you've converted Apple Music tracks, the next step is using them in video projects. Depending on your platform and content type, you can choose software that best suits your needs. Below are the top three video editors for different types of content, along with step-by-step guides for adding converted Apple Music to each:
1. CapCut for TikTok Videos
CapCut is one of the easiest ways to edit TikTok videos like a pro without actually being a pro. It's got a simple drag-and-drop timeline, tons of filters and effects, and even a massive library of music and sound effects. One standout feature? It lets you remove backgrounds without a green screen, which is pretty wild for a free app. It's no surprise it's a favorite among TikTok creators.
How to Add Apple Music to CapCut:
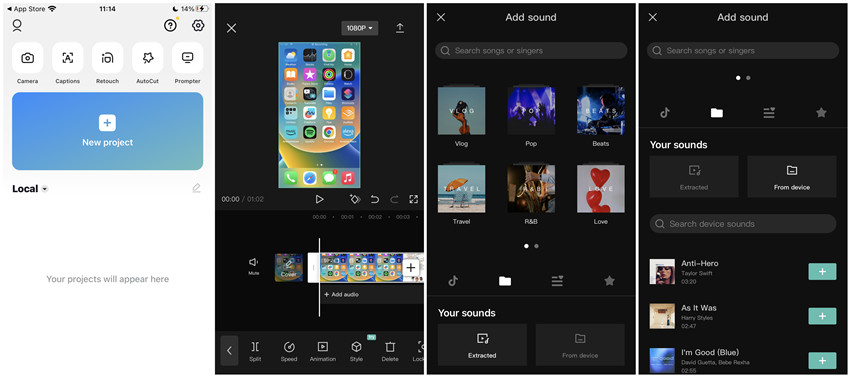
Start a New Project: Open CapCut (download it if needed), tap "New Project," and import video clips from your gallery.
Add Music: Tap "Audio" > "Sounds" > "Your Files," then select and import your converted Apple Music file.
Edit & Export: Drag the track to the timeline, trim, adjust volume, apply fade effects, and enhance with filters. Once satisfied, tap "Export" to save and share your video.
Read More: How to Add Apple Music to Your CapCut Project
2. InVideo AI for Instagram Videos
InVideo AI is all about making video editing effortless. Instead of spending hours manually adjusting clips, this AI-powered tool helps automate a lot of the process. It comes with ready-to-use templates, stock media, and smart editing tools that take care of the heavy lifting. If you want to make quick, polished videos for Instagram without diving into advanced editing, this one is worth checking out.
How to Add Apple Music to InVideo AI:
Step 1: Create & Upload Media: Sign in to InVideo AI, start a new project, choose an Instagram Reel/Story template, and upload your video clips.
Step 2: Add Music: Click "Upload Media," select your converted Apple Music file, and place it in the timeline. Adjust the volume, trim, or add fade effects.
Step 3: Enhance & Export: Customize with overlays, animations, and AI-powered effects. Click "Export" and download your video for Instagram.
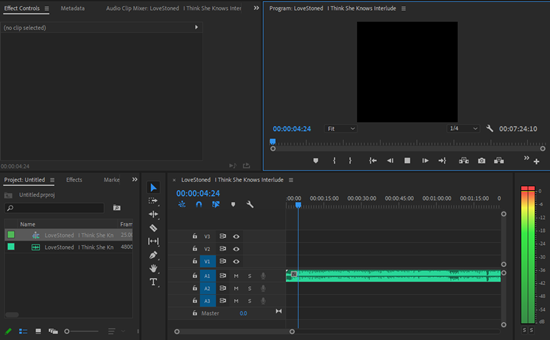
3. Adobe Premiere Pro for YouTube Videos

Adobe Premiere Pro is what most professionals use when they want full creative control. It's loaded with powerful editing tools, supports multi-cam editing, and has deep integration with the rest of Adobe's Creative Cloud suite. The recent updates bring AI-powered features like Generative Extend, which can intelligently fill in missing footage—a real lifesaver when you need to stretch a clip without awkward jumps. If you're serious about YouTube or filmmaking, this is one of the best tools out there.
How to Add Apple Music to Adobe Premiere Pro:
Step 1: Set Up & Import Media: Open Premiere Pro, create a new project, and drag in your video clips.
Step 2: Add & Adjust Music: Click "File" > "Import" to select your converted Apple Music file, then place it in the timeline. Adjust its length, volume, and position.
Step 3: Refine & Export: Use Premiere Pro's tools for noise reduction or equalization if needed. Click "File" > "Export" > "Media," choose your format, and export your video for YouTube.
Read More: How to Add Apple Music to Premiere Pro
4. AceMovie for All Videos
TunesKit AceMovi is a well-rounded option that sits somewhere between beginner-friendly and professional. It has all the basics like trimming, transitions, and effects, but it also throws in some pro-level features like screen recording and advanced overlays. It's available on both Windows and macOS, so if you're looking for a flexible editor that can handle everything from casual social media posts to more polished video projects, this one's a solid choice.
How to Add Apple Music to AceMovie:
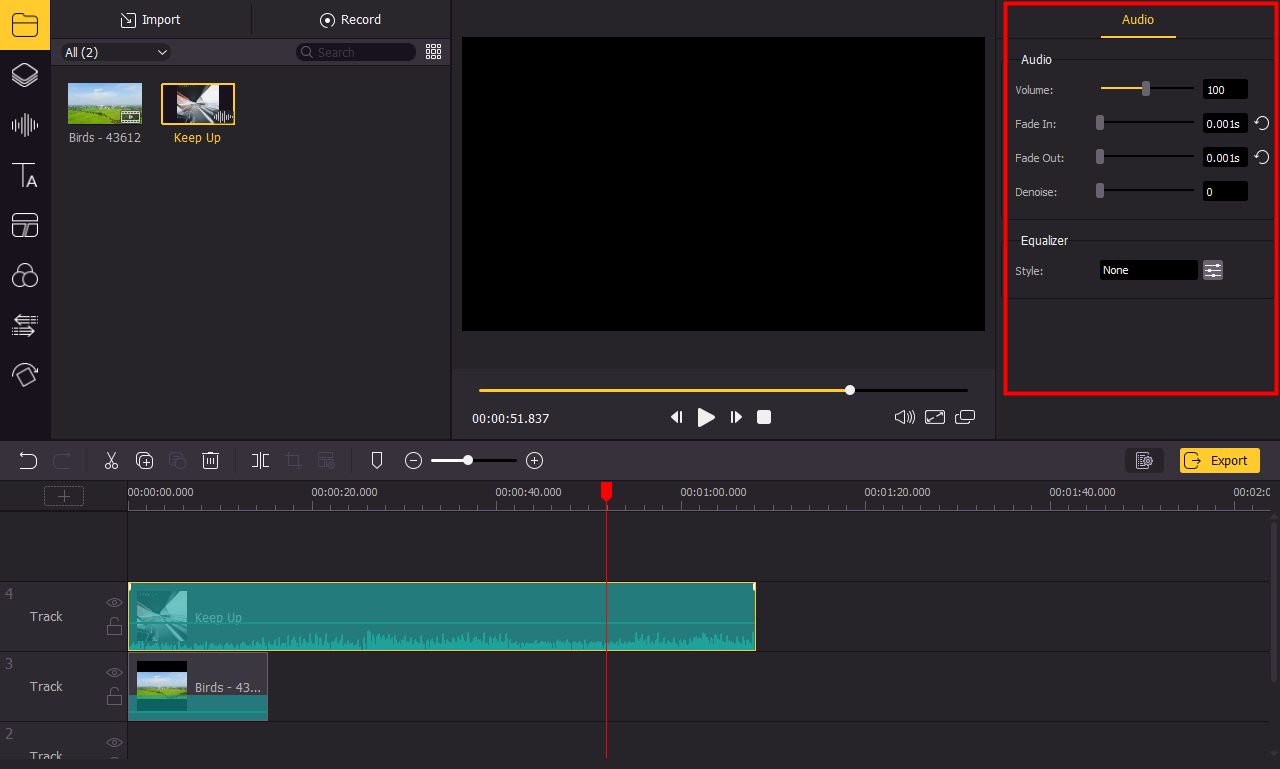
Step 1: Launch & Import Media: Open AceMovi on your computer, then import your video clips into the project library.
Step 2: Add Apple Music: Drag and drop the converted Apple Music file into the audio track of your timeline. Adjust the volume, trim, and place it as needed.
Step 3: Enhance & Export: Explore features like adding text, filters, and transitions to improve your video. Once happy with the result, export your video to share it.
Part 5. Tips and Tricks for Using Apple Music in Videos
1. Think About the Story You Want to Tell
Before you start adding Apple Music tracks, take a moment to think about your video's story. Whether it's a vlog, tutorial, or something creative, decide on the mood and feeling you want your video to have. For example, if it's a high-energy workout video, pick upbeat music to match. A travel vlog might work better with a calm, relaxing tune. Having a clear idea of what your video is about will help you choose the perfect Apple Music tracks that fit the vibe you're going for.
2. Take Advantage of Built-In Music Libraries
While Apple Music offers a lot of great music, don't forget that most video editing apps also come with their own libraries of royalty-free music. These can be super helpful when you want to add background music or sound effects without worrying about licensing. Apps like CapCut, InVideo AI, and Adobe Premiere Pro all offer free music tracks and sound effects that are easy to add to your project, saving you time and giving you more options.
3. Make Sure You Have the Right to Use the Music
It's important to check that you have permission to use the Apple Music tracks in your videos, especially if you plan to post them online. Some music is protected by copyright, which means you could run into issues if you don't have the proper rights. Platforms like YouTube and Instagram can take down your video if you use copyrighted music without permission. Always check the licensing terms and consider using tracks that are free for use or get the proper permissions to avoid any problems.
Conclusion
Till now, you have completely added Apple Music to your videos. You could choose to add your Apple Music to a video using your liked video editors. But before that, you should convert those Apple Music songs to unprotected audio files first. Then you'll have the chance to use Apple Music songs. ViWizard Audio Converter is a quick and reliable solution for you.
You May Be Interested


Adam Gorden, the digital media specialist at ViWizard, is dedicated to providing the best solutions for digital media management, including audio and video conversion, file optimization, and media workflow enhancements.
Leave a Comment (0)