I love working on video projects in iMovie, but sometimes finding the right background music can be a challenge. Apple Music seems like the perfect source—it's built into the Apple ecosystem, has a massive library, and offers the right track for any mood. Most importantly, I've paid for it. But when I try to add a song and access the "Music" option, it just doesn't show up. Even after downloading it to my library and checking my settings, iMovie won't recognize it.
Apple doesn't make it obvious, but there's a reason for this limitation. Apple Music isn't designed to work with iMovie because it's a streaming service, not a direct music source for video editing like iMovie's built-in sound effects library. Every track is protected by DRM (Digital Rights Management), meaning it can only be played within the Apple Music app—no exporting, no external use. Even songs you've downloaded or purchased through Apple Music won't work unless they meet specific conditions.
But that doesn't mean you're out of options. There are ways to make it work. Let's take a closer look at why Apple Music doesn't work with iMovie by default—and essentially, how you can fix that.

Part 1. How to Add Music to iMovie from iTunes Purchases
Let's start with the most straightforward and legal way to add music to iMovie—using purchases from the iTunes Store, Apple's digital music store offering DRM-free 256kbps AAC files, which are fully supported by iMovie projects.
After buying a song, it's automatically added to your iTunes library, ready for use. Unlike Apple Music tracks, there are no DRM restrictions, so I can easily drag and drop them into iMovie's timeline and adjust them to fit my video. However, according to Apple Support's guidelines on music in iMovie, you must have express permission to use the music for video projects. So, it's important to check the rights for the music if you plan to share your video widely.
That said, purchasing music from the iTunes Store isn't always necessary if you want to use Apple Music for personal use. There's an alternative method to convert Apple Music into iMovie-friendly formats like MP3. Tools like the ViWizard Apple Music Converter can handle this conversion effortlessly, without needing any additional purchases.
A full-featured Apple Music converter that easily converts Apple Music songs, albums, playlists—including iCloud Music Library content, personalized recommendations, and curated playlists—into MP3, M4A, M4B, WAV, AIFF, and FLAC so you can keep your Apple Music forever or transfer it to any device without restrictions.
| File Type | Audio Support |
| iMovie File Import: | AAC, AIFF, BWF, CAF, MP3, MP4, RF64, WAV |
| Audio about Apple Music: | DRM-protected |
| iTunes Purchases: | AAC (unprotected) |
| ViWizard File Output: | AAC, WAV, MP3, M4B, M4A, FLAC |
If you're still interested in the process to integrate your iTunes purchases into iMovie projects, here's how to:
Step 1Verify DRM Protection and Local Availability
Before using a track in iMovie, make sure it's not protected by Digital Rights Management (DRM). DRM-protected songs can't be used in iMovie, and music needs to be stored locally on your device. If the track is only in iCloud, it may not show up in iMovie. Here's how to check:
- Open iTunes (or the Music app on macOS Catalina and later).
- Navigate to your library and select the song you want to use.
- Right-click (or Control-click) the song and choose "Song Info."
- In the "File" tab, check the "Kind" field:
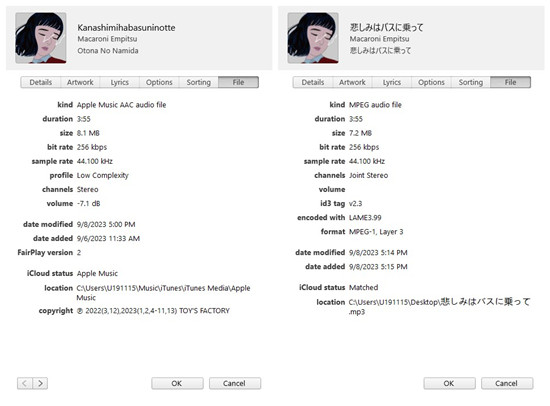
- If it says "Protected AAC audio file," the track is DRM-protected and cannot be used in iMovie.
- If it says "AAC audio file" (without "Protected"), the track is DRM-free and should work fine in iMovie.
- If there's a cloud icon next to the song, it means the track is stored in iCloud.
- Click the cloud icon to download the song to your device before using it in iMovie.
- Note: Ensure that the downloaded music is in a format compatible with iMovie.
Step 1Import iTunes Purchases into iMovie
Once your track is confirmed to be DRM-free and downloaded, importing it into iMovie is straightforward:
- Open your iMovie project.
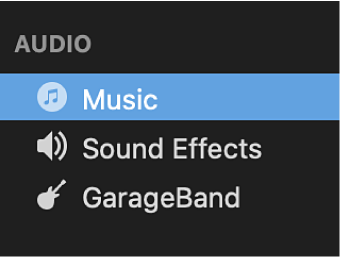
- Click the "Audio" tab at the top left of the iMovie window.
- In the sidebar, select "Music" (or "iTunes" on older macOS versions).
- Your DRM-free tracks should appear here.
- Drag and drop your chosen track into the project timeline.
- Note: If you don't see your music, ensure it's stored locally and not in iCloud.
If you prefer a more manual approach or face issues with the previous method:
- Open iTunes (or the Music app) and find your DRM-free track.
- Drag the song directly from iTunes to your desktop.
- Go back to iMovie and drag the song from your desktop into the project timeline.
Part 2. Best Alternative Ways to Use Apple Music in iMovie (Workaround)
Using Apple Music in iMovie with iTunes purchases is an official option, but it involves a few complex steps—like purchasing the track or album, checking the format, uploading to iCloud, and eventually integrating it with your iMovie library. If you're looking for a simpler solution, the ViWizard Apple Music Converter is worth considering. It lets you convert Apple Music tracks into formats like MP3 and more, which work perfectly in iMovie—without any DRM issues. At first, it may seem like extra work to convert songs, but once you get the hang of it, you'll see how much flexibility it offers.
If you've felt limited by the restrictions of Apple Music, ViWizard Apple Music Converter is definitely worth trying out. It's available for both Windows and Mac, so you can give it a go today!
Part 3. How to Convert Music from Apple Music to iMovie [Mac] (Tutorial)
The following steps will be a guide on how to download and convert Apple Music songs to MP3 or other iMovie supported formats using ViWizard Apple Music Converter. Just ensure to download the Mac version of iTunes and ViWizard on the computer.
Key Features of ViWizard Apple Music Converter
Free Trial Free Trial* Security verified. 5, 481,347 people have downloaded it.
- Convert Apple Music songs, albums, playlists, and artists into MP3 for easy access
- Preserve lossless audio, high-resolution lossless, and Dolby Atmos quality
- Strip DRM from Apple Music for unrestricted offline listening
- Save converted audio files while retaining full ID3 tag details
Step 1Download and Install ViWizard Apple Music Converter
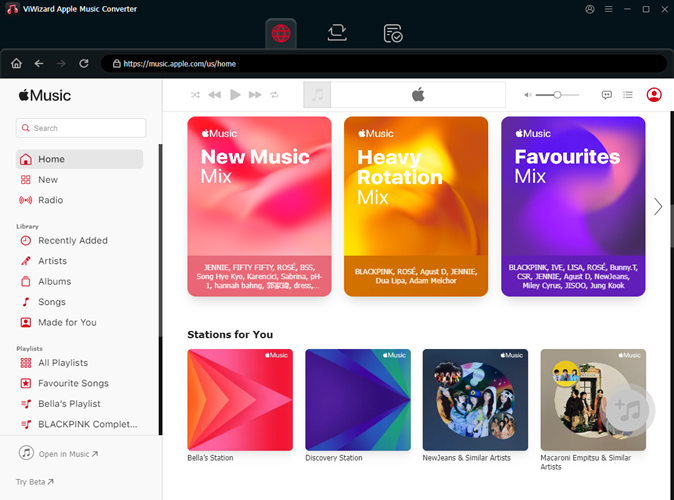
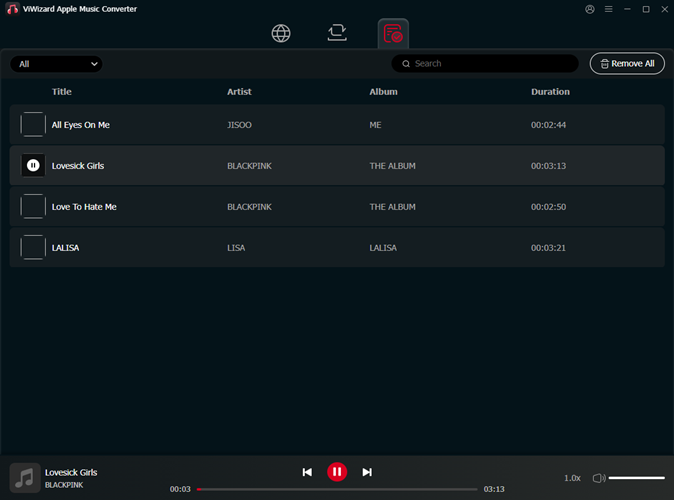
Begin by downloading and installing the ViWizard Apple Music Converter on your computer. This tool is essential for converting Apple Music tracks into formats compatible with iMovie, such as MP3 or WAV. After installation, launch the app and sign in with your Apple Music account using your Apple ID to access your entire music library. To start the conversion process, click the "+" button at the bottom-right corner to add the music you want to convert. This allows you to select and prepare tracks for conversion.
Step 2Choose the Output Format for iMovie
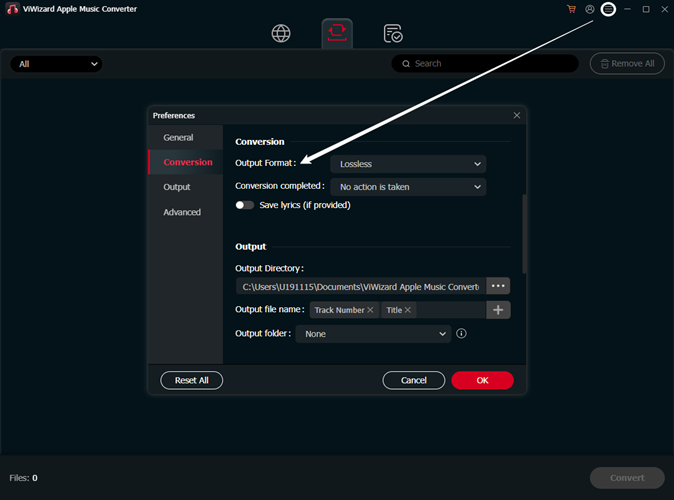
For smooth compatibility with iMovie, select an output format such as MP3 or WAV, which iMovie can easily handle. To adjust the output settings, click the settings icon (usually in the top-right corner). Here, you can fine-tune audio quality settings such as the sample rate, bit rate, and audio channels to suit your preferences. Once the adjustments are made, click OK to confirm your settings and move forward with the conversion process.
Step 3Add Music and Begin the Conversion
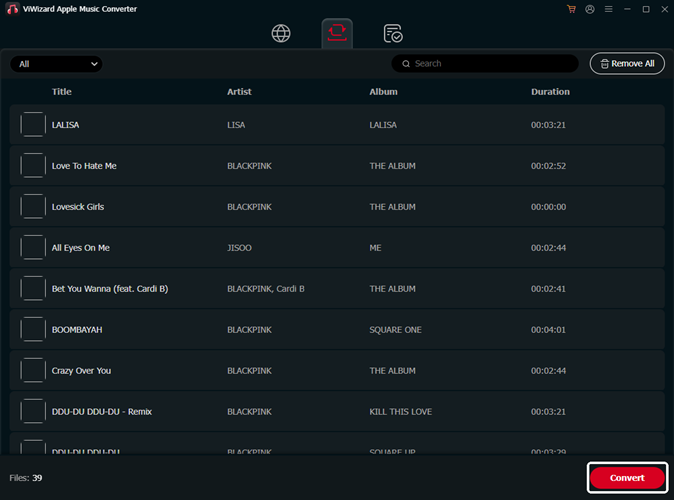
Browse through your Apple Music library or enter the URL of a specific album or playlist into ViWizard. Once you find the tracks you want to convert, click Add to Conversion List to add them to your queue. Afterward, click the Convert button, and ViWizard will begin converting the selected Apple Music files into the desired format. This ensures that the music is now ready to be imported into iMovie.
Step 4Access the Converted Files
After the conversion is complete, click the History button to view your converted files. From there, click the folder icon to open the location where the files are saved on your computer. These DRM-free music files are now ready for use in your iMovie project. Simply import them into iMovie by dragging the converted files into your project timeline, and you can start editing with your new background music.
Part 4. How to Import Converted Apple Music to iMovie [Mac]
You have two options to add the converted Apple Music files to iMovie on your Mac—either through iTunes or directly. However, keep in mind that Apple Music tracks are typically DRM-protected, which can prevent them from being used directly in iMovie. To work around this, you can either use DRM-free music from the iTunes Store or convert Apple Music tracks using third-party software.
Step 1Add Converted Apple Music to iTunes (Optional)
- Open the iTunes desktop app on your Mac.
- Navigate to File > Import and select the music files or folders in the Finder sidebar.
- Open your selections to add all compatible music files to iTunes.
- Open or create a project in iMovie on your Mac.
- Click on Audio above the browser and choose Music in the sidebar.
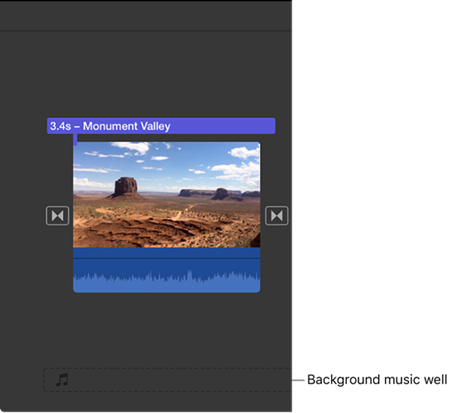
- Browse and find the clip you want to add to your project in the timeline.
- Drag the clip to the background music section below the timeline.

Step 2Edit the Background Music Clip in Your iMovie Project
- Position, trim, and edit the background music clip in the timeline.
- If Trim background music is enabled, iMovie will automatically adjust the audio duration to match the movie.
- Adjust the volume by selecting the audio clip and using the volume control.
- To fade the background music in or out, click on Audio Adjustments and choose the fade-in or fade-out effects.
Step 3Export an iMovie Project with Background Music
- Preview your project to ensure the background music is edited as desired.
- To export, click the Share button and select the appropriate export options.
Part 5. How to Import Converted Apple Music to iMovie [iPhone/iPad]
If you're using the iMovie mobile app on your iPhone or iPad, follow these steps:
Step 1Sync Converted Apple Music
- Ensure the converted files are added to your iTunes library on your computer.
- Connect your iPhone or iPad to the computer using a USB cable.
- In iTunes, select your device at the top of the sidebar.
- Choose Music and select Sync Music > Entire Music Library.
- Click Sync to start syncing your music library.
- Click Apply when syncing is complete.
Step 2Add Apple Music to Your iMovie Project as Background Music
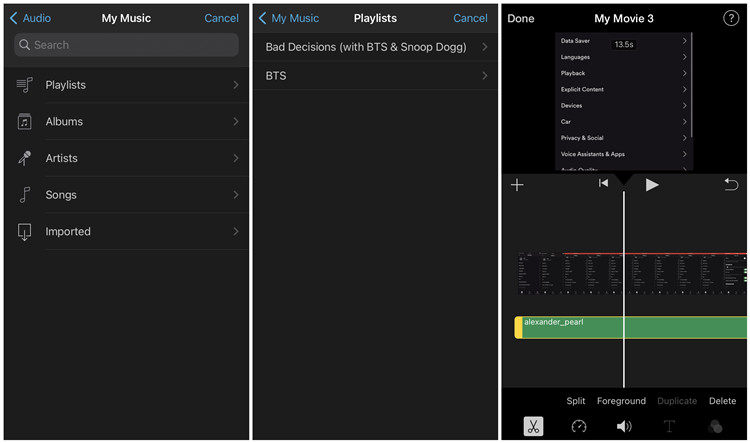
- Open or create a movie project in the iMovie app on your iPhone or iPad.
- To add background music, tap Add Media > Audio > My Music and select the music files.
- Tap on the background music clip in the timeline to activate editing controls.
- Adjust the clip's length by tapping and holding its edge, then dragging to the desired duration.
- Modify the volume by selecting the clip and using the volume control to increase or decrease it.
- Add more audio or sound effects by tapping "Add" > "Audio" and selecting additional clips.

Step 3Export an iMovie Project with Background Music
- When done, tap the "Share" button to save or export the project.
- Choose your preferred sharing or exporting option.
Conclusion
iMovie is the most convenient and useful video editor for Mac and iPhone users while Apple Music is one of the best music services ever. And ViWizard Apple Music Converter is the one who can help you take better advantages of both of them. Have a try of ViWizard Apple Music Converter and you'll find it out.
You May Be Interested

Adam Gorden, the digital media specialist at ViWizard, is dedicated to providing the best solutions for digital media management, including audio and video conversion, file optimization, and media workflow enhancements.
Leave a Comment (0)