
With more Amazon Music users managing multiple accounts, the need to transfer music from one account to another has become common. Whether switching subscriptions, merging accounts, or just starting fresh, you'd expect Amazon to offer a seamless way to move playlists and saved songs. Surprisingly, there's no built-in option—at least not officially.
Amazon's only suggested method for moving music is sharing playlists or individual songs, but this approach has obvious limitations. And with a large library, it soon becomes a tedious task. For users wanting a full transfer, this solution falls short. Fortunately, while Amazon doesn't provide a direct way to move your music, there are still effective workarounds.
Read More: How to Transfer Downloaded Amazon Music to New Phone
Part 1. How to Transfer Amazon Music to Another Account
1. Export Amazon Music Downloads to Another Account
Let's be real: while Amazon Music allows users to download songs for offline listening, those files are encrypted and tied to the original account. You can't just find the downloads saved as cached files and transfer them to a new account—that would be pointless. But thanks to ViWizard Amazon Music Converter, you can easily convert your Amazon Music downloads into local files like MP3 that can be stored anywhere, including on another Amazon account. Once converted, you can upload these songs to a new account, transfer them to another device, or keep them for offline listening without restrictions.
One thing to keep in mind: make sure you're using the converted files for personal use only.
Key Features of ViWizard Amazon Music Converter
Free Trial Free Trial* Security verified. 5, 481,347 people have downloaded it.
- Download songs from Amazon Music Prime, Unlimited, and HD Music
- Convert Amazon Music songs to MP3, AAC, M4A, M4B, FLAC, and WAV
- Retain the original ID3 tags and lossless audio quality of Amazon Music
- Support customizing the output audio parameters for Amazon Music
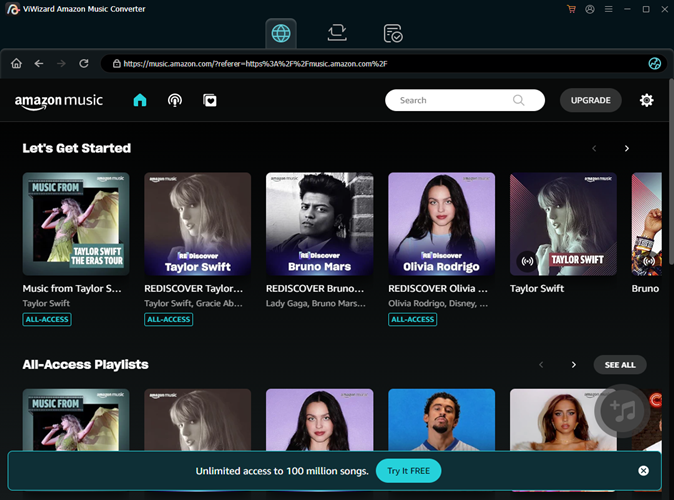
- Go to the ViWizard website, download the software for your system (Windows or Mac), and install it.
- Open ViWizard. In the settings menu (usually in the top-right corner), choose your preferred output format, typically MP3 for maximum compatibility with devices. Adjust the audio quality (sample rate and bit rate) based on your needs. Once done, click "OK" to save the changes.
- Browse your Amazon Music library or paste a specific URL for a song, album, or playlist. Click "Add to List" to queue your selection for conversion.
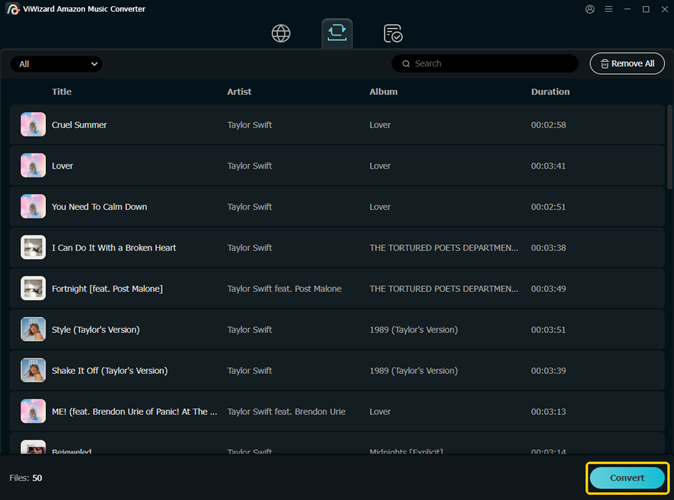
- Click "Convert" to start converting the selected tracks into your chosen format. The process will take a few moments depending on the number of files.
- After conversion, go to the "History" tab in ViWizard. Click the folder icon to open the folder where your MP3 files are saved. From there, you can transfer them to any device or upload them to a new Amazon Music account.
Key Verdict: This is the best option for users who want to hold on to their entire music collection without starting from scratch.
2. Send Purchased Music to a New Account
Sometimes, the simplest option is to send purchased tracks to a new account. Since MP3 purchases from Amazon are DRM-free, this works great for users who've bought music through Amazon and want to access it on a different account. For tracks still locked in Amazon's music catalog, however, you'll need a tool like ViWizard Amazon Music Converter to make the transfer. With it, you can convert your entire music catalog, including subscription-based songs, to a new account. It's perfect for those who don't want to repurchase songs or albums.
A well-rounded Amazon Music converter that downloads and converts on-demand music from Amazon Music Prime, Amazon Music Unlimited, Amazon Music HD, and personal purchases to MP3, WAV, M4A, M4B, AIFF, and FLAC while preserving the original sound quality and ID3 tags to take your Amazon Music library offline without DRM limitations.
- Log in to your original Amazon Music account.
- Navigate to "Your Music Library" to find your MP3 purchases.
- Click "Download" next to the desired tracks or albums. These will be saved to your computer as MP3 files.
- Log in to your new Amazon Music account.
- Go to "Your Music Library" and select "Upload your music."
- Follow the prompts to upload the MP3 files from your computer.
Key Verdict: If your collection isn't too large, this method can be a simple and effective solution. While it's not the most cost-effective for users with massive libraries, it ensures your music is linked to the new account without any hassle.
Part 2. How to Transfer Amazon Music Library to Another Account
There's an official way to share your Amazon Music library—Amazon Household, which comes with the Amazon Music Unlimited Family plan. This feature links up to six accounts, allowing members to share their digital music library, including eligible music and playlists. While this won't transfer Amazon Music Unlimited playlists or saved songs, it does ensure that linked accounts can share music seamlessly. You won't need to manually transfer each song—just set up a Household, and both accounts will have access to the same music library, while still maintaining their distinct libraries.
- Visit the Amazon Music Unlimited Family Plan page and subscribe to the plan.
- Complete the subscription process as directed.
- After subscribing, click on the profile icon and go to "Your Amazon Music Settings."
- Look for the option to "Invite Members" and click on it to generate an invitation link.
- Send the invitation URL to the other account via email or text. The invitee needs to accept the invitation within 7 days to join your plan.
- Once the invitee accepts, they will gain full access to your Amazon Music Unlimited plan.
- They can now enjoy the music library, playlists, and content shared from your account.
- Family members must be 13 years or older to join.
- All account owners must reside in the same country for this to work.
Read More: 4 Ways to Share Amazon Music with Family
Key Verdict: This key feature of the Amazon Music Family Plan costs $19.99 per month or $199 per year.
Part 3. How to Transfer Amazon Music Playlists to Another Account
1. Manually Create Playlists on the New Account
Transferring your Amazon Music playlists to another account can be done manually, but it does require a bit of effort. Start by signing into both your old and new Amazon Music accounts. On the original account, navigate to the playlists you wish to transfer. One by one, add the songs to a new playlist on the new account. Keep in mind that this process can take some time, especially if you have a large playlist. Additionally, be aware of limitations if the accounts are on different subscription plans, such as Unlimited or Prime.
- Log in to both your old and new Amazon Music accounts on separate devices or tabs.
- On the old account, go to the playlist you want to transfer.
- On your new account, create an empty playlist where you'll add the songs.
- From your old account, search for each song in the playlist and add it to the new playlist. This step can be slow for large playlists, and if you have different subscription plans (e.g., Prime vs. Unlimited), some songs might be unavailable on the new account.
- Continue adding all the tracks manually, one by one, until the playlist is fully transferred.
Key Verdict: This method is simple but time-consuming. It's best for users with a smaller music collection.
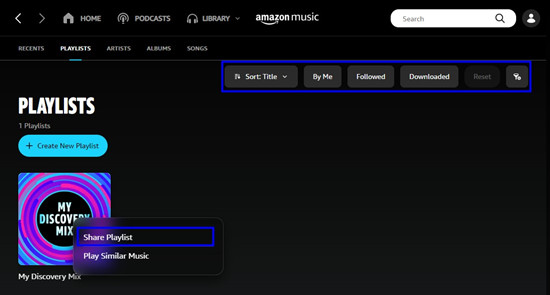
2. Share Playlists to the New Account
Amazon Music also allows you to share playlists between accounts. To do this, open the playlist you want to share on your old account and select the Share option. You'll be given the option to share the playlist via a link. Send the link to the new account via email or text. Once the new account receives the link, they can open it in Amazon Music and add the playlist to their own library.
- On your old account, go to the playlist you want to transfer.
- Click the Share button (three dots or share icon), then select Share Playlist or Send via Email/Text.
- Send the generated playlist link to the new account through email or text.
- On your new account, open the link from the message. The playlist will open in Amazon Music.
- Once the playlist opens, click Add to Library to save it to your new account's library.

Key Verdict: This method is the most efficient for users who want to transfer playlists easily. It works well for most users, but it's not suitable for DRM-protected music.
Part 4. How to Transfer Your Amazon Music Profile to Another Account
An Amazon Music profile is what allows you to enjoy personalized recommendations, playlists, activity feeds, and playback tailored to your individual listening habits. It essentially captures your music preferences and creates a custom listening experience. However, you can only transfer your profile to a new account without Amazon Music.
- Ensure you're using the latest version of the Amazon Music app on your device.
- Open the app and tap on your profile picture at the top of the home screen.
- Select "Manage Profiles."
- Tap on the profile name to open a dropdown menu and select "Edit Profiles."
- Choose "Transfer Profile to an Amazon Account," then tap "Get Started."
- You'll be prompted to enter your email address and select "Continue to Transfer."
- Follow the instructions sent to your email to confirm and finalize the transfer.
Key Verdict: This method fully transfers your personalized profile and helps bridge the gap by allowing shared access to music, playlists, and recommendations, easing the transition.
Summary
Transferring music from one Amazon Music account to another one may seems a little complicated. However, this post can help you complete the process with the fewest steps. Generally speaking, the most feasible way is to use ViWizard Amazon Music Converter to download transfer them to another account without any loss of music contents.
You May Be Interested


Adam Gorden, the digital media specialist at ViWizard, is dedicated to providing the best solutions for digital media management, including audio and video conversion, file optimization, and media workflow enhancements.
Leave a Comment (0)